On this page
| Table of Contents | ||||
|---|---|---|---|---|
|
The Challenge
Traditionally, transacting EDI data requires that you manually enter/upload the data, or hand code to get the EDI data, into your target system. Additionally, handling errors and updating the document format requires significant time and effort.
SnapLogic's B2B solution helps you optimize this process with minimal manual intervention. This use case demonstrates how you can leverage SnapLogic to automatically create a sales order in NetSuite by reading the orders stored in the EDI gateway's SFTP site.
The SnapLogic Pipeline Solution
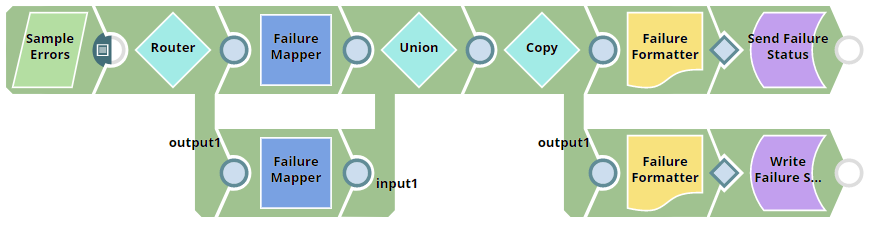
The following Pipeline, when executed, creates the sales order in NetSuite and sends a status notification to the EDI gateway.
...
The following Error Pipeline handles the errors that might occur while executing the above Pipeline. For example, from the Create Sales Order Snap.
You can download and import the above Pipelines from the Downloads section below into your SnapLogic org using your own dataset.
...
Task 1: Reading and Mapping Data
Reading the sales order data (primary input) can be automated using the File Poller Snap. The Snap polls the target directory (in this example, the EDI gateway's SFTP site) for new files at regular intervals. You can modify the polling intervals by opening the File Poller Snap and editing the Polling interval field.
...
Thus, the fields from the sales order data in the SFTP site are mapped to the sales order's schema in NetSuite.
Task 2: Creating the Sales Order
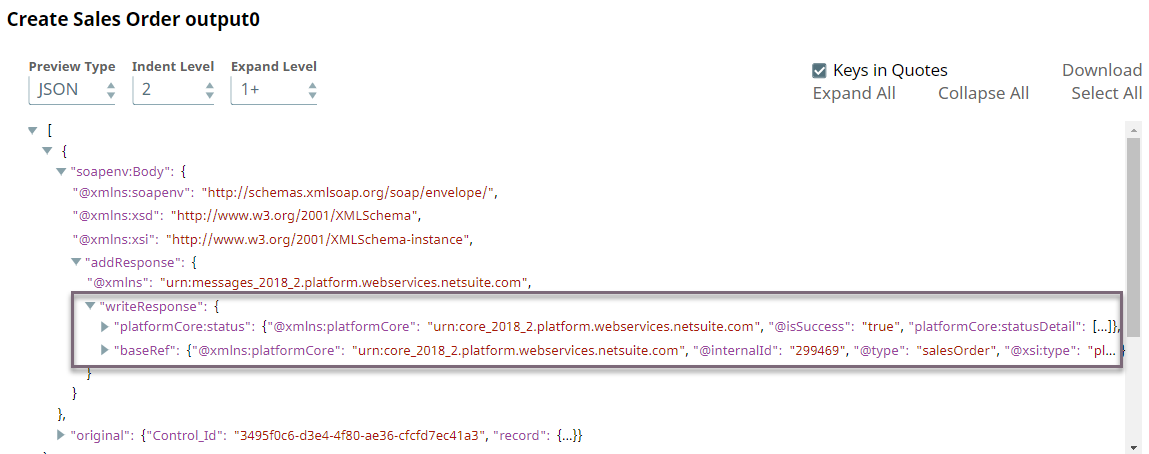
During Pipeline execution, the sales order data is passed to the NetSuite Create Snap, which uses this information to create the sales order in NetSuite. Upon successful execution, the order is created in the NetSuite account and displays in the NetSuite Snap's output.
Task 3: Processing the Output
Now that the sales order is created, we must perform the following two operations:
...
We need the output from the NetSuite Create Snap for the above operations. We use the Copy Snap to create copies of the NetSuite Create Snap's output.
Sending the status message
A status message for each sales order created in the ERP is maintained to track the sales orders. These status messages are maintained in a separate sub-directory in the SFTP site. In our example, this sub-directory is labelled Out. Each sales order's file has the Control_ID included in the title to help distinguish them.
...
Thus, the status of each successful sales order can be stored in the SFTP.
Processing the sales order
After fulfilling the sales order, an invoice is generated in NetSuite and sent to the SFTP site of 1 EDI Source. To create an invoice we need the sales order's details, as generated by the NetSuite Create Snap. In this use case, we are using the output from the NetSuite Create Snap to retrieve the sales order details. So, this output is written to a JSON file in the SLDB using the File Writer Snap labelled Write Result. The resulting JSON file forms the input for the second use case.
Error Handling
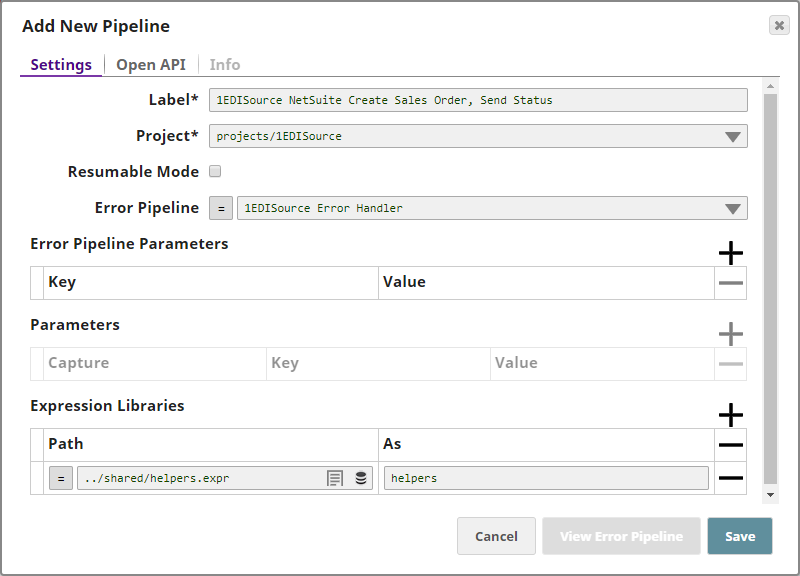
SnapLogic's Error Pipeline feature enables you to handle Pipeline-execution errors by running a separate Pipeline. This Pipeline is specified in the Error Pipeline field in the parent Pipeline's properties.
...
When there is an error in the execution of the parent Pipeline, the error data is sent to the Error Pipeline automatically. See Handling Errors with an Error Pipeline for details.
...
You may configure an Error Pipeline to handle the error data based on your requirements. The Error Pipeline in this use case is configured to send the failure notification to the SFTP site along with the Control_ID. Any additional data is removed using the Mapper Snaps. The failure status is written to the Out directory in the SFTP site.
Try it Out
- Download the Solution Pipeline and the Error Pipeline.
- Log into SnapLogic and click the Import a Pipeline icon
 in SnapLogic Designer.
 - Select the downloaded Pipeline from your local Drive.
- Edit the Pipeline's details such as Label and click Save.
- Configure the accounts in the Snaps as appropriate.
- Validate
 and execute
 the Pipeline.
Downloads
| Attachments | ||
|---|---|---|
|
...