In this article
| Table of Contents | ||||
|---|---|---|---|---|
|
...
| Excerpt | ||||||||||||
|---|---|---|---|---|---|---|---|---|---|---|---|---|
|
| Info | ||
|---|---|---|
| ||
|
Known Issues
None.
Snap Input and Output
...
| Field Name | Field Dependency | Description |
|---|---|---|
| Label* | N/A | Specify the name for the Snap. You can modify the default name to be specific and meaningful, especially if you have more than one of the same Snap in your Pipeline. Default Value: Calculate Order Refund |
| Version* | N/A | Specify the Shopify API version. Alternatively, click the Suggestion Default Value: 2021-07 |
| Order Id* | N/A | Specify a unique identifier for the order. Default Value: N/A |
| Number Of Retries | N/A | Specify an integer value to set the maximum number of reconnection attempts that the Snap must perform, in case of connection failure or timeout. Default Value: 1 |
| Retry Interval (Seconds) | N/A | Specify the duration in seconds for which the Snap must wait between two reconnection attempts, until the number of retries is reached. Default Value: 1 |
| Snap Execution | N/A | Select one of the three modes in which the Snap executes. Available options are:
Default Value: Execute only |

| Insert excerpt | ||||||
|---|---|---|---|---|---|---|
|
Example
Calculating Refund For An Order
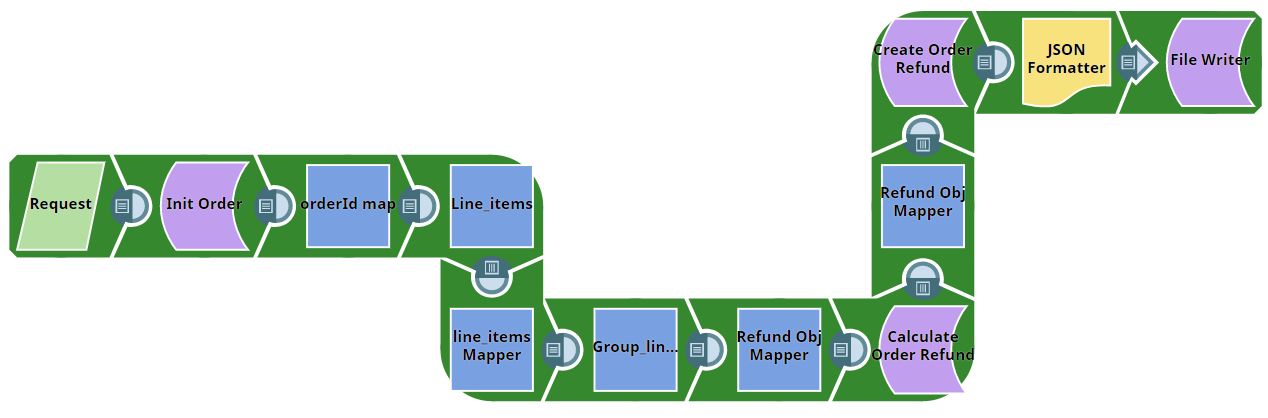
This example Pipeline demonstrates how to calculate refund for an order and subsequently create an Order Refund using the Calculate Order Refund and Create Order Refund Snaps.
First, we pass the following customer and order data using the JSON Generator Snap.
| Paste code macro | ||
|---|---|---|
| ||
[ { "email": "john.doe@snaplogic.com", "phone": "9533322211", "test": true, "line_items": [ { "variant_id": 40273525866686, "product_id": 6863881928894, "quantity": 1 } ], "transactions": [ { "kind": "sale", "status": "success", "amount": 5000 } ], "billing_address": { "address1": "Sector-1", "address2": "Apartment 5", "city": "Vishakapatnam", "company": null, "country": "India", "first_name": "John", "last_name": "Doe", "phone": "9533322211", "province": "AP", "zip": "530046", "name": "John", "country_code": "IN" }, "shipping_address": { "address1": "Sector-1", "address2": "Apartment 5", "city": "Vishakapatnam", "company": null, "country": "India", "first_name": "John", "last_name": "Doe", "phone": "9533322211", "province": "AP", "zip": "530046", "name": "John", "country_code": "IN" } } ] |
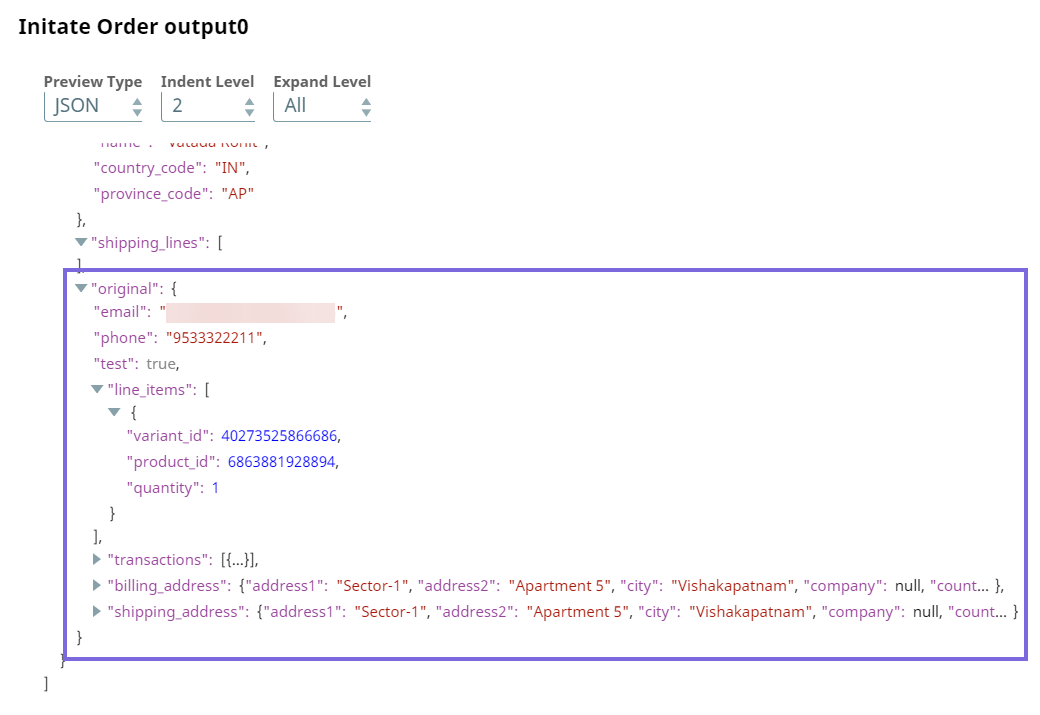
Upon validation, we see the following data in the output preview of the Snap.
| Paste code macro | ||
|---|---|---|
| ||
[
	{
		"email":"john.doe@snaplogic.com"
		"phone":"9533322211"
		"test":true
		"line_items":
	[
	{
		"variant_id":40273525866686
		"product_id":6863881928894
		"quantity":1
	}
]
		"transactions":
[
	{
		"kind":"sale"
		"status":"success"
		"amount":5000
	}
]
		"billing_address":
	{
		"address1":"Sector-1"
		"address2":"Apartment 5"
		"city":"Vishakapatnam"
		"company":null
		"country":"India"
		"first_name":"John"
		"last_name":"Doe"
		"phone":"9533322211"
		"province":"AP"
		"zip":"530046"
		"name":"John"
		"country_code":"IN"
}
		"shipping_address":
	{
		"address1":"Sector-1"
		"address2":"Apartment 5"
		"city":"Vishakapatnam"
		"company":null
		"country":"India"
		"first_name":"John"
		"last_name":"Do"
		"phone":"9533322211"
		"province":"AP"
		"zip":"530046"
		"name":"Rohit"
		"country_code":"IN"
		}
	}
]
|
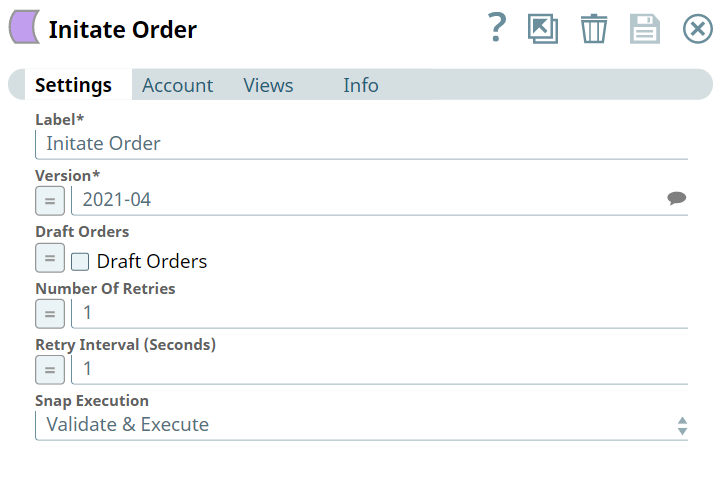
Next, we configure the Create Order Snap to create an order. On validation, the Snap creates an order.
| Create Order Snap Configuration | Output |
|---|---|
|  |
Next, we configure the first Mapper Snap to get the order ID.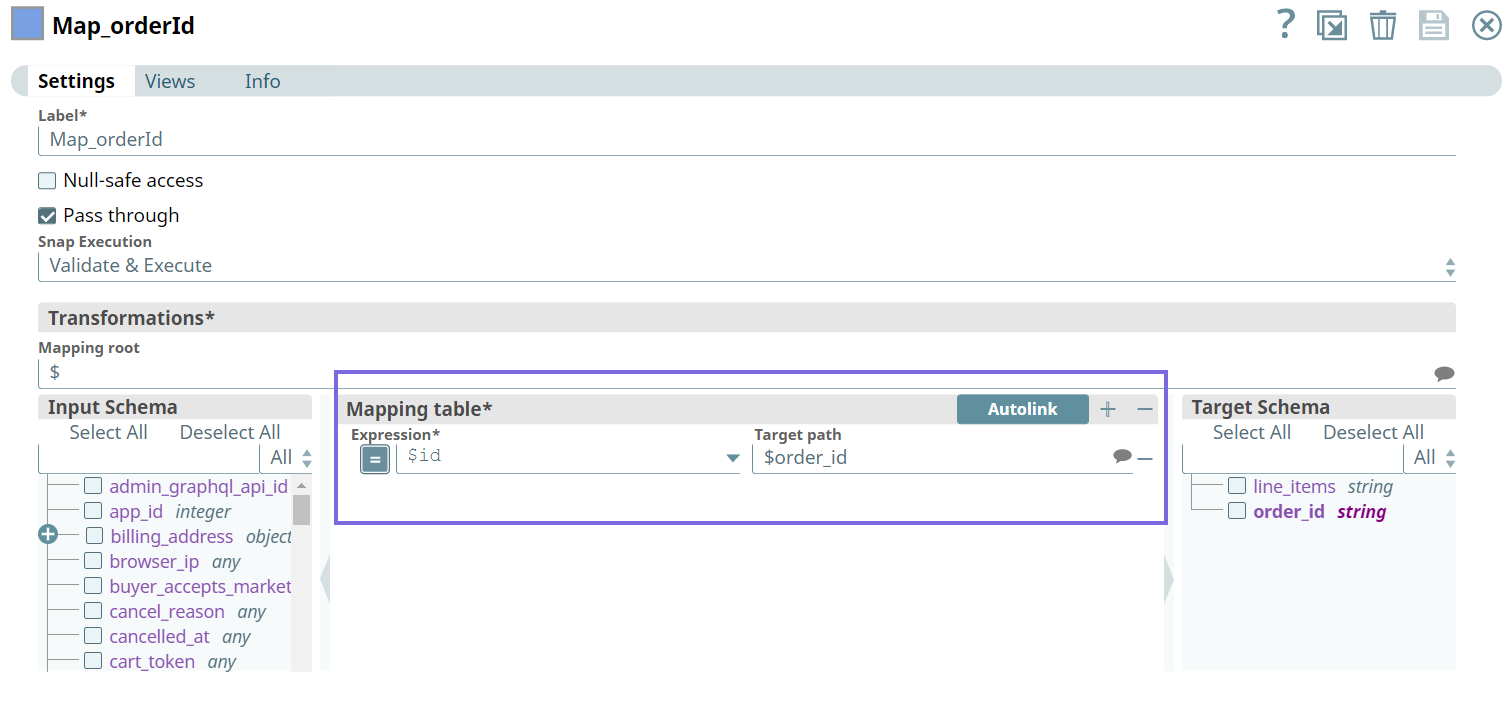
Upon validation, the Snap generates the following data in the output preview of the Snap.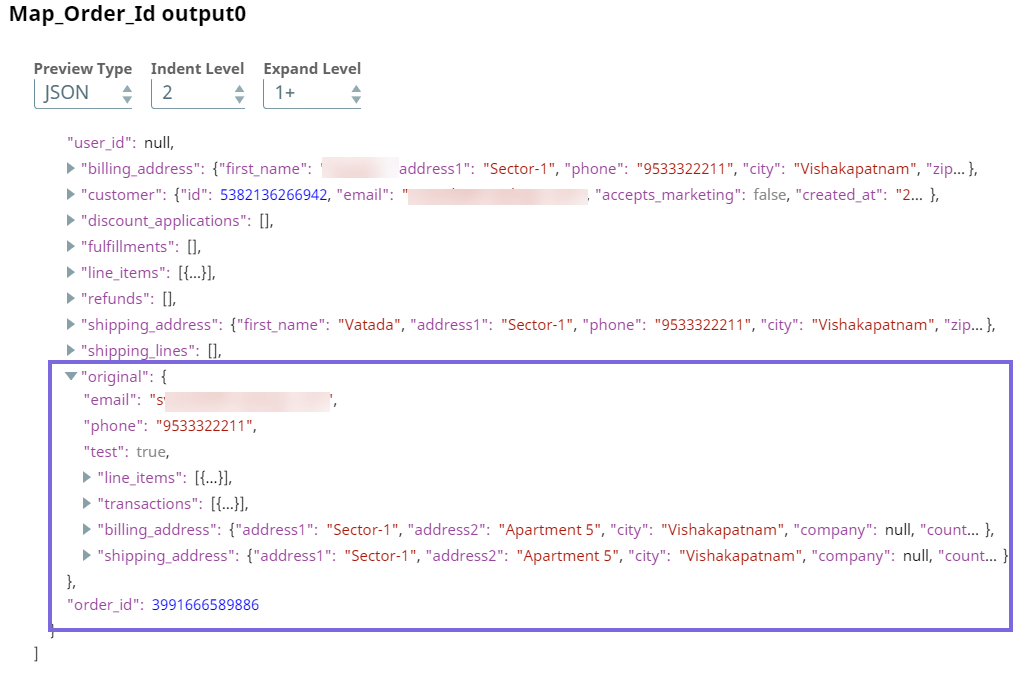
Next, we configure the JSON Splitter Snap to split each item in the line item into separate documents. We specify the $line_items (list that holds the document entries) for Json Path and $order_id (path of the object) for Include Path to include in the output.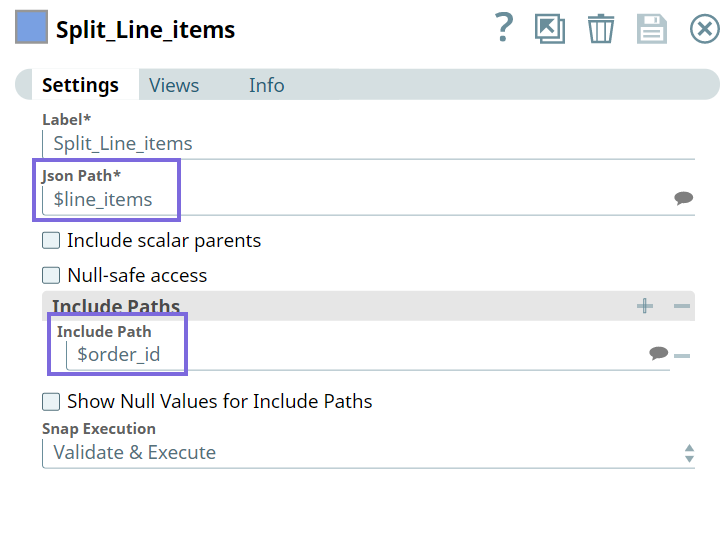
Upon validation, we see the data for each line item in the order separately.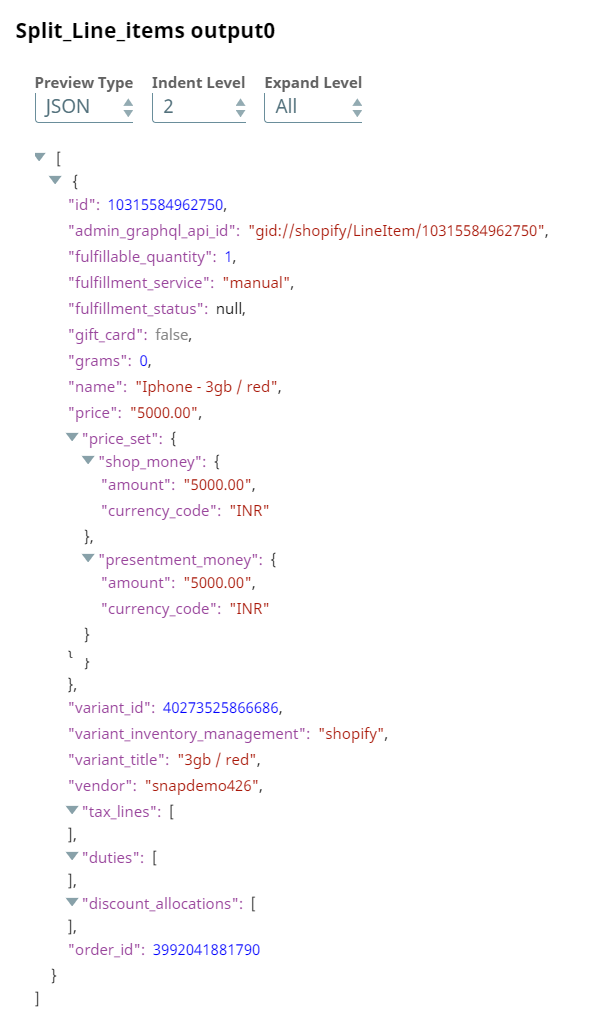
Next, we configure the second Mapper Snap to map the following attributes in the line item.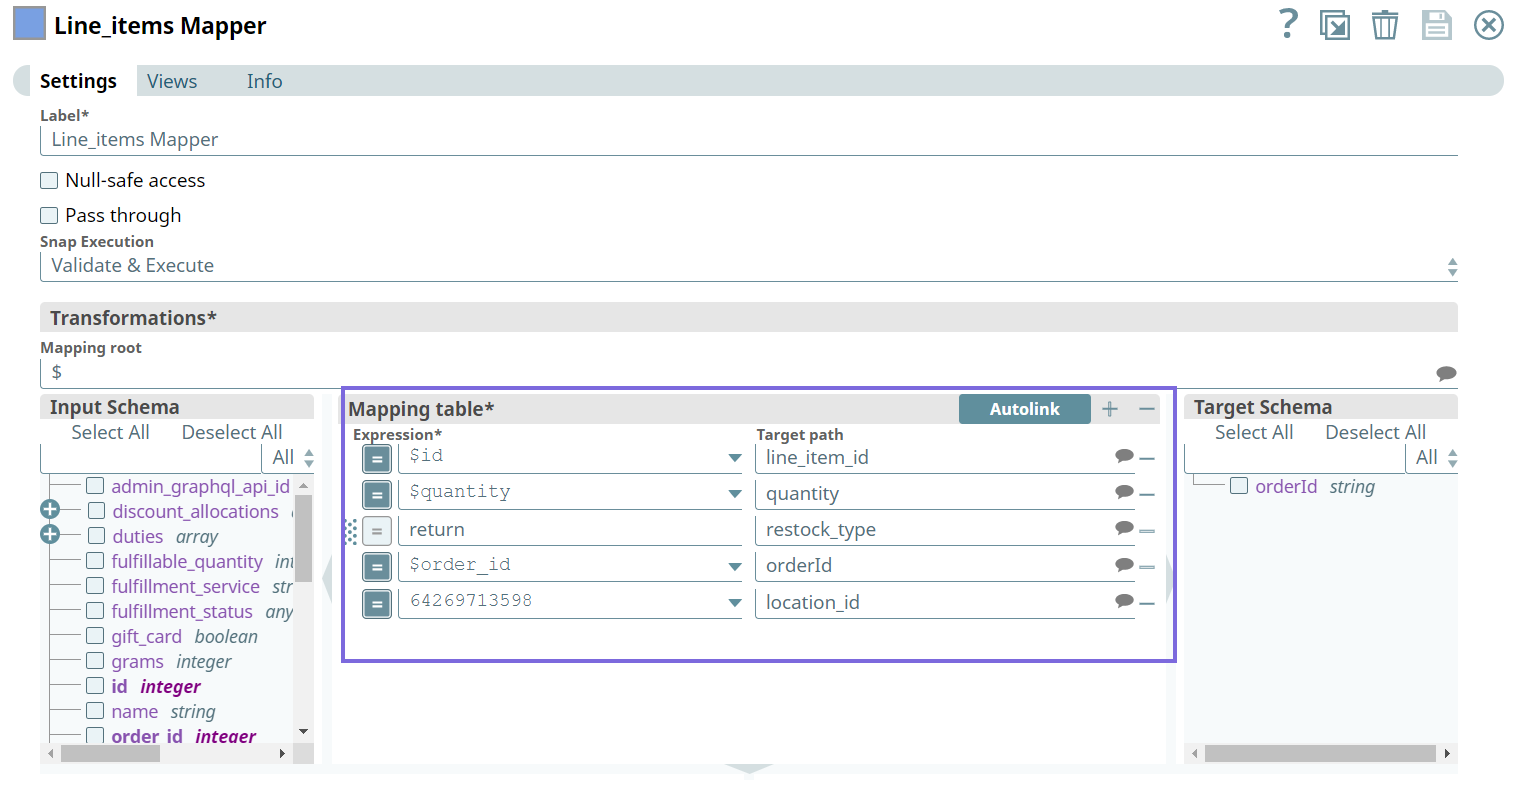
Upon validation, the Snap generates the line item data as configured.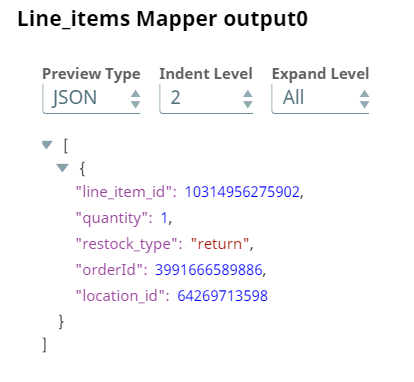
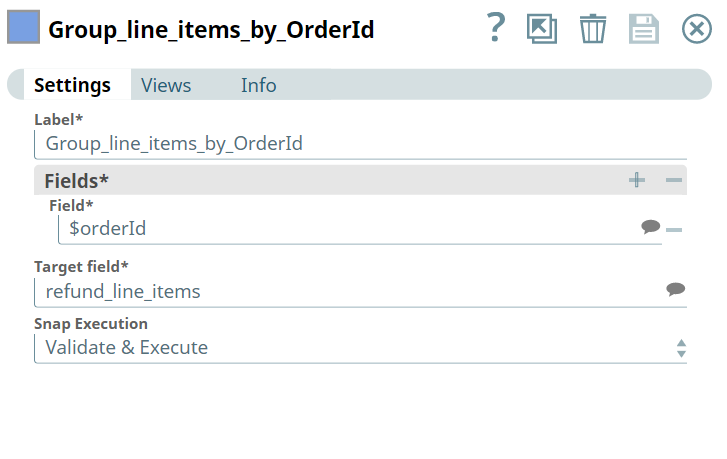
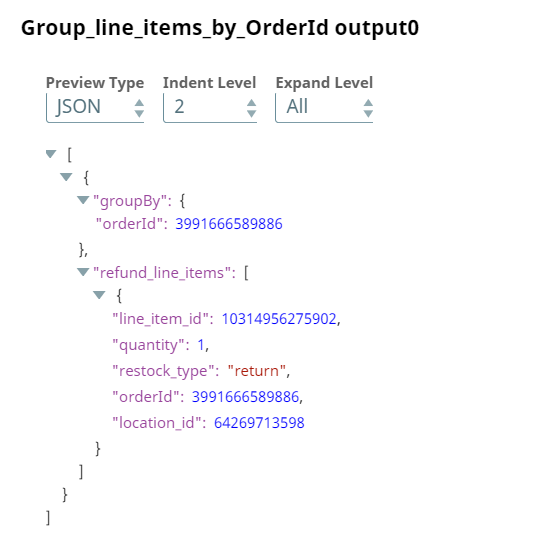
Next, we use the Group by Fields Snap to group the line items by Order ID. However, we are only interested in refund line items; hence, we specify refund_line_items in the Target field. Upon validation we see the list of items grouped under refund_line_items object.
| Group By Fields Snap Configuration | Output |
|---|---|
|
|
Next, we use the Mapper Snap to pass the refund line items output from the upstream Snap to calculate order refund subsequently.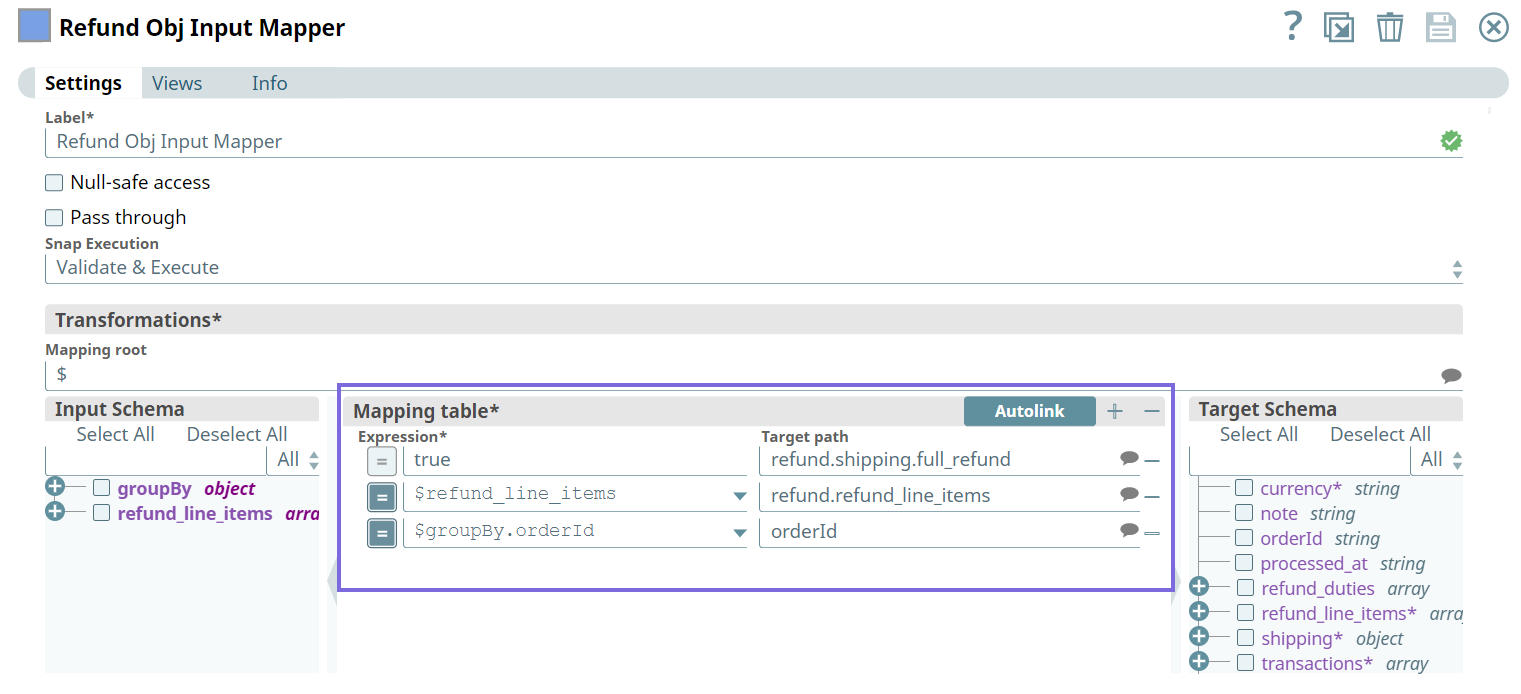
Upon validation, the Snap generates the refund order data as follows.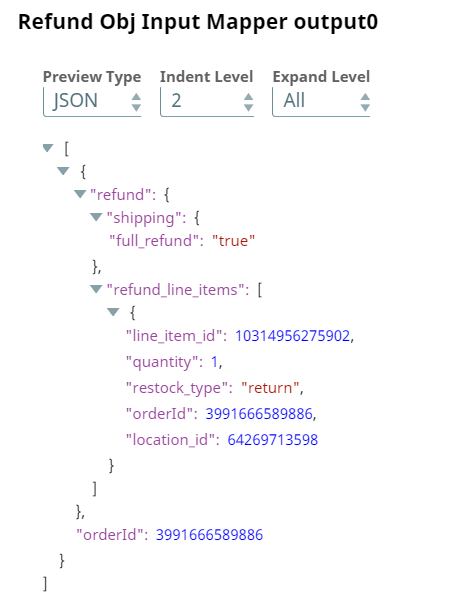
Next, we configure the Calculate Order Refund Snap to calculate the refund for the order.
Upon validation, the Snap generates the status of the refund (full refund in this case) and other details, such as quantity, line_item_id, orderId, and location_id.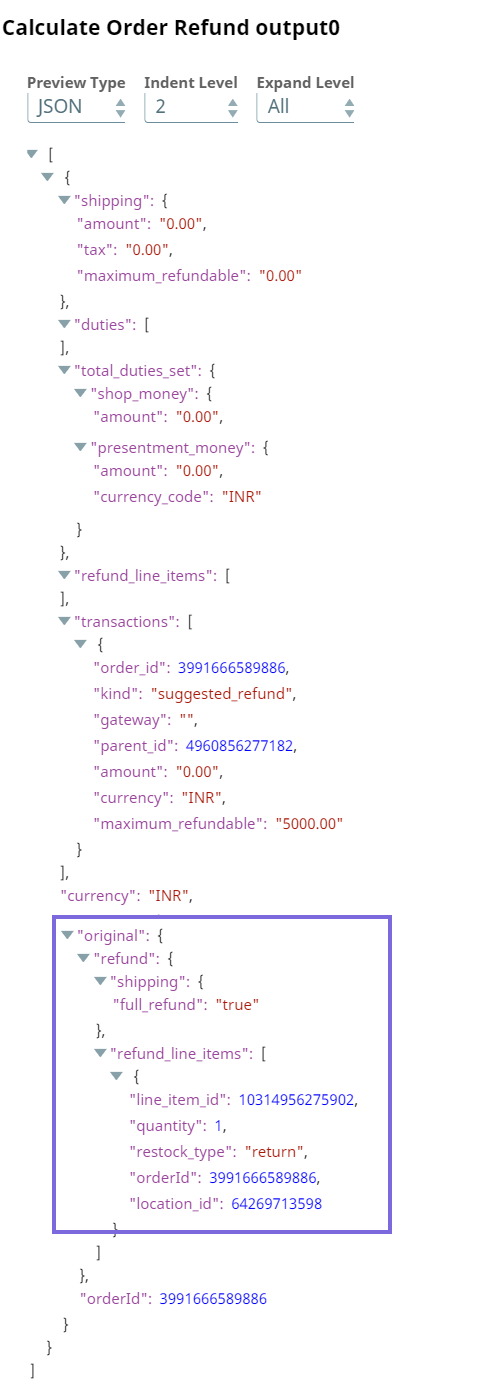
Next, we use the fourth and the last Mapper Snap in our Pipeline to pass the details as highlighted below to use the Snap's output in the downstream Snap for creating an order refund.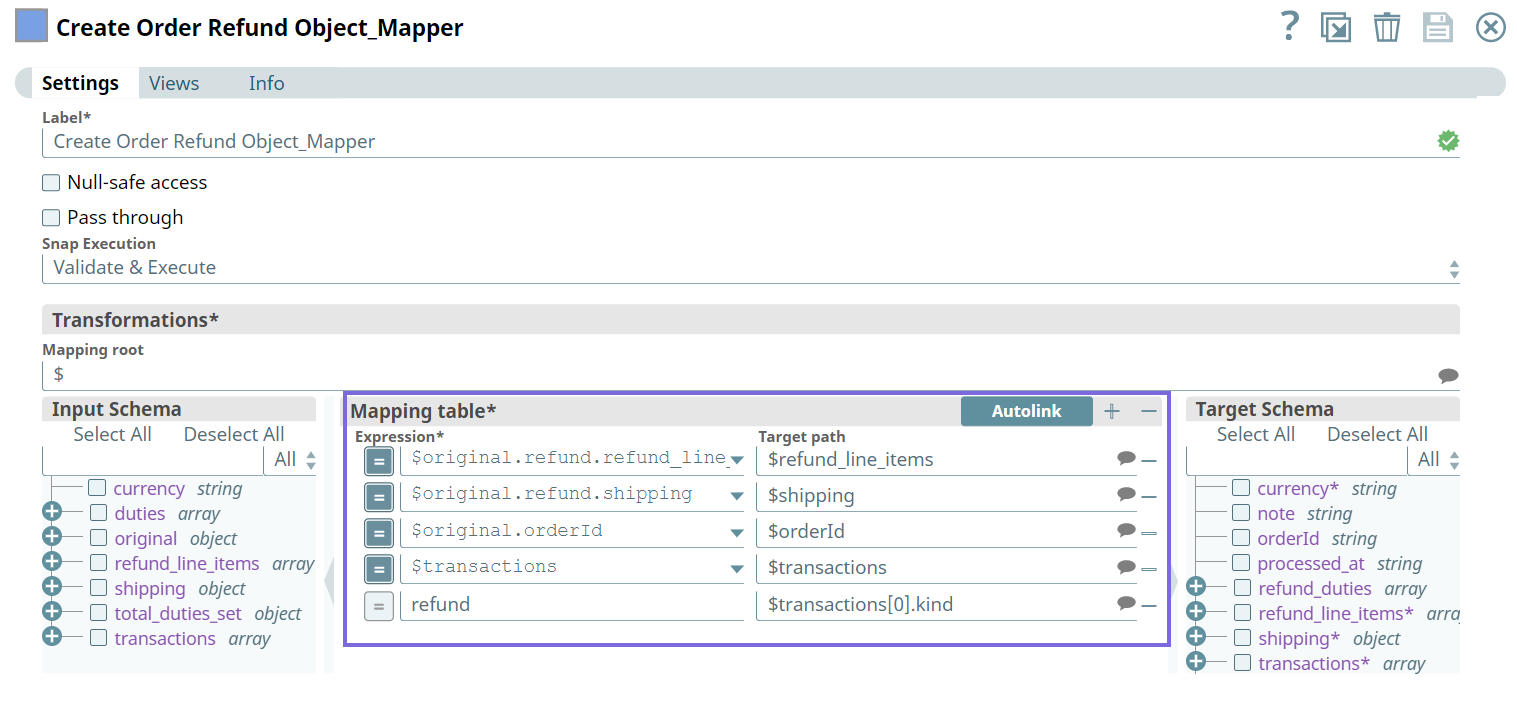
We configure the Create Order Refund Snap as follows.
Upon validation, the Snap generates a refund for the order and we an view the Order Refund ID in the output preview of the Snap.
We further use the JSON formatter Snap to format the JSON file, and write the document on to SL database using the File Writer Snap.
Download this Pipeline.
| Attachments | ||
|---|---|---|
|
| Insert excerpt | ||||||
|---|---|---|---|---|---|---|
|
...