On this Page
| Table of Contents | ||||
|---|---|---|---|---|
|
To integrate GitHub with SnapLogic:
Authorize your GitHub account.
Checkout repository to project.
Repository Checkout
In the SnapLogic Manager, navigate to your project and click the arrow to open the Project Options menu. If GitHub integration is enabled, the Checkout GitHub Repository option is added as to the list of available options as shown below:
...
Click Checkout. The files and assets in the repository are displayed in the Asset table of your project. The Asset window changes to include the GitHub menu. See Configuring GitHub Options in the SnapLogic UI for details.
...
Before users in an Org can work with the GitHub or GHES Git Integration, they must authorize SnapLogic to act on their behalf.
To authorize, follow these steps:
In SnapLogic, click your SnapLogic profile name to open the User Settings dialog:
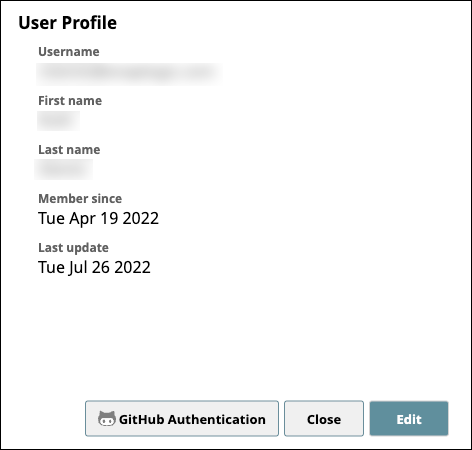
Click GitHub Authentication. A SnapLogic page opens asking for authorization to act on your behalf with GitHub. If it does not open, check whether your browser is blocking pop-ups.
Click Authorize.
If you are not logged into your GitHub account, a dialog will prompt you to do so.Enter your GitHub credentials and click Login.
Click the Authorize button.
Click Update to update your profile and close the dialog box.
After successful authentication and authorization, your SnapLogic profile will be updated with your GitHub user name and the time you last logged in.
...