Configure Creating a new Pipeline consists of the following activities:
Opening a Pipeline canvas in SnapLogic Designer
Configuring two or more linked Snaps
...
together to orchestrate a flow of data between
...
...
Pipeline: In Designer, click
|
...
 to open the Add New Pipeline dialog: to open the Add New Pipeline dialog:
 Image Added Image Added
The Add New Pipeline dialog opens
|
...
...
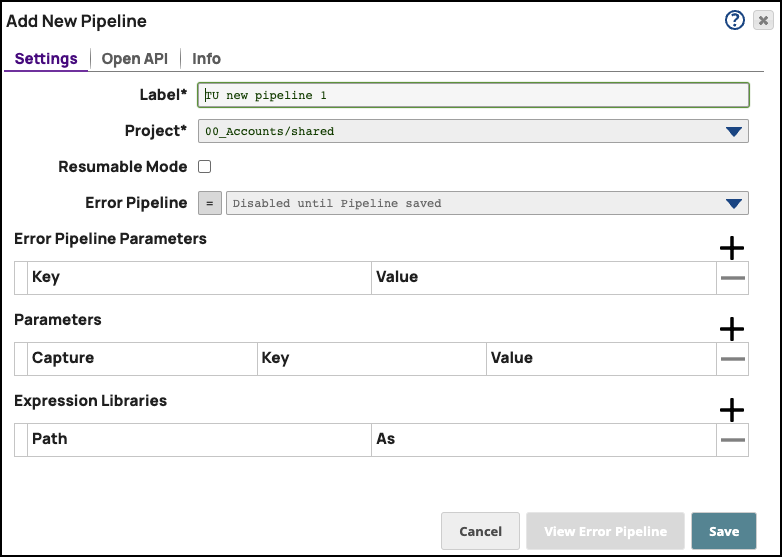 Image Added Image AddedModify the Label (
|
...
...
...
...
assets, projects, or project
|
...
spaces are limited to UTF-8 alphanumeric characters and these
|
...
...
...
...
...
Related articles
| Filter by label (Content by label) |
|---|
| showLabels | false |
|---|
| max | 5 |
|---|
| spaces | SPD |
|---|
| showSpace | false |
|---|
| sort | modified |
|---|
| reverse | true |
|---|
| type | page |
|---|
| cql | label = "pipeline" and type = "page" and space = "SPD" |
|---|
| labels | pipeline |
|---|
|
| Page Properties |
|---|
|
Related issuesplan to save this Pipeline to a different Project from the one you last accessed, select the path to the target Project. To make this a Resumable Pipeline, select Resumable Mode. Optionally, click and add key/value pairs to define the following Pipeline Properties: Click Save. You now have a blank canvas to build your Pipeline. If you want to modify settings or add parameters, click to open the Edit Pipeline Properties dialog.
| Info |
|---|
You can always add and remove parameters for your Pipeline in Designer after the Pipeline is saved. |
|
Use the Snap Reference documentation to do the following:
Determine the Snaps you need to use to build your Pipeline.
Gather Account information required to connect to your endpoints.
All Snap Packs and their Snaps feature a dedicated documentation page.
...
Related Content