In this article
| Table of Contents | ||||
|---|---|---|---|---|
|
...
Field Name | Field Type | Description | |||
|---|---|---|---|---|---|
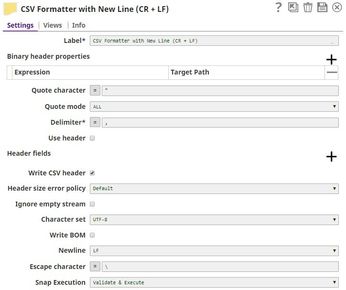
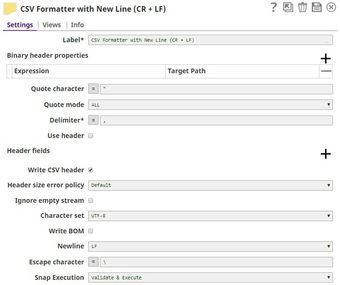
Label* Default Value: CSV Formatter | String | Specify the name for the Snap. You can modify this to be more specific, especially if you have more than one of the same Snap in your Pipeline. | |||
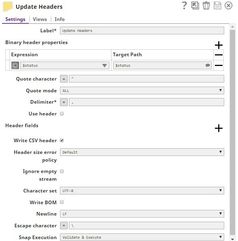
Binary header properties | Use the fieldset to add binary-header properties to the output data. These properties contain information related to the data and tell the system how the data must be interpreted. Binary headers in a document can be accessed and used in the expression-enabled properties of downstream Snaps. For example, you can use binary headers to specify custom statuses associated with the output data. Similarly, a 'content-location' property added to the binary header in this Snap can be referenced in the File name property of a File Writer Snap with the expression: $['content-location']. | ||||
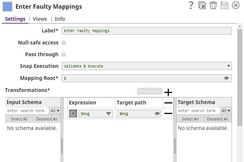
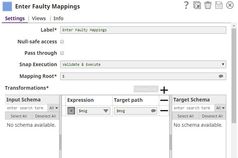
Expression Default value: N/A | String | Specify the value to be associated with a specific binary header property. | |||
Field 2 Default Value: N/A | String | Specify the target JSON path where the value in the expression is written. | |||
Quote character Default value: “ | String | The character that you want to use as the escape character in the CSV document. For example, if you use double quotes (") as the escape character, then commas in the actual data will need to be escaped using double-quotes on both sides. This property can be an expression. However, if the value associated with the expression contains more than one character, only the first character is used as the quote character. | |||
Quote mode Default value: ALL | Dropdown list | Select an option to specify how the quote character should be used in formatting the CSV data. Available options are:
If the Quote character property is empty, the selection of this property is ignored and the Snap uses NONE for the Quote mode. | |||
Delimiter Default value: , | String | Specify the character that must be used as a delimiter in formatting the CSV data. Tabs are common delimiters. To use a tab as your delimiter, enter \t. This property accepts any delimiter that resolves to a single character. For example, \t resolves to a tab and \n resolves to a new line. You can also use an escaped Unicode string, such as \U0007. This property can be an expression, and can contain values from Pipeline parameters. | |||
Use header Default value: Deselected | Checkbox | Select this checkbox to indicate whether the column names in the Header fields property should be used to format the CSV data. If this checkbox is deselected, the key set of the first document data is used as a CSV header.
| |||
Header fields Default value: N/A | String | Specify the header values that you want to use in the output CSV data. | |||
Write CSV header Default value: Selected | Checkbox | Select this checkbox to indicate whether the header strings listed in the Header fields properties should be written to the output CSV data. Default value: Selected. | |||
Header size error policy Default value: Default | Dropdown list | Select an option to handle any header size errors.
The header size error condition occurs when any subsequent input document has additional column names which are not present in the header. To handle header size errors, you can select any of the following options:
| |||
Ignore empty stream Default value: Deselected | Checkbox | Select this checkbox to indicate whether you want the Snap to ignore empty streams received at the input view during Pipeline execution. If this option is selected, the Snap does not produce any output stream; else, the Snap writes an empty array to the output stream. Default value: Not selected. | |||
Character set Default value: UFT-8 | Dropdown list | Select the character set in which the input CSV data is encoded. The available options are:
| |||
Write BOM Default value: Deselected | Checkbox | Select this checkbox to indicate the behavior of the Snap when it starts to write the CSV output data. If this option is selected, the Snap writes the BOM (Byte Order Mark) for the character set selected in the Character-set encoding property; else, the Snap skips writing BOM. | |||
Newline Default value: LF | Dropdown list | Select an option to specify the newline characters that you want to use as a line break. The available options are: LF, CR+LF and CR. | |||
Escape character Default value: \ | String | Specify the escape character that is to be used when formatting rows. Only single characters are supported. As of 4.3.2, this property can be an expression, which is evaluated with the values from the pipeline parameters. Leave this property empty if no escape character is used in the input CSV data. | |||
Snap Execution Default Value: Validate & Execute | Dropdown list | Select one of the three modes in which the Snap executes. Available options are:
| |||
...
| Expand | ||
|---|---|---|
| ||
Use the CSV Generator Snap to supply CSV documents:
 Notice how the double-quotes used in the first line of the input CSV data is escaped in the output document. The CSV Formatter Snap formats the input data and produces an output in the line feeds for Windows style. We selected the Newline Property with CR+LF to give the line feeds in Windows format. We also leave the Quote character field unchanged as '"'. This tells the Snap that all special characters have to be placed in quotes in the CSV output.
  Use the File Writer Snap to create a file using the output. Successful execution of the Pipeline displays the following output: 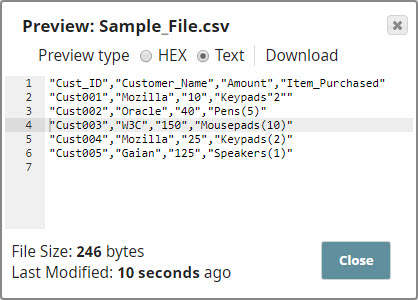 |
...
| Expand | ||
|---|---|---|
| ||
For the purposes of this example, we are picking up CSV data from a CSV Generator Snap. You can also supply this data using a combination of File Reader and CSV Parser Snaps. The CSV Generator Snap contains transaction details, as shown below: 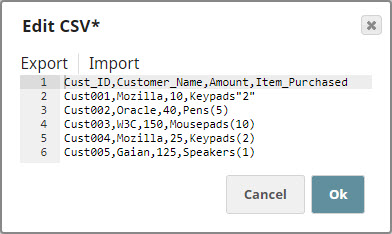 We copy the output of the CSV Generator Snap and connect each copy to a Filter Snap, where we filter out transactions based on whether they are worth more or less than $40: 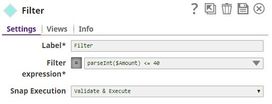 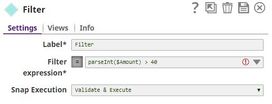 We now add a 'Bill_Type' binary header property to each set of filtered outputs, so each document is tagged appropriately: 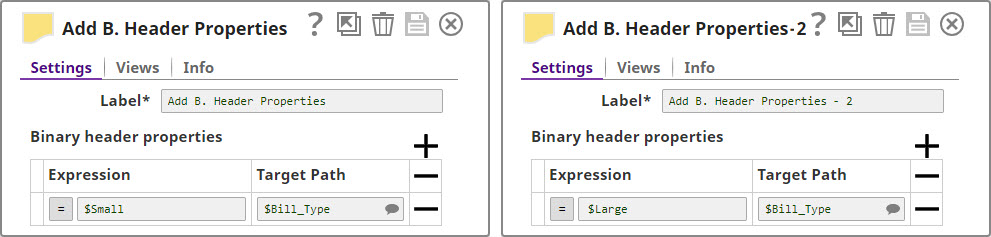
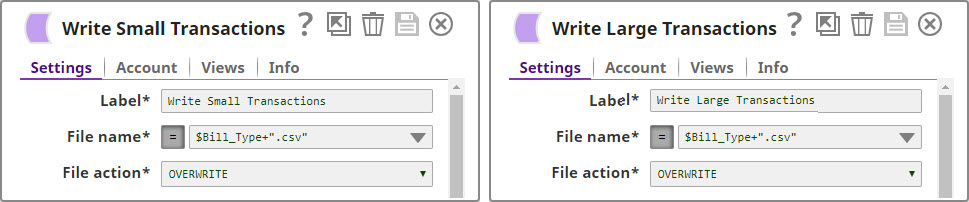 You can now see that two new files were created in the project: $Small.csv and $Large.csv: 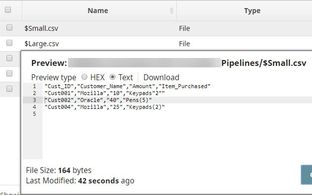 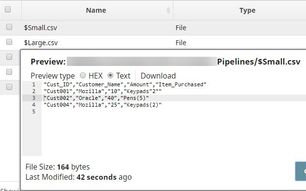 Download this Pipeline. |
...
| Expand | ||||||||||||||||||||||
|---|---|---|---|---|---|---|---|---|---|---|---|---|---|---|---|---|---|---|---|---|---|---|
| ||||||||||||||||||||||
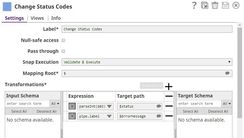
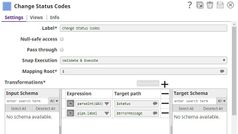
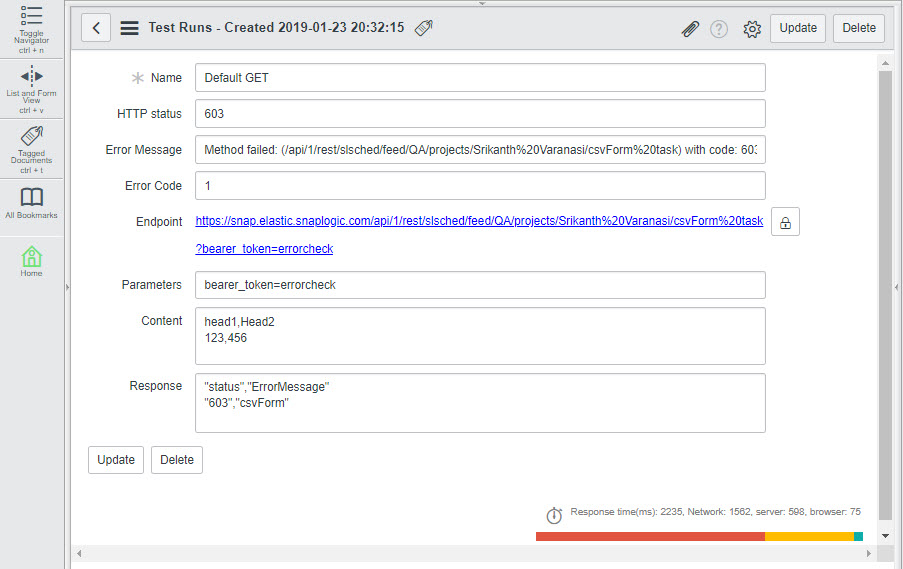
For the example to work, the Pipeline triggered by the Task should lead to an error. We shall route the error output to an error view. We shall then use the error view to manipulate the Status header of the error document. Once this is done, the parent Task sends the updated error output back to ServiceNow, and we should see the updated status code in the ServiceNow Administration interface. We need to perform the following tasks:
Let us look at each of these tasks in some detail: Creating a Pipeline to accept CSV and manipulate error document dataThis Pipeline is structured as shown in the screenshot above. Let us now look at its constituents:
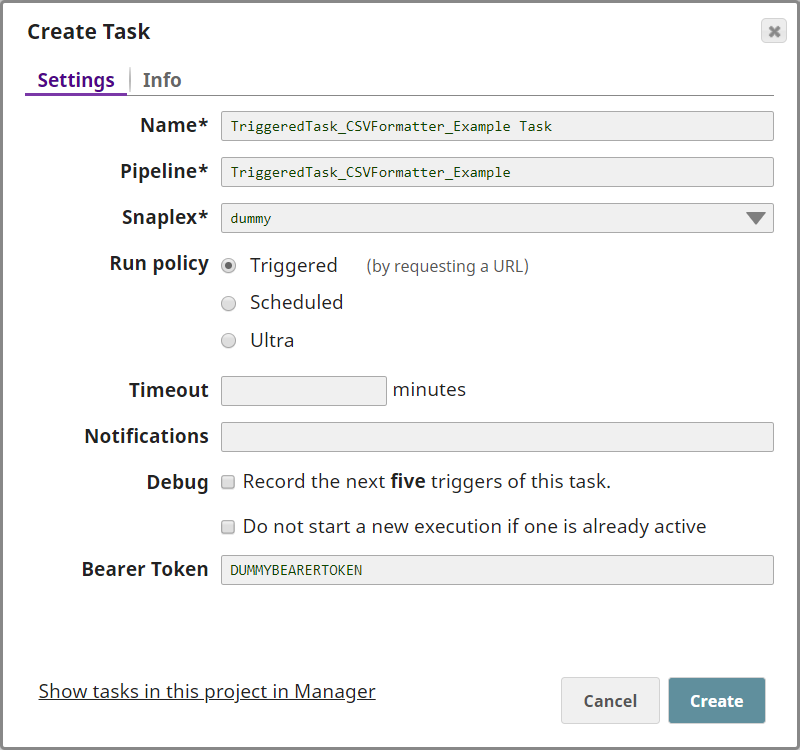
Creating a Triggered Task that sends CSV data into the TriggeredTask_CSVFormatter_Example PipelineTo create a Triggered Task:
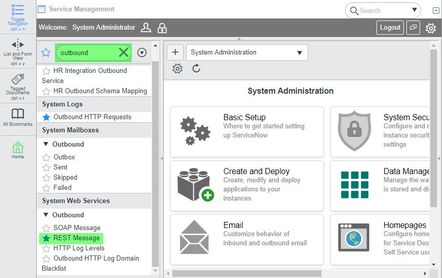
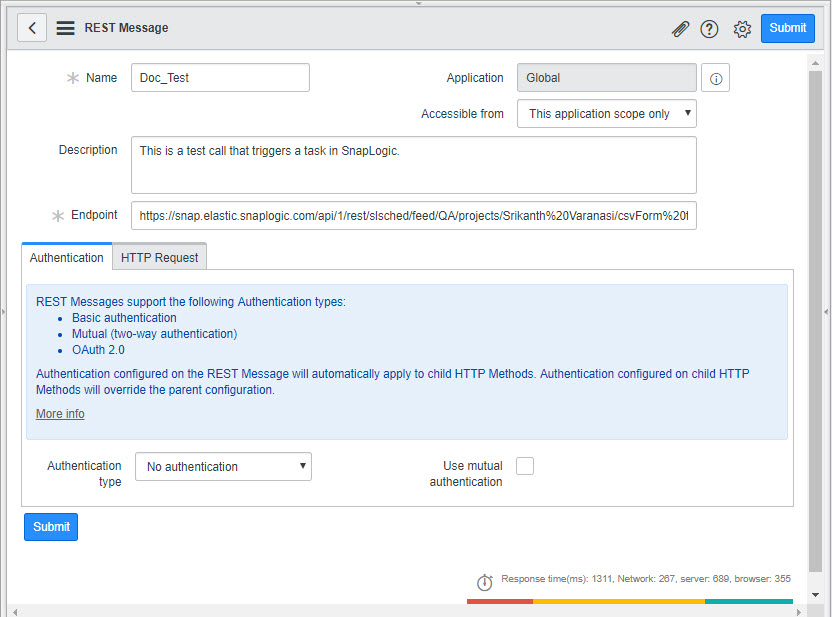
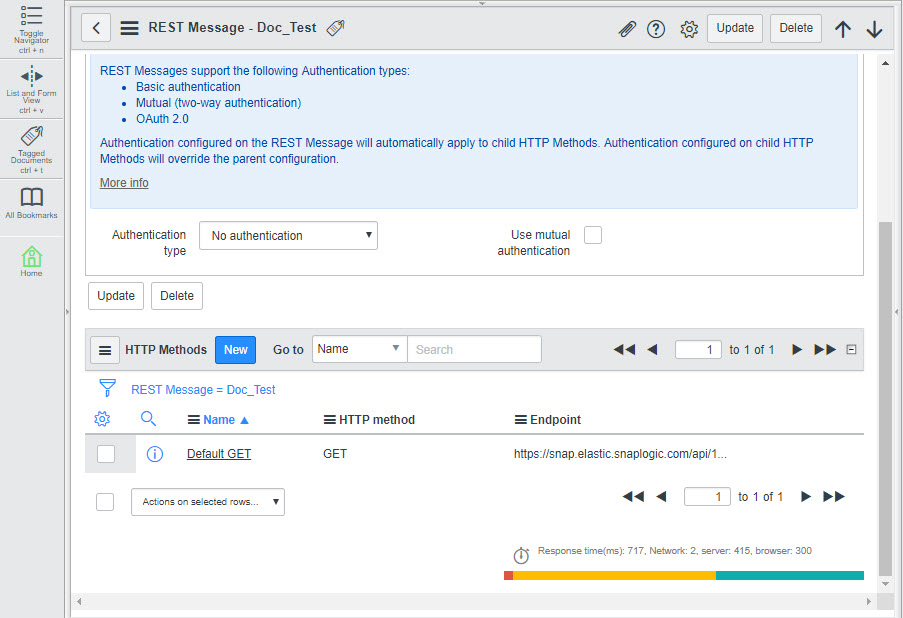
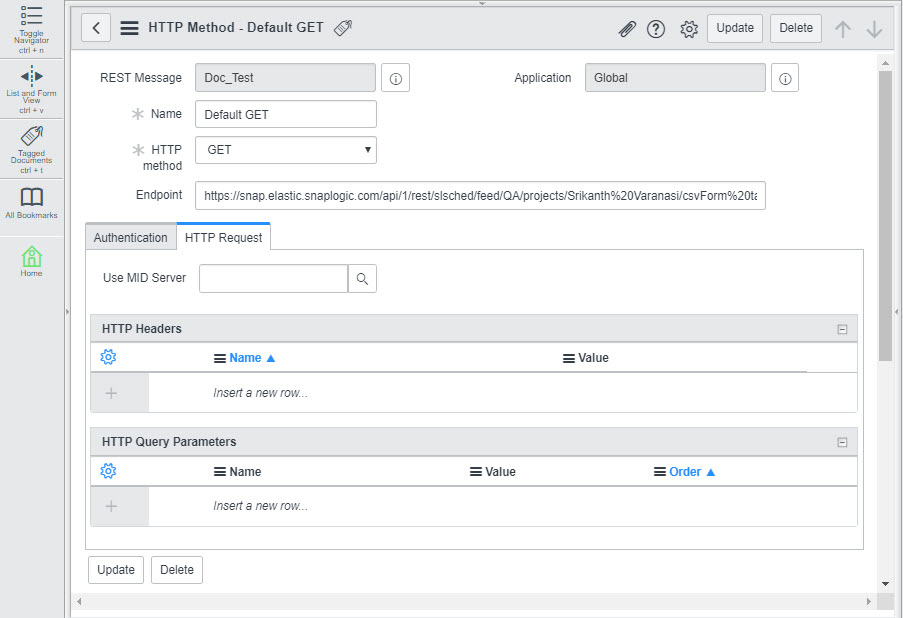
Configuring ServiceNow to send and receive CSV data from the Triggered Task
To configure ServiceNow to send and receive CSV data from the Triggered Task created in Step 2:
You can similarly use the CSV Formatter Snap to update binary header values associated with any input document. |


...