In this article
| Table of Contents | ||||
|---|---|---|---|---|
|
Overview
Project Spaces provide a way to group related Projects and set permissions for them. Each Project Space has a shared folder and can contain multiple Projects. In Manager, the left navigation pane displays the Project Spaces tree. The shared folder under Project Spaces contains Assets that are accessible from all Project Spaces and Projects in the Org. The shared folder in a Project Space contains Assets that are accessible from all Projects in that Space.
...
Org admins create and manage Project Spaces. They set permissions for users and groups at the Project Space, shared folder, and Project level. Users added to the Projects Spaces > shared folder automatically have read and execute permissions for folder Assets. To assign read, write, and execute permissions to a Project Space shared folder, the Org admin must explicitly assign full access to the user for that Project Space.
...
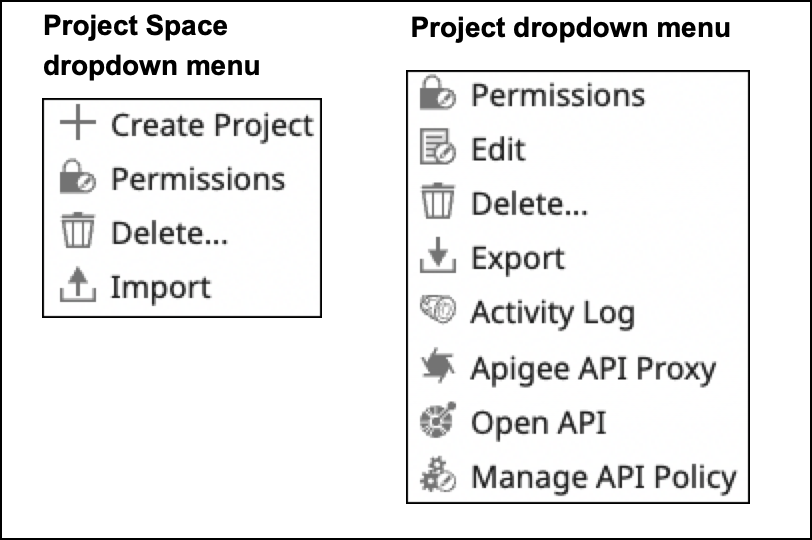
To assign permissions at the Project Space or Project level:
Click the dropdown menu next to arrow for the Project Space or the Project:

Click Permissions:

From the Add dropdown list, select a user or a group.
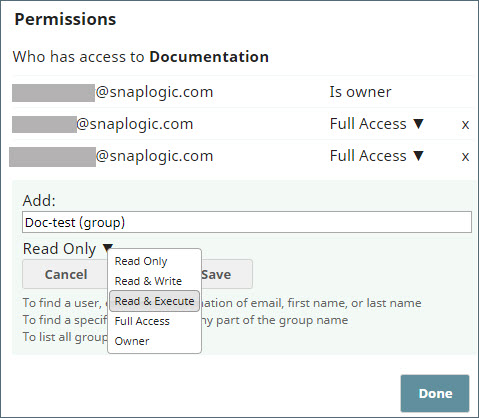
From the permissions dropdown menu, select the permission level.
Click Save.
Add more permissions, or if finished, click Done.
...
In the Manager left navigation pane, click the dropdown icon next to the Project Space name:
From the dropdown menu, select Delete. A confirmation box displays:
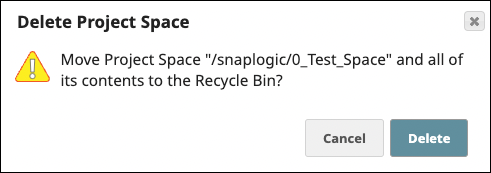
Click Delete.
Restoring or Permanently Deleting Project Spaces and Projects
Org administrators can restore deleted Project Spaces , and Projects , and Assets from the recycle bin or permanently delete them.
To restore an item:
From the left navigation, select Recycle Bin:

Click the Project Folders tab to filter list deleted Project Spaces and Projects:

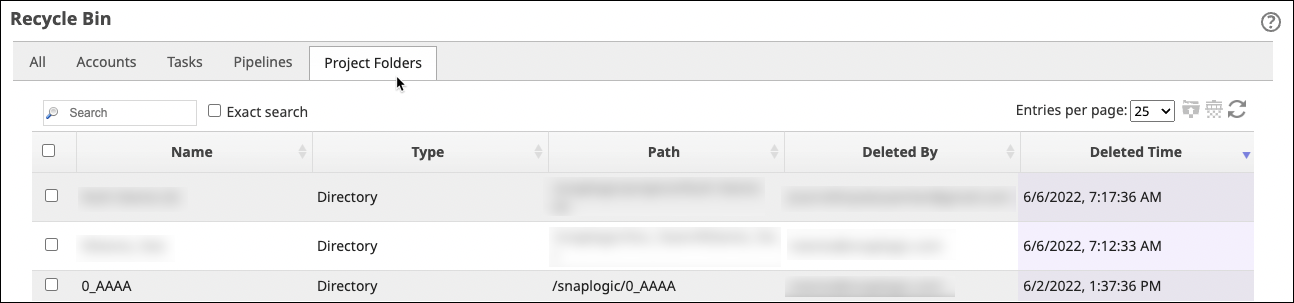
Select the item to restore.
In the toolbar, click Restore:

In the confirmation dialog, click Restore.
...