On this page
Introduction
Single Sign On is a convenient way for users to log into multiple services without needing to enter their user name and password for each service. SnapLogic supports Single Sign On (SSO) through the Security Assertion Markup Language (SAML) standard. If you are using a SAML-2 compatible Identity Provider (IdP) to perform SAML authentication, then you can configure your SnapLogic organization to authenticate users against your IdP.
SnapLogic certified authentication methods are:
- OpenAM
- Microsoft Azure Active Directory (AD)
- OKTA
- Ping
Additional methods may work, but have not been verified by SnapLogic.
SAML Overview
The SAML standard defines how Service Providers (SP) can communicate with Identity Providers (IdP) to securely authenticate users. In this case, SnapLogic is the Service Provider and OpenAM is the Identity Provider. The communication between the two starts after the user enters their organization name and clicks the SSO Log In button on the SnapLogic home page. The SnapLogic server uses the organization name to find the associated IdP and then redirect the user's web browser to that IdP with an authentication request. The destination for the redirect is defined by the IdP metadata file that is uploaded when configuring the user's organization to use SSO.
After the IdP receives the authentication request, it validates the request to ensure it is coming from a known Service Provider (SP) and then redirects the users browser back to SnapLogic. The IdP is informed of the SnapLogic service by uploading the SnapLogic metadata file that is generated when configuring the user's organization to use SSO. Finally, the authentication response is validated by the SnapLogic server using the IdP metadata and the user is allowed to begin working in the SnapLogic Designer.
Configuration
As mentioned in the SAML Overview section, configuring your organization to use SSO requires the exchange of metadata between the SP and the Identity Provider (IdP). You must have Org admin access to configure SSO. To perform this exchange:
- Export the metadata from the IdP's instance.
- Save this metadata into a file on your machine; you need this file later.
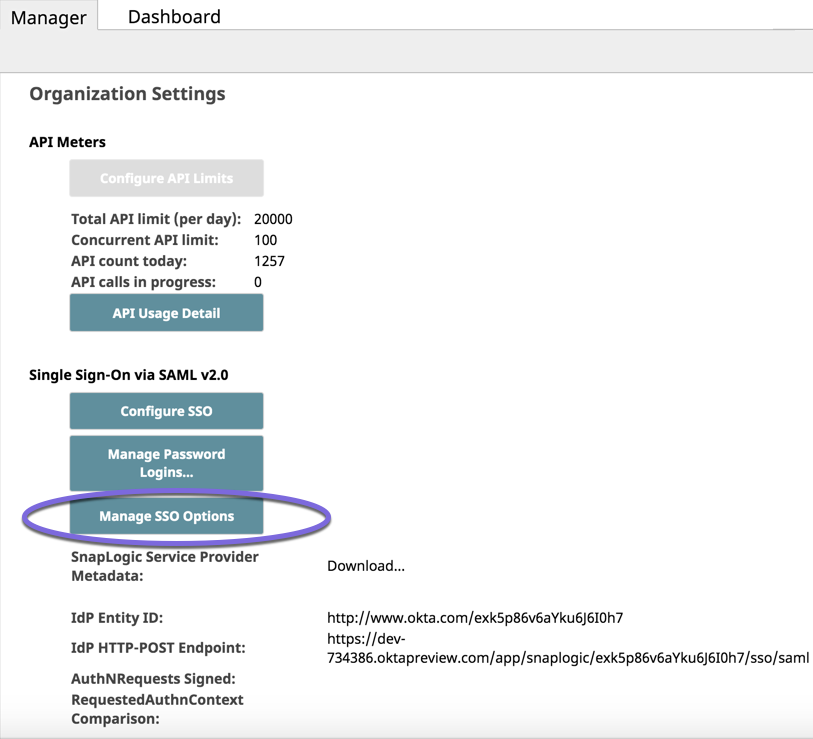
- In SnapLogic Manager, click Settings in the main menu on the left. The Organization Settings page appears.
- Click Configure SSO. The Update pop-up appears. All IdPs supported by SnapLogic are displayed here.
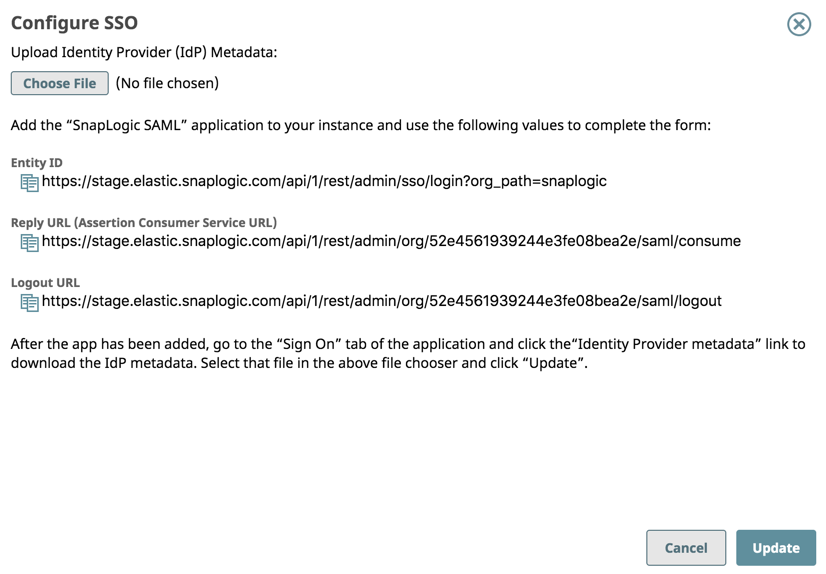
- Entity ID: Click
 to copy and paste this URL in the SAML entity field of your IdP.
 - Reply URL: Click to copy and paste this URL in the SAML token field of your IdP.
- Logout URL: Click to copy and paste this URL in the SAML Logout response field of your IdP.
- Entity ID: Click
- Click Choose File to upload the metadata file that you saved earlier.
- Click the IdP whose metadata file you uploaded. This section has different requirements based on the IdP selected.
Enter the required URLs and click Update to upload the metadata.
When the upload finishes, the SnapLogic server validates the metadata and updates the Settings page to reflect the new values.Double-check the values to ensure that they refer to your IdP.
- The Settings page offers a download link adjacent to the SnapLogic Service Provider Metadata row. Click this link to download the metadata to your machine.
- Go to the IdP's console and perform the applicable steps to upload this metadata. At this point, everything should be configured and ready for use.
Using One IdP Metadata File across Multiple Orgs
Some SSO implementations use an IdP metadata file for multiple Orgs. Users who belong only to one Org (and not the other Orgs) can now log into SnapLogic regardless of which Org the IdP metadata references. For example, previously in this scenario, If you belonged to OrgB, but the IdP used OrgA's metadata, then your login to OrgB would fail with the following error message: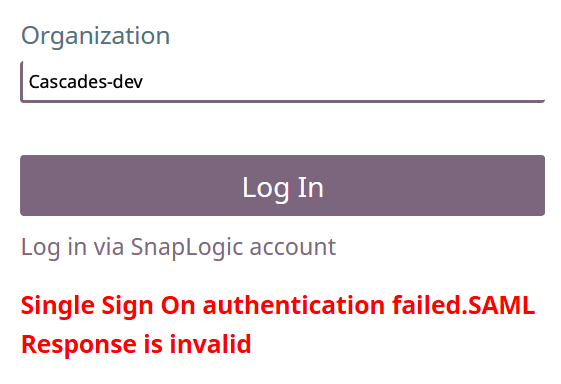
Starting with the 4.23 Release (November 2020), we now support allowing users access to only their Org in this implementation of SSO.
Manage SSO Options
You can customize the the SSO login with additional authentication at the Org level using the Manage SSO Options feature. This feature enables you to configure AuthnRequest, RequestedAuthN Context Comparison, and AuthNContextClassRef authentication methods after uploading the IdP metadata file.
Prerequisite: You must be an Org admin to access the Manage SSO Options feature.
To add additional authentication methods to the SSO login for SnapLogic users:
- Go to SnapLogic Manager, and click Manage SSO Options.
- Choose additional authentication options for the SnapLogic users in your Org as appropriate:
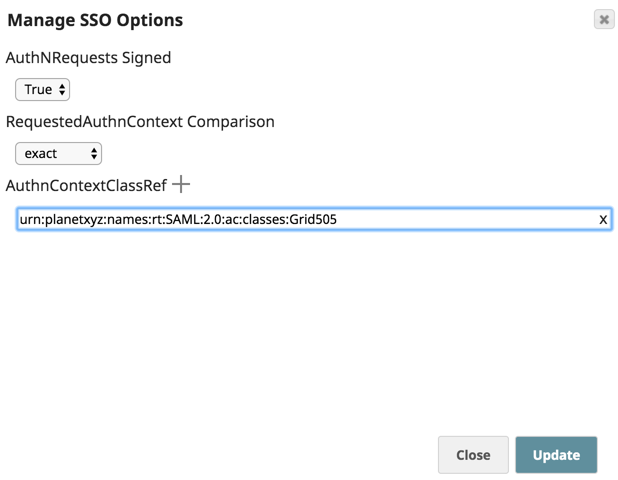
- AuthNRequests Signed: Select True to authenticate the sign-on against a 3rd-party entity. Selecting False declines this authentication method. The default setting is False.
- RequestedAuthN Context Comparisons: Select the method (exact, minimum, maximum, better). The default setting is exact.
- AuthnContextClassRef: Click
 to enter the context class references as values.
- Click Update.
Adding Users
After configuring your SnapLogic organization to authenticate via SSO, the organization administrator still needs to add users to the organization to authorize them to use the SnapLogic service. Adding users can be done through the 'Users' page in the Manager.
When creating users, you can select Disable password-based login to create the user in the system but not give then access through SnapLogic's login.
Logging In
To log in using SSO, navigate to the SnapLogic login page, click Login via Single Sign On. Enter your organization name and then click Log In. The login sequence should first redirect your web browser to the IdP login page and then to the SnapLogic Designer. If the SnapLogic server detects any errors during login, they are displayed below the login form on the SnapLogic home page.
Users In Multiple Organizations
Users may be granted access to multiple organizations in the SnapLogic Integration Platform. Logging into the SnapLogic platform via SSO does not affect which organizations the user has access to. For example, if "Alice" is a member of "Company 1" and "Company 2" and she logs in via the IdP for "Company 1", she is still be able to access "Company 2". The authentication process only validates that the person logging into the service is who she say she is; it does not control what she has access to.
Manage Password Logins
To set accounts to use or not use the SnapLogic login mechanism, click the Manage Password Logins button on the Settings page in Manager to get to the User Authentication Methods page. Then select the users necessary and click Enable or Disable as needed.

See Also
- Two-way SSL with SnapLogic’s REST Snap
- Configuring Azure Active Directory SSO Configuration with SnapLogic