In this Article
Overview
In SnapLogic Manager, the API Manager console provides a space where you can create APIs by referencing a specification. The new API asset acts as a container for the following SnapLogic assets.
- Pipeline: The Pipeline is a representation of the API specification and provides the scaffolding of its implementation in the SnapLogic platform.
- Tasks: The URI endpoints used to trigger Pipeline execution.
- Files: A specification file.
- Accounts: Accounts in Manager referenced by Pipelines used in the API.
- Snap Packs: Snap Packs used in the Pipelines that compose the API.
You can upload or reference an API specification based on the Open API Specification (OAS) 2.0 standard, and then create and manage versions of your API.
Starting in the SnapLogic 4.26 (August 2021) release, SnapLogic API Management supports a Pipeline-based approach to building APIs. You can create an API by building your Pipelines first and collating your assets into a Project. You can then create an API in the API Manager console with this Project.
Additionally, you can create an empty API asset to build out with an API specification and assets afterward.
Prerequisites
- Your Org must have a subscription to the API Management feature; otherwise, the API Management UI is not enabled.
- You must have Write permissions to create an API.
API Manager
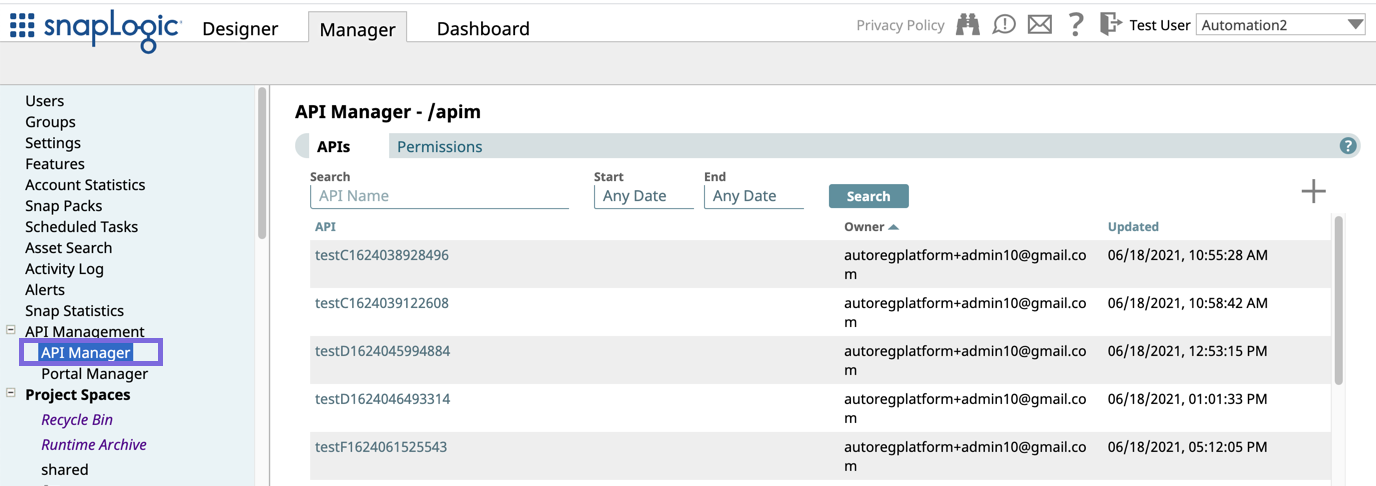
You can navigate to the API Manager console by clicking Manager > API Management > API Manager.
Creating the API using Design First
- In Manager, click API Management > API Manager.
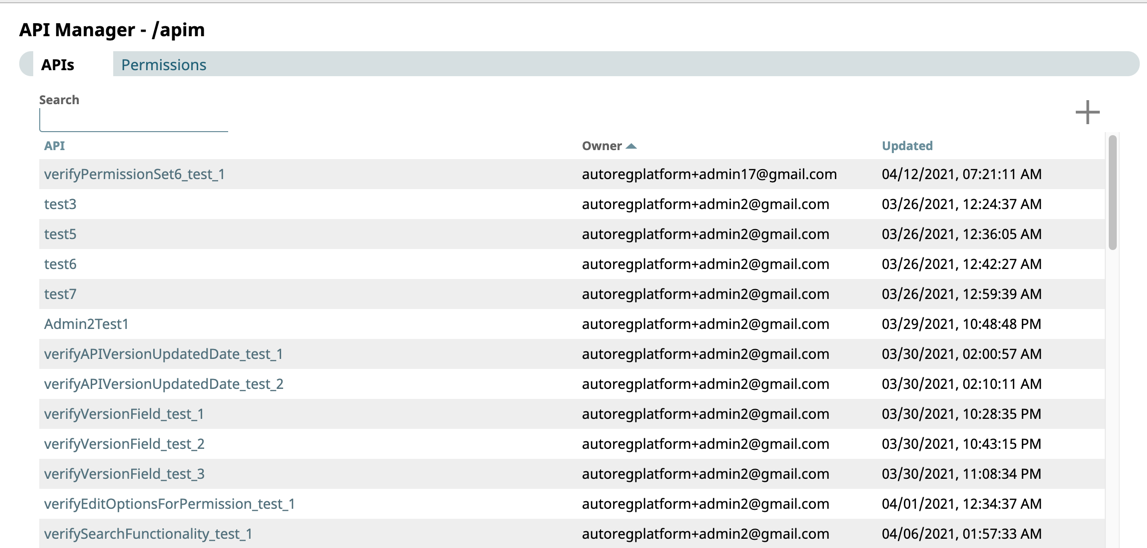
The API Manager - /apim page is displayed. - Click to display the Create API dialog window:
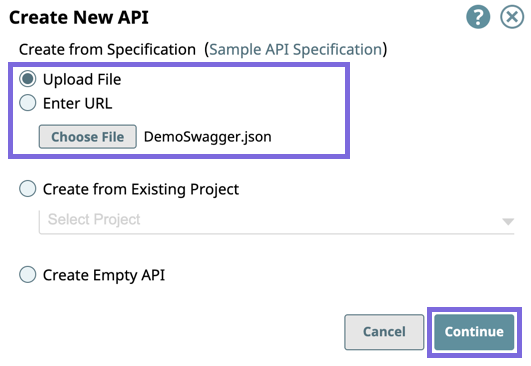
- Select one of the following options:
- Upload File: Select to upload a OAS Specification as a .yaml. or .json file.
- Enter URL: Enter the URL for the OAS Specification.
- Click Continue.
- Select one of the following options:
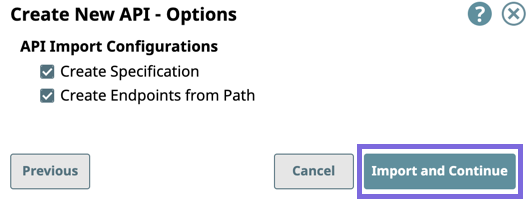
- In the Create New API - Options dialog window select/deselect from the following import options, and then click Import and Continue:
API Import Configurations: The options for import method, selected by default:- Create Specification. Select to include the specification as a File Asset in the API. Deselect to omit the specification file you uploaded.
- Create Endpoints from Path. Select to include all default Assets for this API. Deselect to leave the API an empty container for you to provide the Assets later.
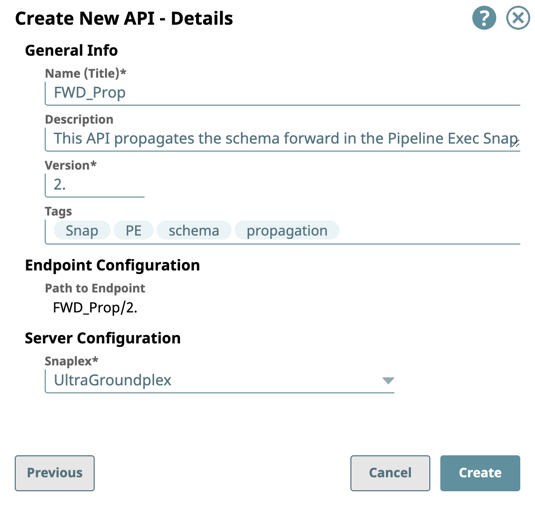
- Complete the Create API - Details form:
- Enter the required information or modify the information that is extracted from the specification in the subsequent Create API dialog window.
- General Info: Provide basic information about your API.
- Name (Title): Enter a name for your API.
- Description: Enter a brief description.
- Version: Define the version. By default, the version is 1.0, when you create an API for the first time. For details about API versions, see Managing Versions of Your APIs.
- Tags: Enter any tags associated with your API. You can create the tags as required.
- Endpoint Configuration: The base path for the endpoint.
Server Configuration: Enter the Snaplex associated with this API.
- You must enter a name and Snaplex. You can also change the version from this dialog window, and thus create another version of the API.
- Depending on the type of Snaplex, the following configuration requirements apply to the Snaplex that is displayed in the selector:
- Cloudplex with a load balancer.
- Groundplex with at least one node.
- General Info: Provide basic information about your API.
- Click Create.
The API asset is displayed on the API Manager page.
- Enter the required information or modify the information that is extracted from the specification in the subsequent Create API dialog window.
You can view details about the API by clicking it. You can also set Permissions on your API.
Creating the API from Existing Project Assets
- In SnapLogic Manager, click API Management > API Manager.
The API Manager - /apim page is displayed. - Click to display the Create New API dialog window.
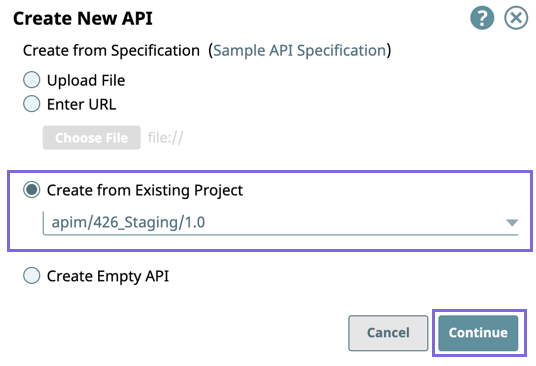
- Select Create from Existing Project.
- Select the target Project from the drop-down list, then click Continue.
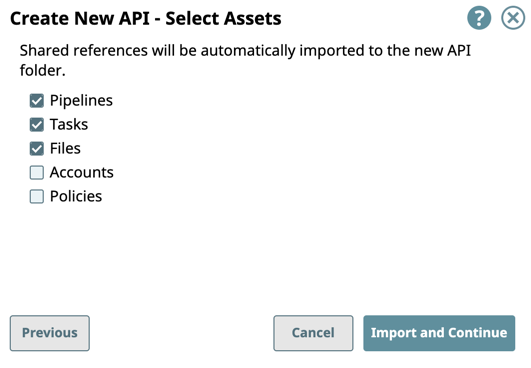
- In the Create New API -Select Assets dialog window, select/deselect the assets from the Project to use in the API, then click Import and Continue.
- Select the target Project from the drop-down list, then click Continue.
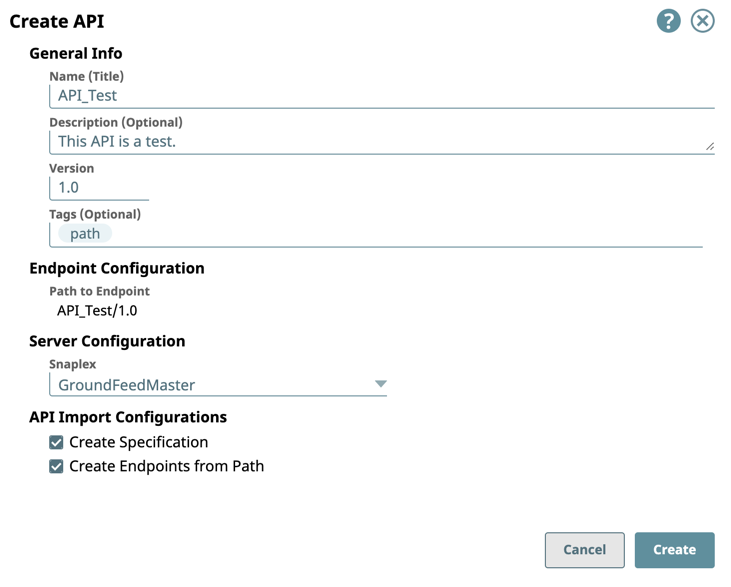
- Complete the creation of the API:
- Enter the required information or modify the information that is extracted from the specification in the subsequent Create API dialog window.
- General Info: Provide basic information about your API.
- Name (Title): Enter a name for your API.
- Description: Enter a brief description.
- Version: Define the version. By default, the version is 1.0, when you create an API for the first time. For details about API versions, see Managing Versions of Your APIs.
- Tags: Enter any tags associated with your API. You can create the tags as required.
- Endpoint Configuration: The base path for the endpoint.
Server Configuration: Enter the Snaplex associated with this API.
- You must enter a name and Snaplex. You can also change the version from this dialog window, and thus create another version of the API.
- Depending on the type of Snaplex, the following configuration requirements apply to the Snaplex that is displayed in the selector:
- Cloudplex with a load balancer.
- Groundplex with at least one node.
- General Info: Provide basic information about your API.
- Click Create.
The API asset is displayed on the API Manager page.
- Enter the required information or modify the information that is extracted from the specification in the subsequent Create API dialog window.
You can view details about the API by clicking it. You can also set Permissions on your API.
Creating an Empty API
- In SnapLogic Manager, click API Management > API Manager.
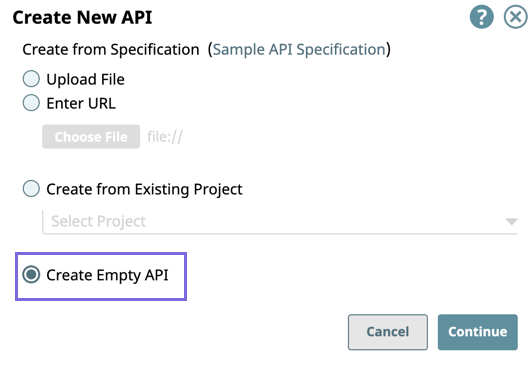
The API Manager - /apim page is displayed. - Click to display the Create New API dialog window, and select Create an Empty API Version:
- Click Continue to display the Create API Details dialog.
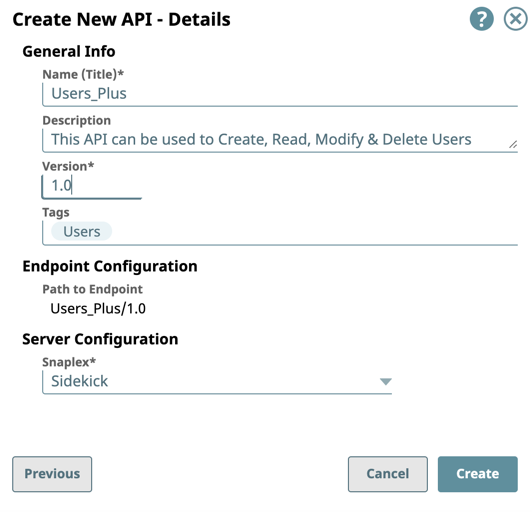
- Complete the creation of the API:
- Enter the required information or modify the information that is extracted from the specification in the subsequent Create API dialog window.
- General Info: Provide basic information about your API.
- Name (Title): Enter a name for your API.
- Description: Enter a brief description.
- Version: Define the version. By default, the version is 1.0, when you create an API for the first time. For details about API versions, see Managing Versions of Your APIs.
- Tags: Enter any tags associated with your API. You can create the tags as required.
- Endpoint Configuration: The base path for the endpoint.
Server Configuration: Enter the Snaplex associated with this API.
- You must enter a name and Snaplex. You can also change the version from this dialog window, and thus create another version of the API.
- Depending on the type of Snaplex, the following configuration requirements apply to the Snaplex that is displayed in the selector:
- Cloudplex with a load balancer.
- Groundplex with at least one node.
- General Info: Provide basic information about your API.
- Click Create.
The API asset is displayed on the API Manager page.
- Enter the required information or modify the information that is extracted from the specification in the subsequent Create API dialog window.
You can view details about the API by clicking it. You can also set Permissions on your API.
Deleting an API from the API Manager Console
To delete an API, you must delete all versions and the assets in those versions. For details, see the following topics:
See Also
- Managing API Version Assets
- Version Details
- API Policy Manager
- Setting Permissions in API Manager
- Sample API Specification
