In this article
Overview
In SnapLogic Manager, the API Manager console provides a space where you can create APIs by referencing a specification. The new API asset acts as a container for the following SnapLogic assets.
Pipeline: The Pipeline is a representation of the API specification and provides the scaffolding of its implementation in the SnapLogic platform.
Tasks: The URI endpoints used to trigger Pipeline execution.
Files: A specification file.
Accounts: Accounts in Manager referenced by Pipelines used in the API.
Snap Packs: Snap Packs used in the Pipelines that compose the API.
You can create an API using one of four ways:
By uploading an Open API Specification (OAS) file (Design First)
By entering a URL that points to an Open API Specification file (Design First)
By creating an API from an existing project
By starting with an empty API
The first version is automatically created when you create the API. However, you can create additional versions of your API and manage them.
Prerequisites
Your API specifications must be based on Open API Specification (OAS) 2.0.
You must have Write permissions to create an API.
API Manager
To navigate to the API Manager, go to Manager > API Management > API Manager.
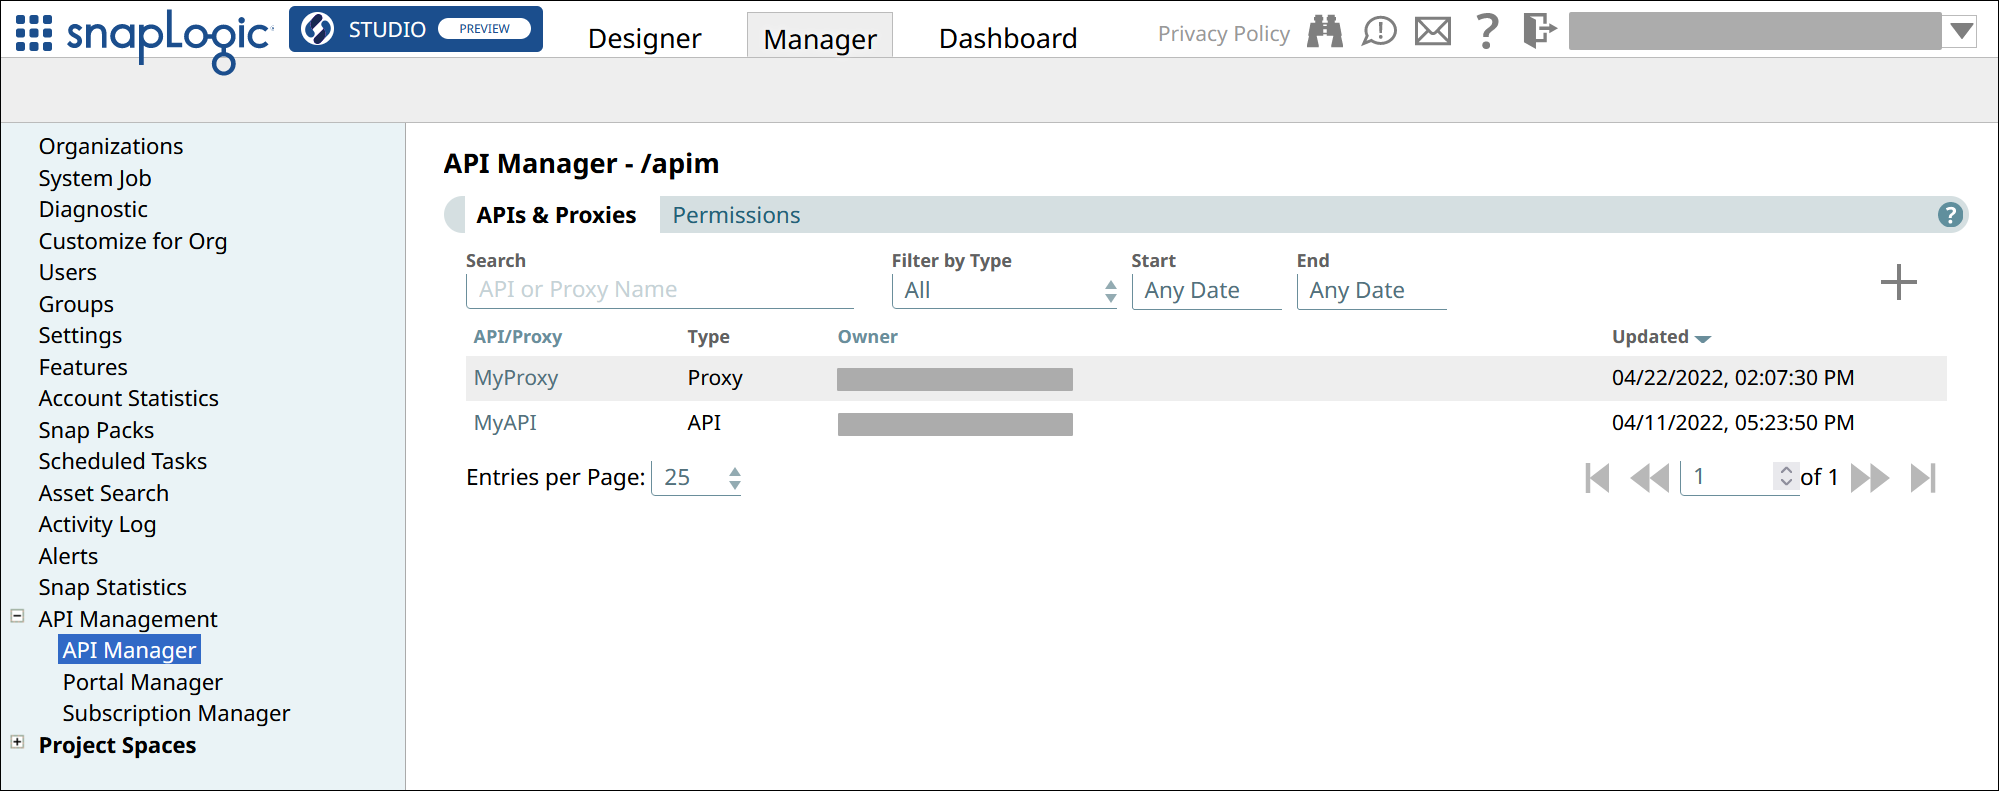
APIs and Proxies appear in this list. You can view details about the API or Proxy by clicking it. You can also set permissions on your API.
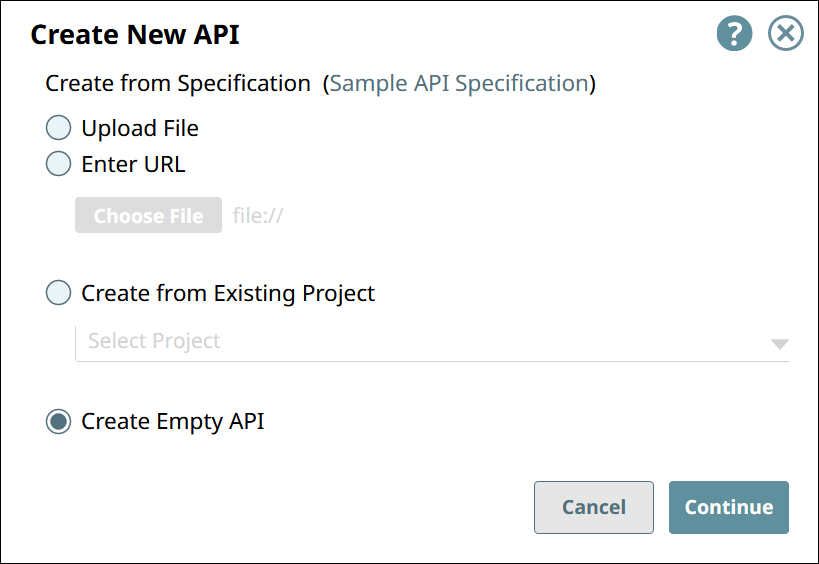
Create the API using Design First
In the API Manager page, under the APIs & Proxies tab, click the add icon (
 ) and choose New API.
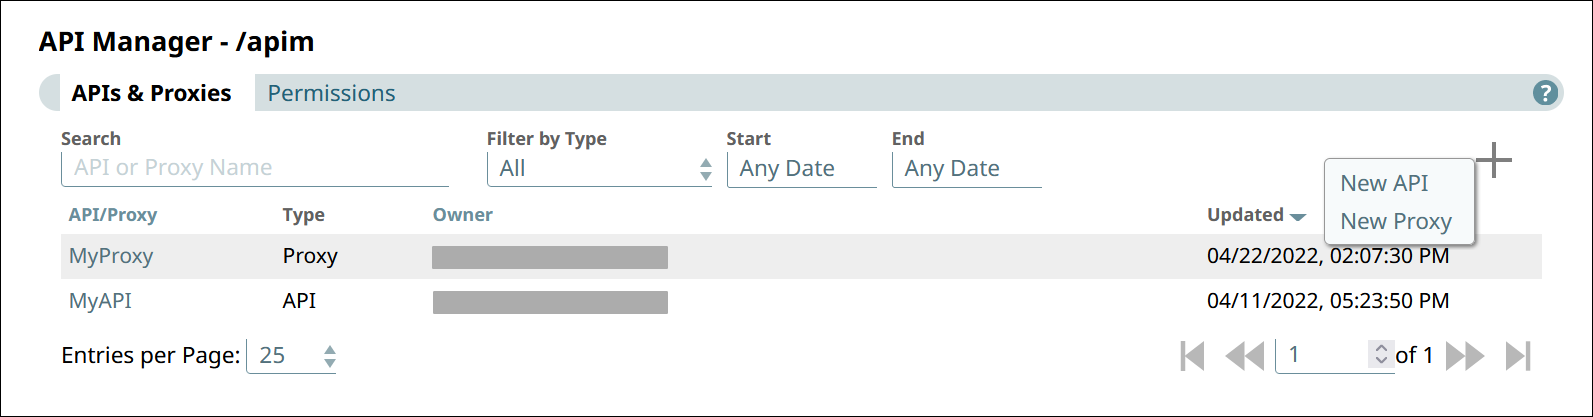
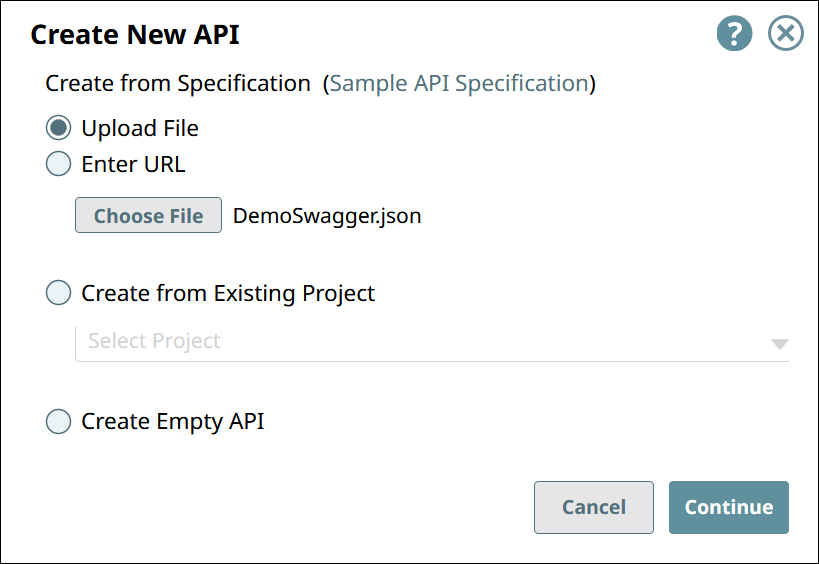
In Create New API, choose the source of the OAS file.
Upload File. You must click Choose File to specify the location of the specification file to upload.
Enter URL. You must enter a valid URL pointing to the location of the specification file.
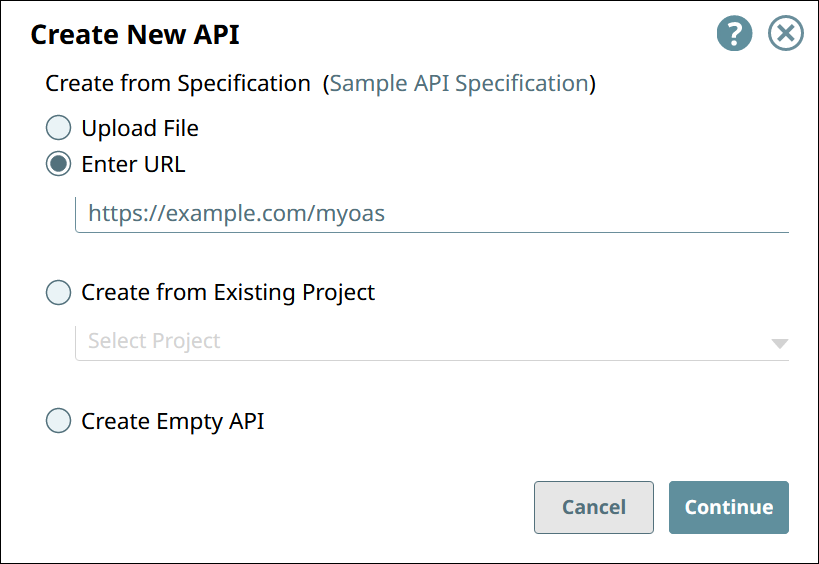
Click Continue.
In Create New API - Options, select your API Import Configurations.
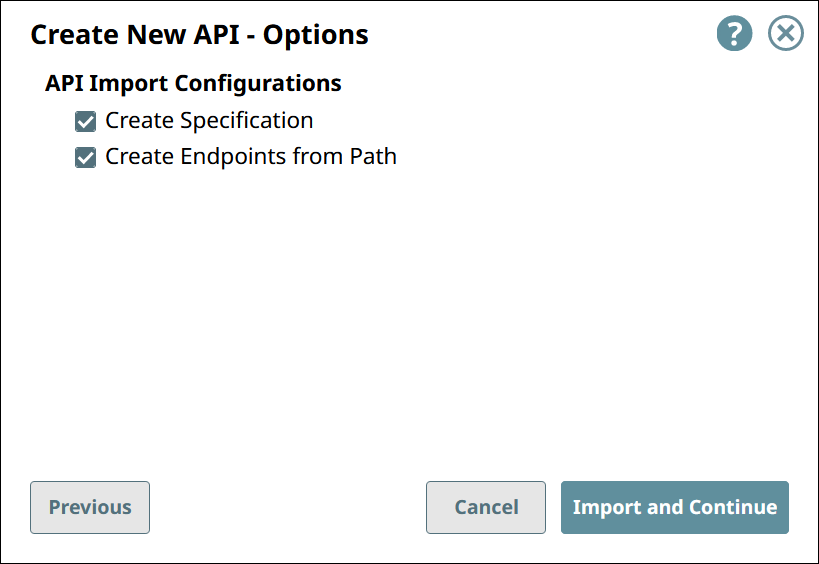
Create Specification. If selected, the imported specification is included as a File Asset in the API.
Create Endpoints from Path. If selected, endpoints for the new API are created based on its path.
Click Import and Continue.
In Create New API - Details, fill in the details for the new API.
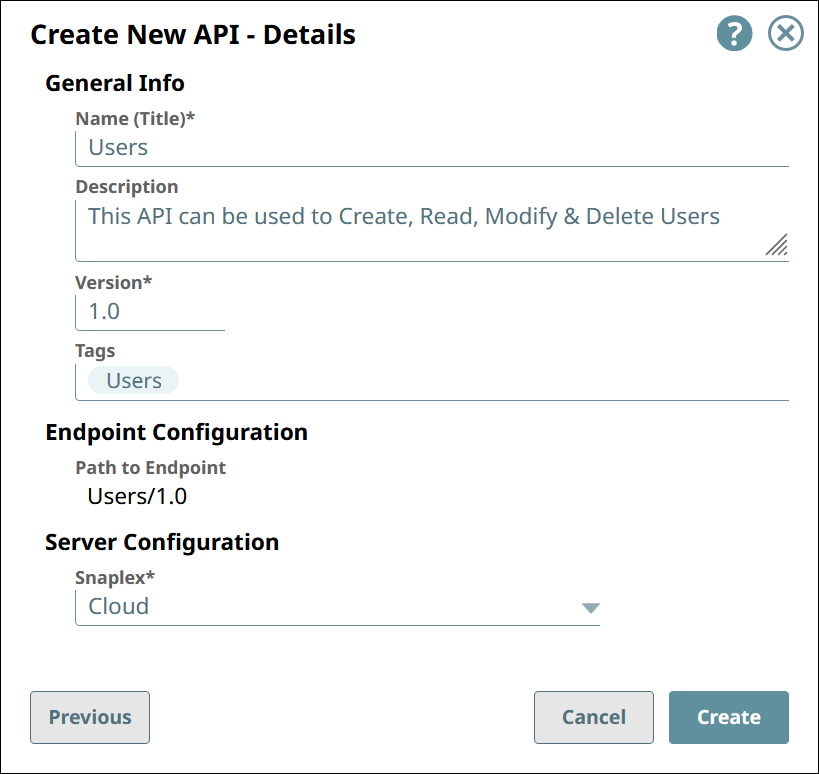
General Info
Name (Title). The name of the new API.
The name must meet the following requirements:
Must be unique.
Must begin with alphanumeric characters A-Z, a-z, or 0-9.
Cannot contain the reserved keyword
shared.Cannot contain |, <, >, [, ], {, }, #, ?, /, and \.
Must be no more than 256 characters. If the name includes double-byte characters, the maximum length is shorter.
Description. A description of the new API.
Version. The version number for the first version of the API.
Default: 1.0.
Learn more: Managing Versions of Your APIsTags. Enter any tags associated with your API. You can create the tags as required.
Endpoint Configuration » Path to Endpoint. (Read-only) The base path for the endpoint.
Server Configuration » Snaplex. The Snaplex to associate with the new API.
Click Create.
Create the API from Existing Project Assets
In the API Manager page, under the APIs & Proxies tab, click the add icon (
) and choose New API.
In Create New API, choose Create from Existing Project and select the Project.
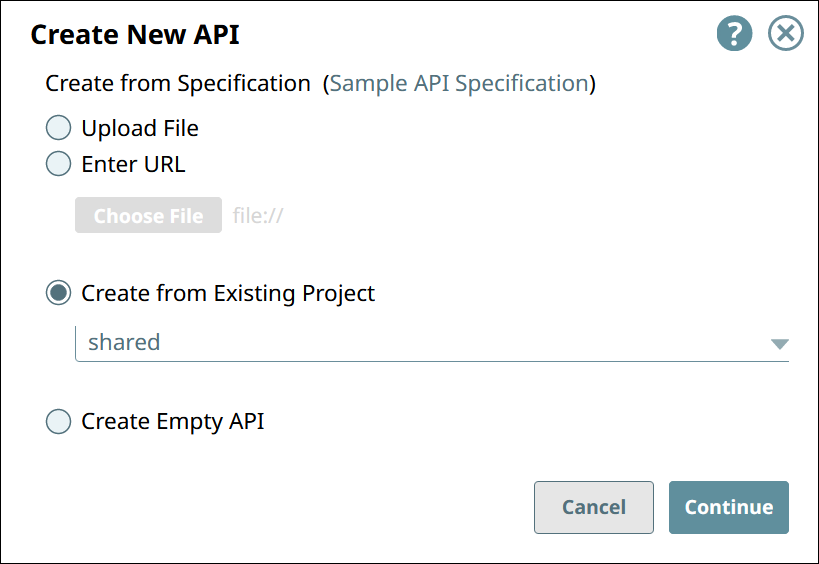
Click Continue.
In Create New API - Select Assets, select the types of assets you want to import to the new API.
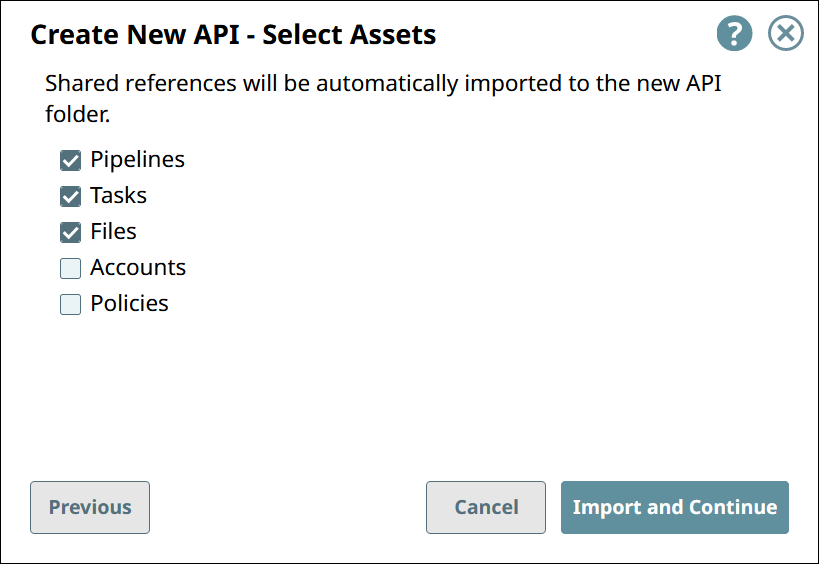
Click Import and Continue.
In Create New API - Details, fill in the details for the new API.
General Info
Name (Title). The name of the new API.
The name must meet the following requirements:
Must be unique.
Must begin with alphanumeric characters A-Z, a-z, or 0-9.
Cannot contain the reserved keyword shared.
Cannot contain |, <, >, [, ], {, }, #, ?, /, and \.
Must be no more than 256 characters. If the name includes double-byte characters, the maximum length is shorter.
Description. A description of the new API.
Version. The version number for the first version of the API.
Default: 1.0.
Learn more: Managing Versions of Your APIsTags. Enter any tags associated with your API. You can create the tags as required.
Endpoint Configuration » Path to Endpoint. (Read-only) The base path for the endpoint.
Server Configuration » Snaplex. The Snaplex to associate with the new API.
Click Create.
Creating an Empty API
In the API Manager page, under the APIs & Proxies tab, click the add icon (
) and choose New API.In Create New API, choose Create Empty API.
Click Continue.
In Create New API - Details, fill in the details for the new API.
General Info
Name (Title). The name of the new API.
The name must meet the following requirements:
Must be unique.
Must begin with alphanumeric characters A-Z, a-z, or 0-9.
Cannot contain the reserved keyword shared.
Cannot contain |, <, >, [, ], {, }, #, ?, /, and \.
Must be no more than 256 characters. If the name includes double-byte characters, the maximum length is shorter.
Description. A description of the new API.
Version. The version number for the first version of the API.
Default: 1.0.
Learn more: Managing Versions of Your APIsTags. Enter any tags associated with your API. You can create the tags as required.
Endpoint Configuration » Path to Endpoint. (Read-only) The base path for the endpoint.
Server Configuration » Snaplex. The Snaplex to associate with the new API.
Click Create.
Enabling "Try It Out" for your API
To allow API users to try out your API,
The API must include a CORS Restriction policy.
Learn how to add and configure the CORS Restriction policy for "Try It Out".The API must be published.
Learn how to publish your API.
The Try it out button appears only if these two requirements are met.
To test the Try it out button for your API: Discovering APIs in the API Catalog#[inlineExtension]View-and-Try-Out-an-API
Deleting an API from the API Manager Console
To delete an API, you must delete all versions and the assets in those versions. For details, see the following topics: