ML Patterns Catalog
On this Page
Overview
Patterns are reusable integration pipelines that can be configured using a step-by-step wizard. In most cases, you will need to supply account information for the data sources or services needed for the process.
Pipeline patterns can be grouped into pattern projects. These pipelines typically are those that are required across teams, and it is easier to share them grouped as a pattern project. You can additionally create user groups and assign global permissions to these groups.
To view matching Pipelines, you must enter a search term in the Search field box. SnapLogic only displays matching Pattern Pipelines and hence, browsing the Pattern Catalog without a Search term will not yield any results.
Patterns Catalog
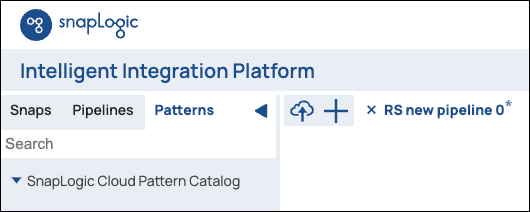
You can view the Patterns Catalog in SnapLogic Designer by clicking the Patterns tab. You can also view the patterns catalog in SnapLogic Manager; however, in SnapLogic Manager, a pattern project is virtually indistinguishable from a regular project unless you edit the project.
You can only see patterns for which you have at least 'Read Only' permission.
Understanding Pattern Project Access Permissions
- You need at least 'Read Only' access to use pipelines in a pattern project.
- If you are the owner of the project or have 'Full Access' permissions on it, you can update and save your pipelines in the project space that contains them.
- If you only have 'Read & Execute' access to a pattern project, you must save a copy of its pipelines in a project to which you have access, before you can make any changes.
Creating a Pattern Project
To create a pattern project, you need Full Access permission to the project space. Contact the SnapLogic Org Admin or the owner of a project space to get access.
To create a pattern project:
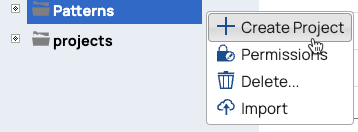
- In SnapLogic Manager, navigate to Project Spaces and select the project space (Patterns, in this example) where you want to create the pattern project.
- Click the arrow next to the Project Space to open project options.
- Click Create Project:
- Enter a name for the Pattern project and select the Pattern Project check box.

- Click Create to create a pattern project in the Patterns tab in Designer:
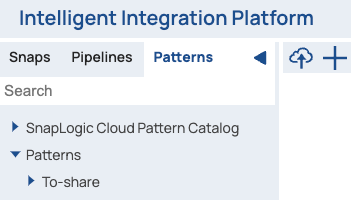
To share the Pipeline patterns in this folder, assign permissions to users or groups. All pipelines you add to this project automatically appear under the Patterns Catalog within the project space in which they are created.
Assigning Permissions
Permission Levels
There are five access levels for any SnapLogic project. Pattern projects too follow these access-level requirements:
| Permission Level | View Pipelines | Edit Project | Execute Pipelines | Modify Pipelines | Delete Pipelines |
|---|---|---|---|---|---|
| Read Only | ✓ | ||||
| Read & Write | ✓ | ✓ | ✓ | ||
| Read & Execute | ✓ | ✓ | |||
| Full Access | ✓ | ✓ | ✓ | ✓ | ✓ |
| Owner | ✓ | ✓ | ✓ | ✓ | ✓ |
These permission levels are not applicable to Org Admins.
Assigning Permissions to Groups and Individual Users
- In SnapLogic Manager, navigate to the pattern project, open the Project Options menu, and click Permissions.

The Permissions dialog opens: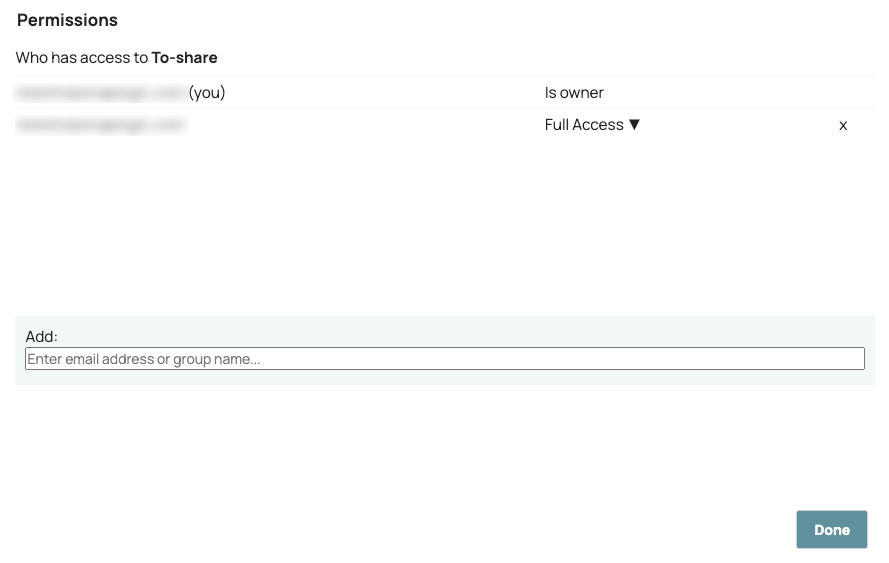
- In the Add field, enter the group name or user's email address and select the permission level that you want to assign.
- Click Share & Save. The user is displayed in the access list.
- Click Done.
Adding Pipelines to a Pattern Project
You can add pipelines to your pattern projects or others where you have 'Full Access' permission. You can add pipelines by:
- Importing pipelines into the project
- Creating pipelines in the project
Importing Pipelines into a Pattern Project
Before importing the Pipeline, it must be exported as a .slp file.
- In SnapLogic Designer, at the top-left of the canvas, click Import:
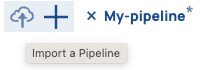
- Select the pipeline to import and click Open.
The Add New Pipeline dialog opens.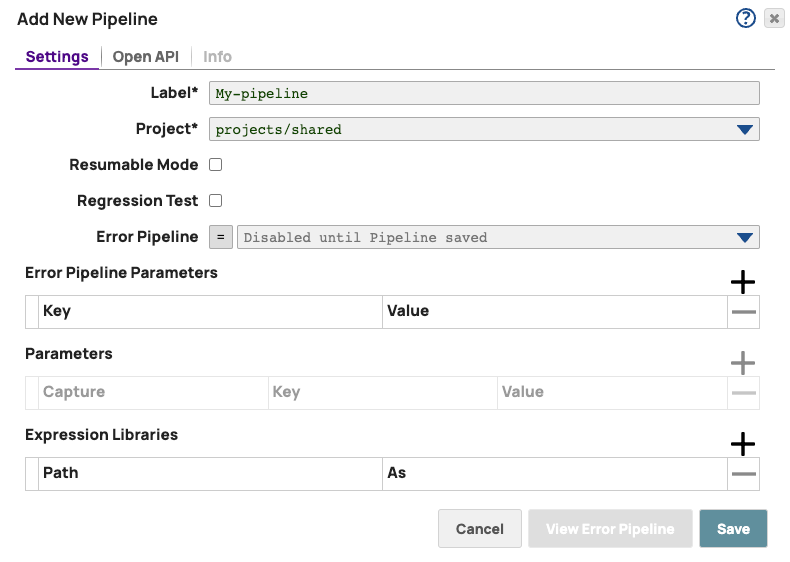
- Enter a new Label for the pipeline.
- Select the pattern project's path in the Project field.
- Click Save.
Creating Pipelines in the Pattern Project
- In SnapLogic Designer, at the top left of the canvas, click the Add button:
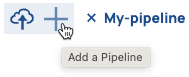
- Enter a name for the pipeline in the Label field.
- Select the pattern project in the Projects field.
- Click Save.
The pipeline becomes a part of the pattern project. - You can now build and configure the pipeline as required.
Moving Existing Pipelines to a Pattern Project
- Open the pipeline to move.
- In the Designer toolbar, click Move Pipeline:

The Choose Destination Project for Move dialog opens: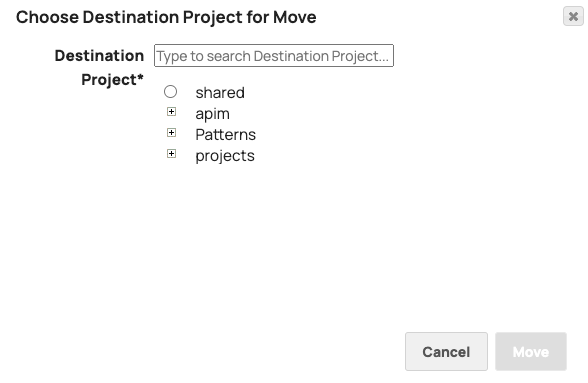
- Enter the pattern project's name in the Destination field. This filters the list of projects displayed.
- Select the target pattern project and click Move. The pipeline is moved to the project and is now visible in the Patterns Catalog.
Have feedback? Email documentation@snaplogic.com | Ask a question in the SnapLogic Community
© 2017-2024 SnapLogic, Inc.