Use Case: Access your Box Application
In this article
This article explains how to authenticate your SnapLogic Pipelines that interact with the Box application using the Java Web Token (JWT) open standard.
Scenario: Authenticating your Box Application with Java Web Token Open Standard.
You can use the JWT Snap Pack to authenticate the Pipeline's access to the Box application. When you create a custom Box application with JWT Authentication, the JWT can be digitally signed using a Public and Private Key pair. The JWT Account requires a KeyStore, which contains the Private Key. The JWT Snap Pack uses the Private Key to sign the payload of the JWT token.
In this tutorial, we describe the tasks required for accomplishing the following two objectives:
- How to create a KeyStore file (in PKCS12 format). This part of the tutorial describes the basic tasks and options for doing so with open source OpenSSL and JWT.
- How to Generate the Token for a Box Account. This part of the tutorial describes how to implement the grouping of JWT, JSON Generator, and Mapper Snaps to do so.
For this scenario, the following Snaps are used:
How to Create a KeyStore File (PKCS12 Format)
Public-Key Cryptography Standards (PKCS12) define an archive-file format for storing server certificates, consisting of an intermediate certificate (if any) and a Private Key in a single encryptable file. To generate a KeyStore file in PKCS12 format, we need a Private Key and a Certificate (self-signed or signed by CA).
The tasks described in this section can be used for any application that uses the JWT open standard.
Creating the Private Key for the KeyStore
You can create a Private Key choosing one of the three following options:
- Option 1: Create a new Private Key with Box
- Option 2 : Create a New Private Key with OpenSSL
- Option 3: Using an existing Public and Private Key Pair
Option 1: Create a new Private Key with Box
- You can generate a new key pair, as described in Box documentation.
Download the resulting
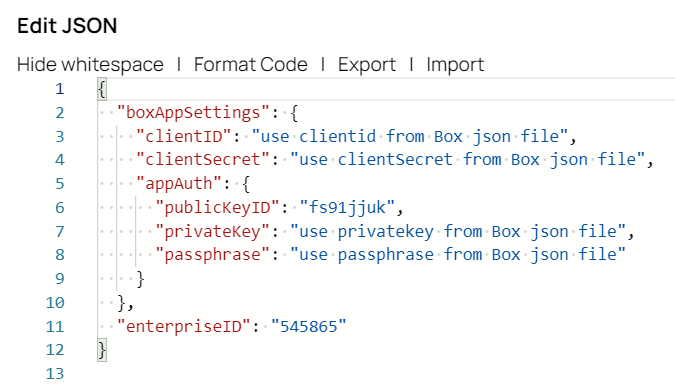
xxxx_config.jsonfile.Example: config.json file{ "boxAppSettings": { "clientID": "use clientid from Box json file", "clientSecret": "use clientSecret from Box json file", "appAuth": { "publicKeyID": "fs91jjuk", "privateKey": "use privatekey from Box json file", "passphrase": "use passphrase from Box json file" } }, "enterpriseID": "545865" }- Save the Private Key (displayed as "privateKey" in the previous step) in the
box-private-with-passphrase.keyfile. Decrypt the passphrase from the private key by running the following command:
openssl rsa -in box-private-with-password.key -out box-private.key
When prompted to enter the passphrase, enter the passphrase from the
xxx_config.jsonfile.Verify the key size of the
box-private.keyfile by running the following SSL command:openssl rsa -in box-private.key -text -noout
See the following example for the first line of the command output:
Private-Key: (2048 bit) indicating a 2048 bit key
Option 2: Create a new Private Key with OpenSSL
Create a new Private Key with the OpenSSL tool by running the following command:
openssl genrsa -out box-private.key 2048
Option 3: Use an existing Public and Private Key Pair
If you already have an existing Public and Private key pair, you can use it for the KeyStore.
Creating the Certificate for KeyStore
Now that you have the Private Key, you can create the certificate for the KeyStore using one of the following two options:
Option 1: Use a Self-signed Certificate
Use OpenSSL to run the following command for generating a CSR (Certificate Signing Request) file:
openssl req -new -key box-private.key -out box.csr
Generate a self-signed certificate using the
box.csroutput file from the previous step by running the following command:openssl x509 -req -days 365 -in box.csr -signkey box-private.key -out box.crt
Option 2: Use a CA-signed Certificate
If you have a CA-signed Certificate, you can use that. (In this document, we use the name box.crt)
Generating the KeyStore using the Private Key and Certificate
Now that you have created the Private Key and the Certificate, you can generate the KeyStore following these steps:
Create a PEM file with the Private Key and Certificate by running the following commands:
cat box-private.key > box-private.pem
cat box.crt >> box-private.pem
Generate the KeyStore file in PKCS12 format.
Run the following OpenSSL command:
openssl pkcs12 -export -in box-private.pem -out box-keystore.p12 -name 4m5tzcag
Where 4m5tzcag is the <Alias_Name> in this example. If the Private Key was generated by Box, the <Alias_Name> is the Public Key ID from the
xxx_config.jsonfile that you download from Box.- When the Set Password prompt appears, enter the Export password. This is the password for the KeyStore, and you need to provide it when creating the JWT Account.Example Command
openssl pkcs12 -export -in box-private.pem -out box-keystore.p12 -name 4m5tzcag
You can obtain the Public Certificate associated with the
box-private.keyfrom the KeyStore by running the following Open SSL command:openssl pkcs12 -in box-keystore.p12 -nokeys -out box-public.crt
Create the JWT
Now that you have generated the KeyStore file, you can create the JWT for use in your SnapLogic Pipelines by doing the following:
- Make the KeyStore file available to Snaplogic by one of the following three methods:
- Upload the
box-keystore.p12file to SnapLogic file system in Manager.- Download the
box-keystore.p12file to the machine hosting the JCC Nodes in the Groundplex. - Store the
box-keystore.p12file in a web location that can be accessed by SnapLogic.
- Download the
- Create a JWT Account as described in Configuring JWT Accounts. You must specify the KeyStore passphrase that you used when generating the
box-keystore.p12KeyStore file.
- Upload the
You can now proceed to the second part of this tutorial, where we describe how to generate the JWT Token using the JWT Generate Snap in a Pipeline.
How to Generate the Token for a Box Account
This tutorial focuses on creating the Pipeline Pattern used to generate the token for Box Account used to access the Box application. We assume that you have completed the tasks outlined in How to Create a KeyStore File (PKCS12 Format.
The following Pipeline demonstrates how to use the JWT Snap Pack to generate the token to access a Box.com account. In this scenario, we are focusing only the first branch of the Pipeline, which contains four Snaps:

After you download the sample pipeline, ensure that you add a valid clientID, clientSecret, publicKeyID, privateKey, and passphrase to run the pipeline successfully.
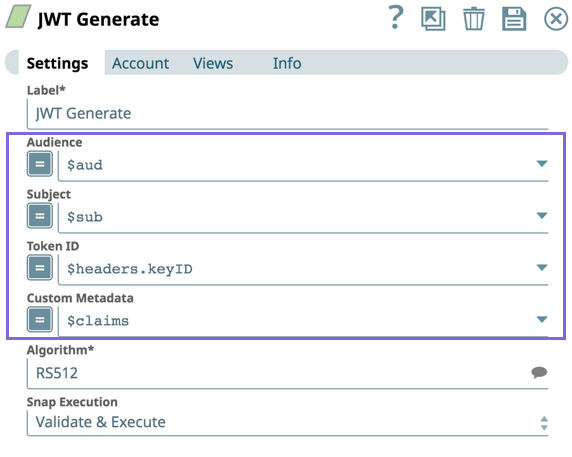
When we configure the JWT Generate Snap with a JWT account as follows, the JWT Generate Snap signs the JWT claims payload as expected by the Box application.
In the JSON Generator Snap, we create the config.json file that contains the Public and Private Keys.
In the Mapper Snap, we configure the JWT authentication settings for the Box account. The Mapping Table displays how the JWT keys are mapped for the JWT Generate Snap.

In the JWT Generate Snap, tokens are generated for the keys specified in the Mapper Snap. The Generate Snap has explicit Audience and Subject fields
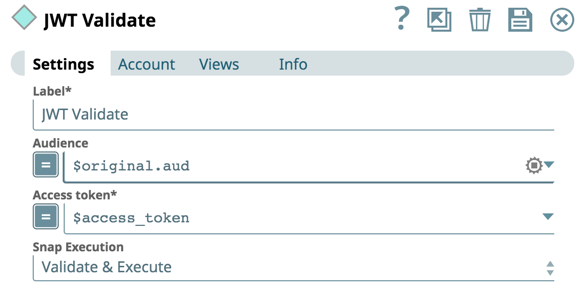
The JWT Validate Snap authenticates the keys from the JWT Generate Snap.
To validate the signature, enter the Public Key in the Verify Signature field of the JWT.io by running the following command:
openssl pkey -in box-private.pem -out box-public.pem -pubout
The following image is an example reference of a verified signature:
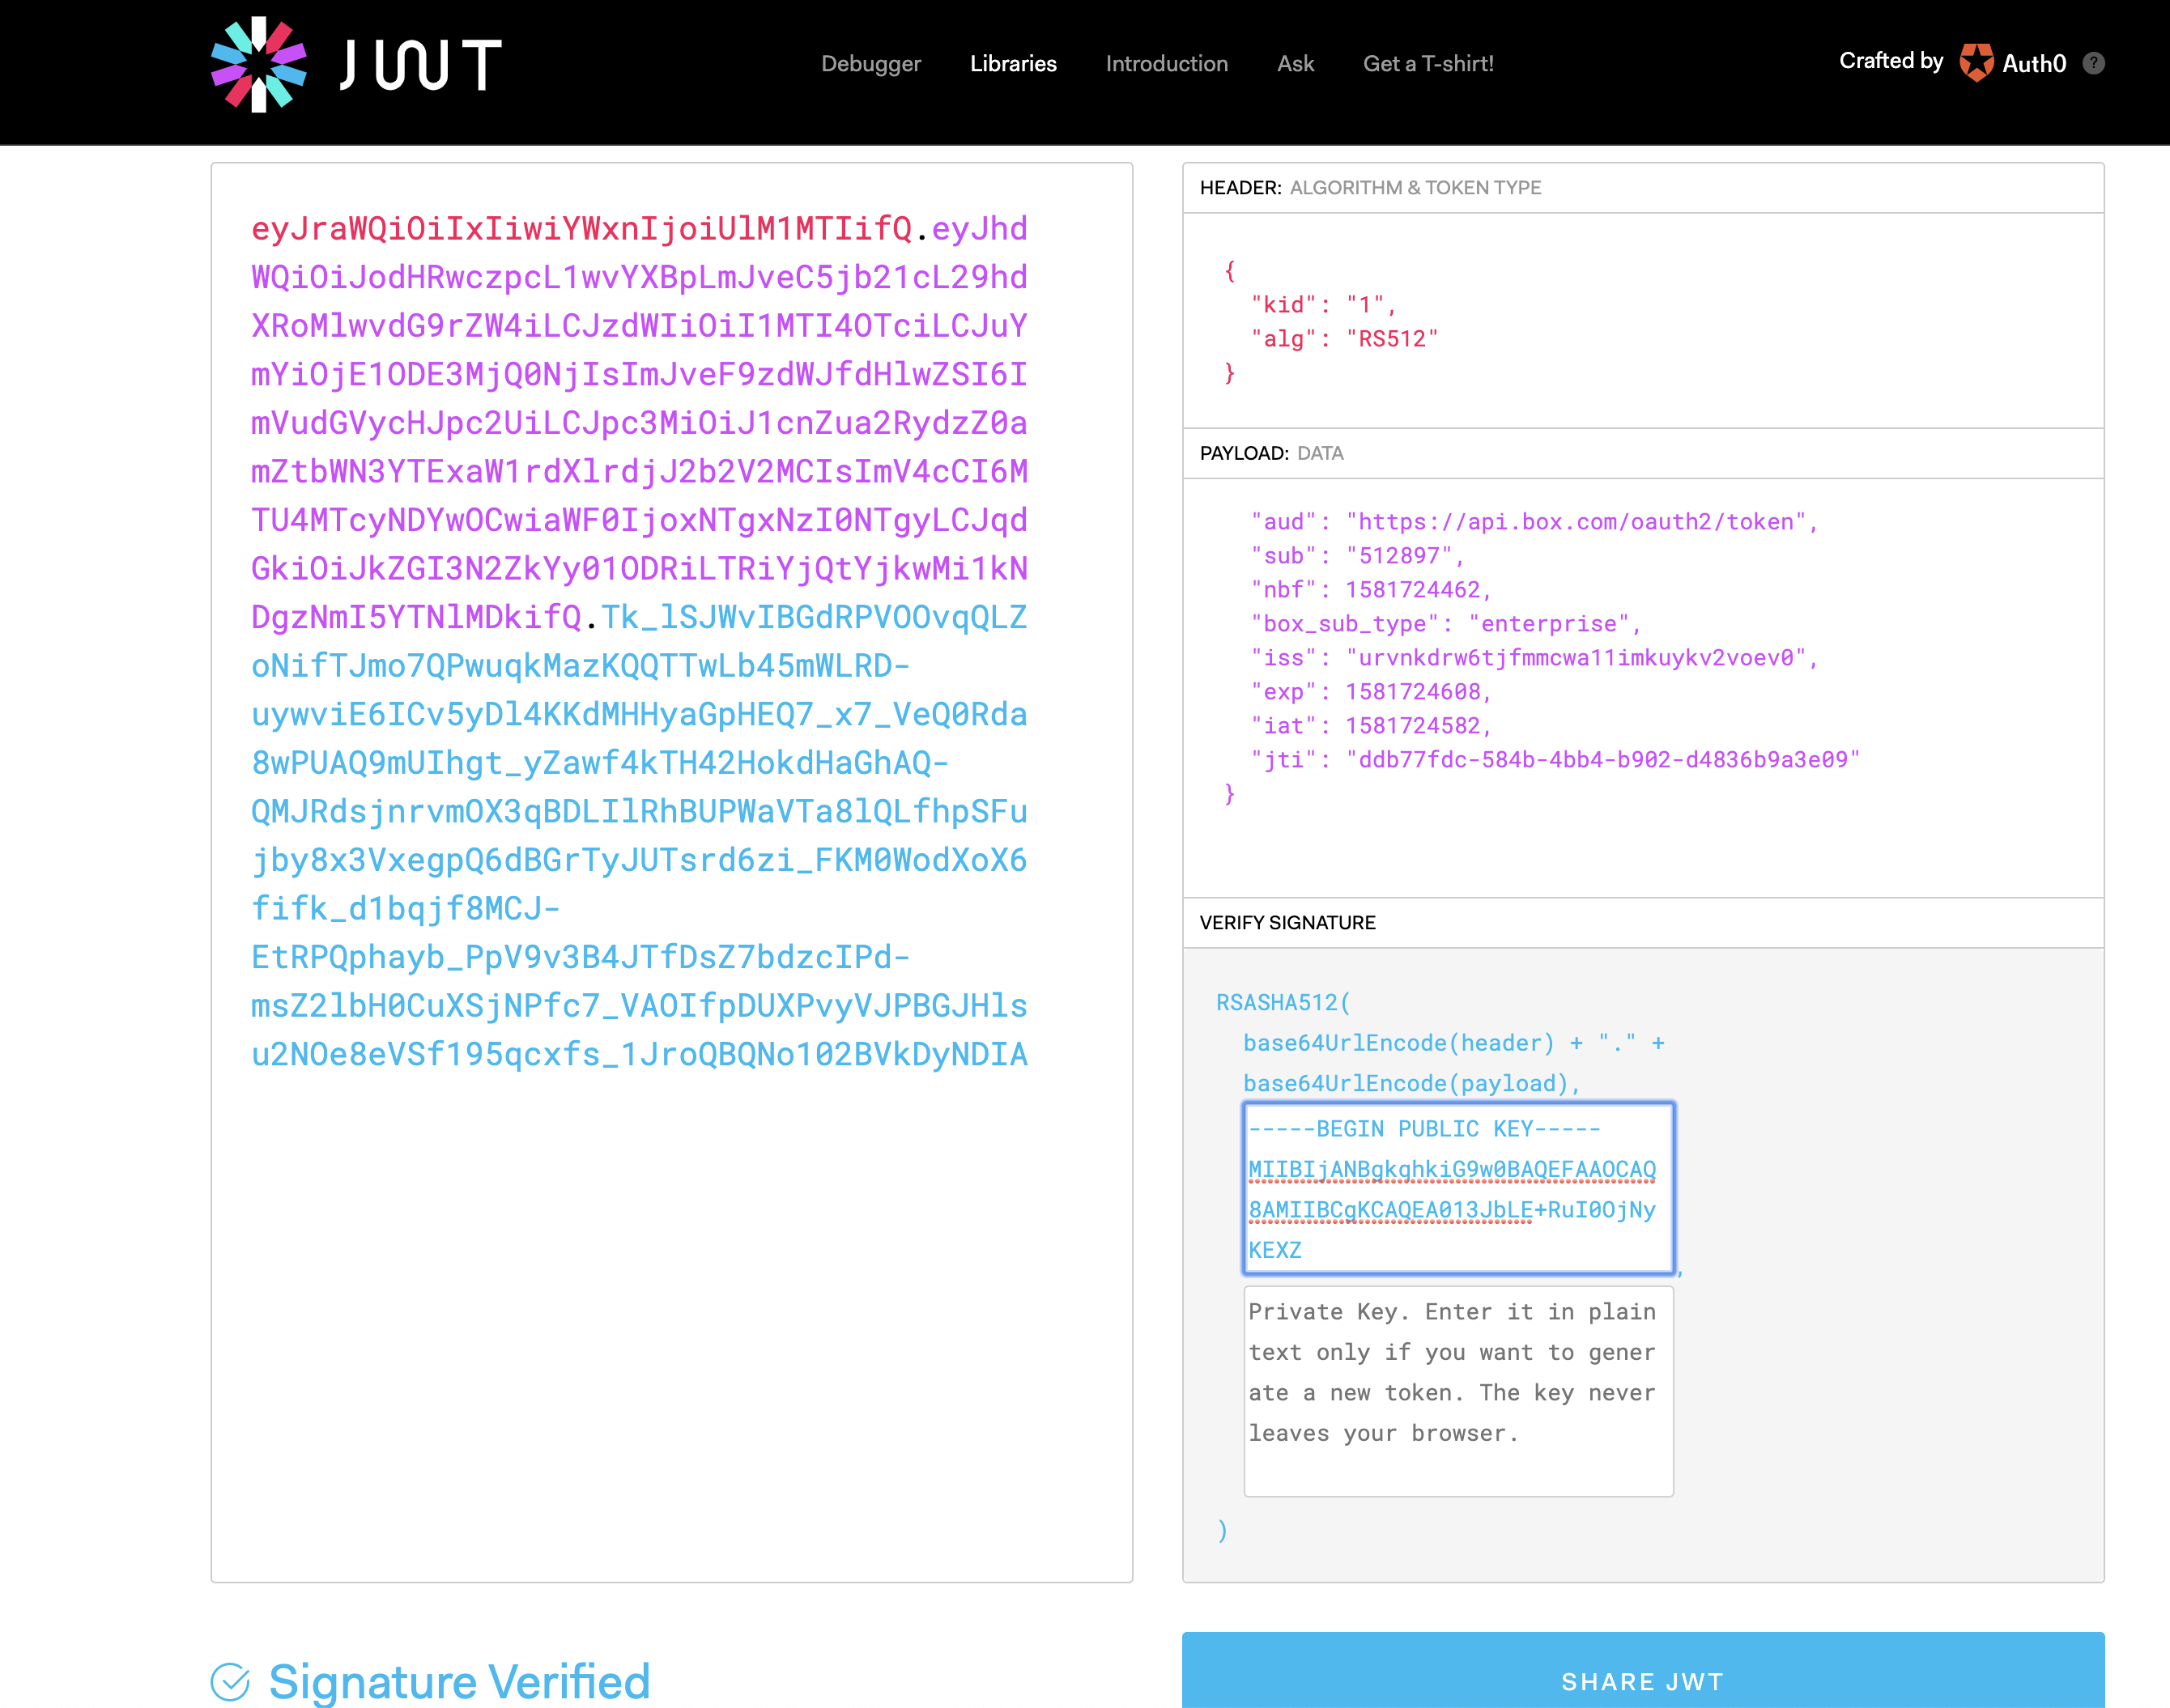
Once you complete both parts described in this tutorial, you can use this authentication method inside the Pipeline delivering its payload to get access to the Box application. The token generated from JWT Generate Snap can be decoded at jwt.io, by doing a Copy-Paste of the Public Certificate that was obtained in the Verify Signature section (top box).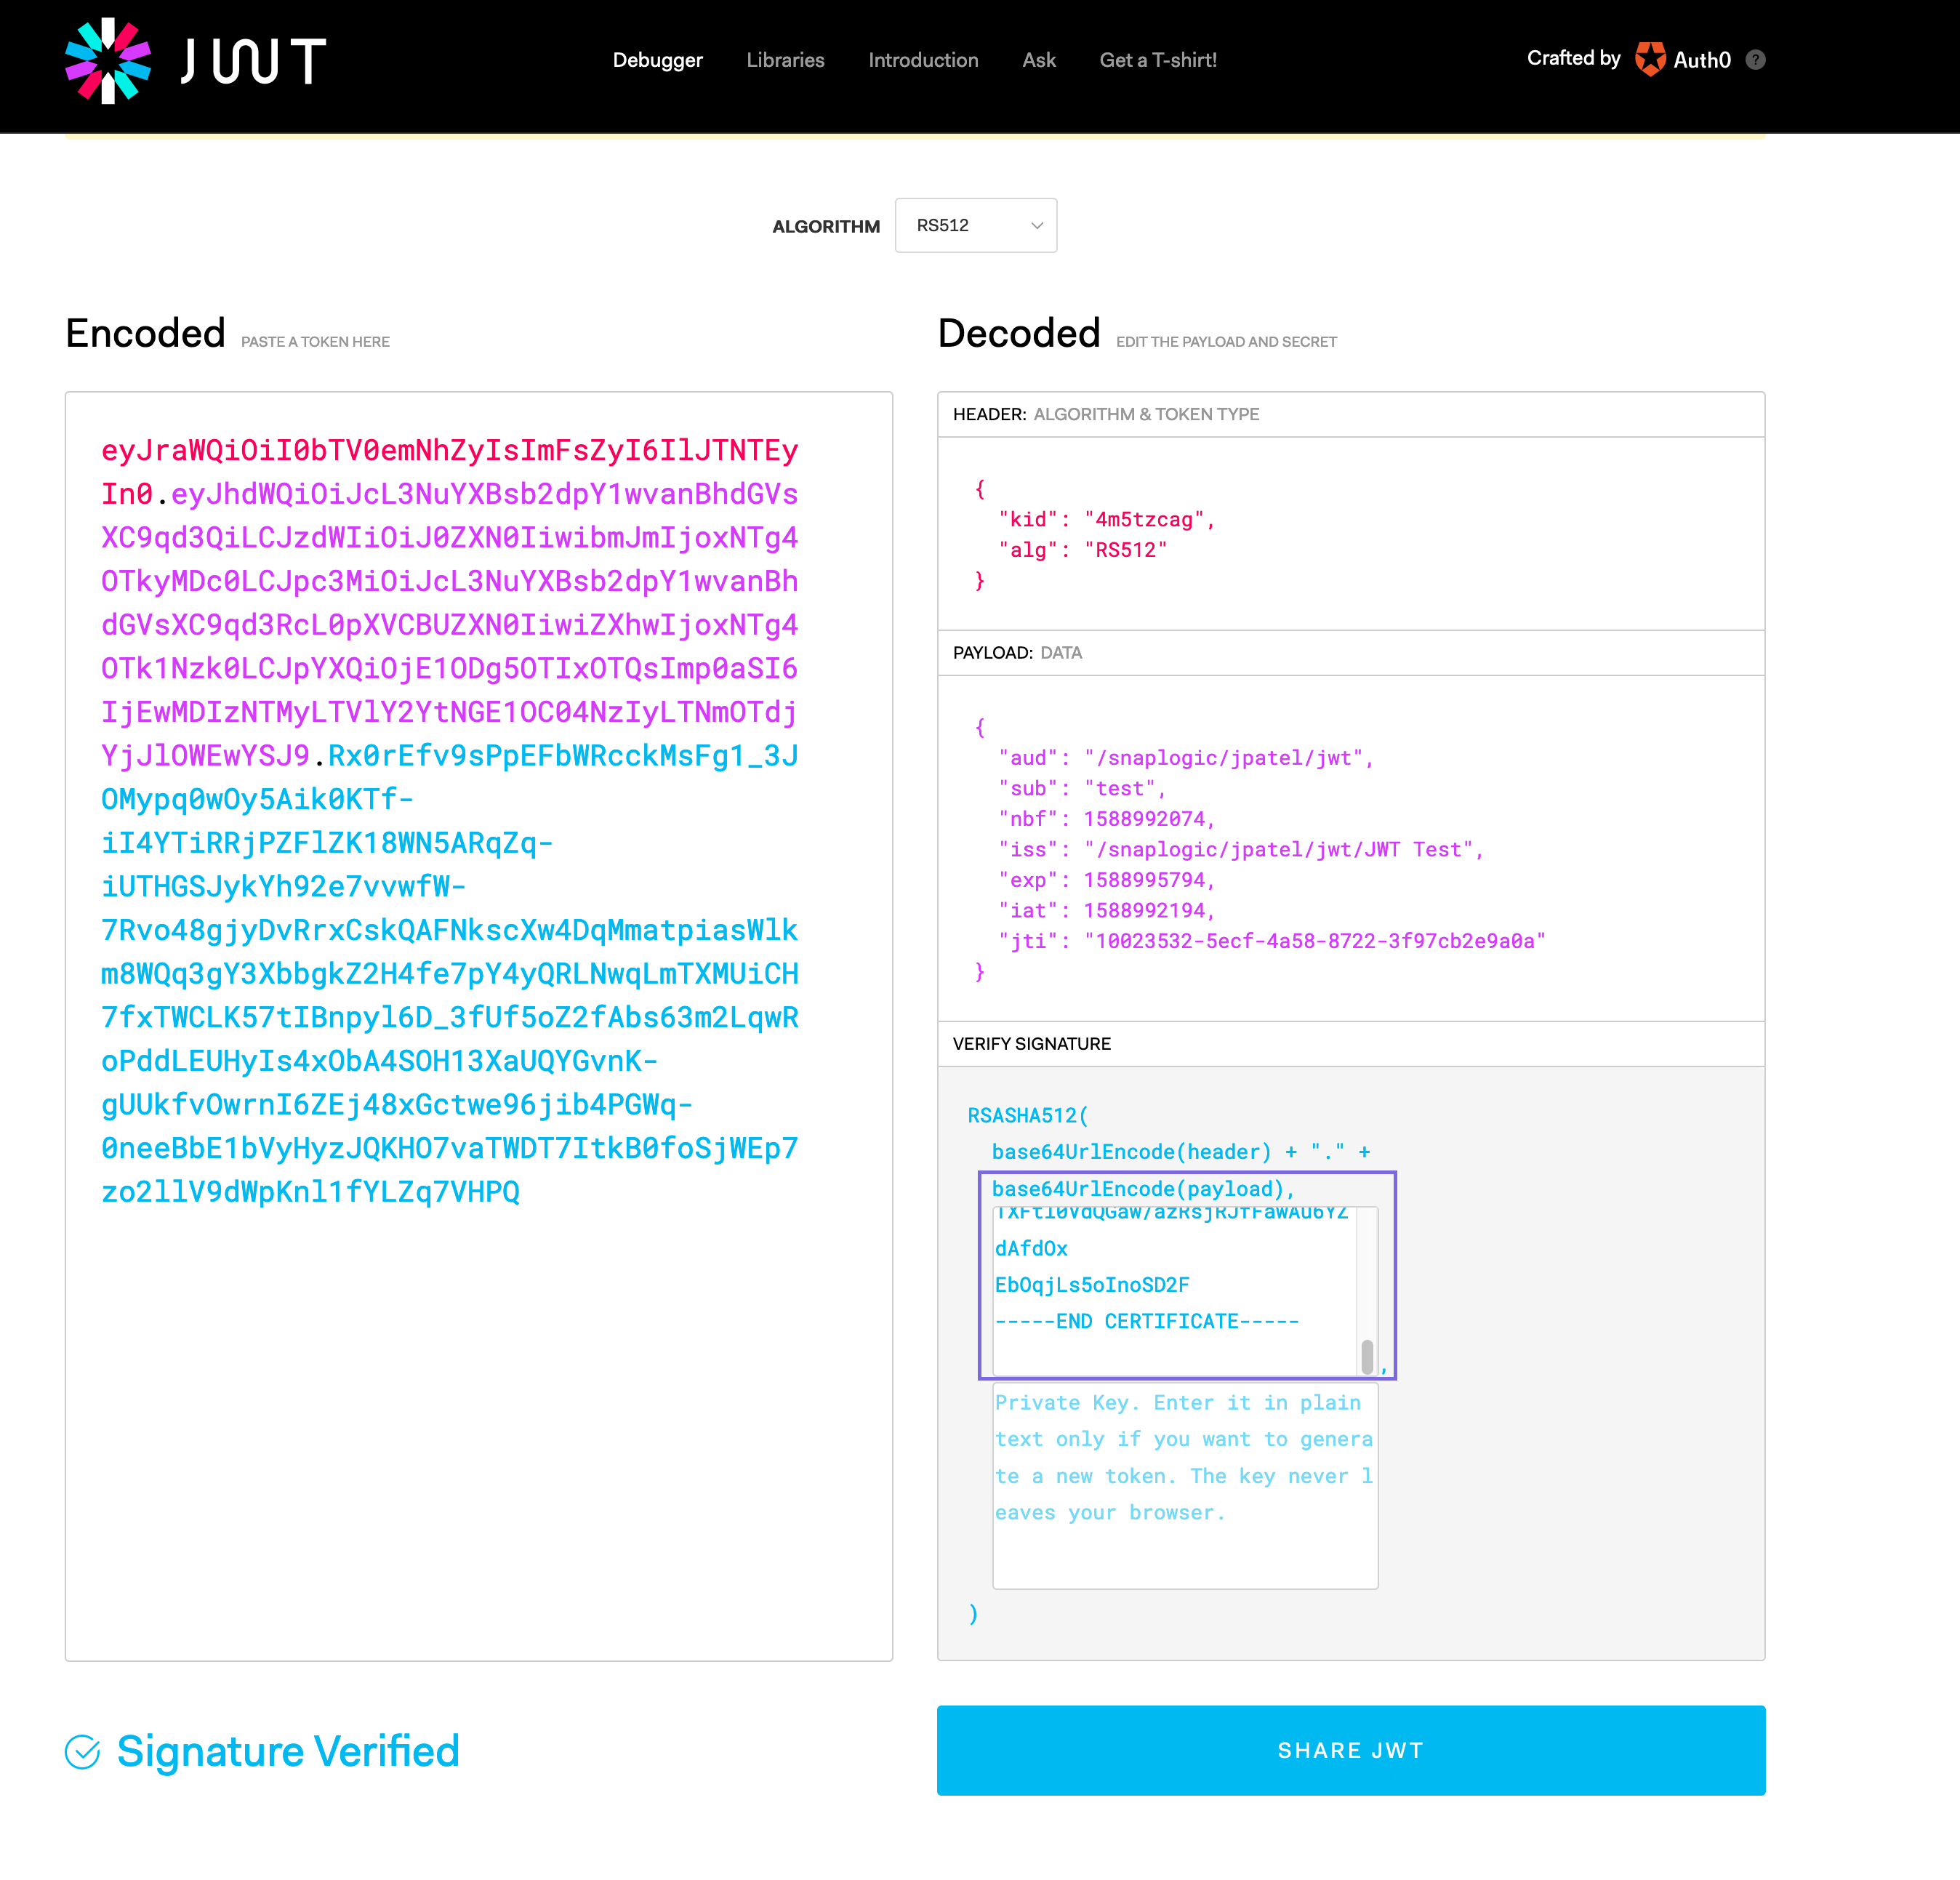
See Also
Have feedback? Email documentation@snaplogic.com | Ask a question in the SnapLogic Community
© 2017-2024 SnapLogic, Inc.