Use Case: Creating and Deleting an Account in Salesforce Using REST Snaps
In this article
Overview
We recommend that you use the HTTP Client Snap instead of Snaps from the REST Snap Pack to connect to REST-based APIs and applications.
This use case demonstrates how you can use REST Snaps to create an account in Salesforce and delete it using REST Snaps.
To use this example, you need at least an account in the free version of Salesforce. To create a Salesforce account, see Salesforce Developers.
Creating the Pipeline
- You design the Pipeline as follows:
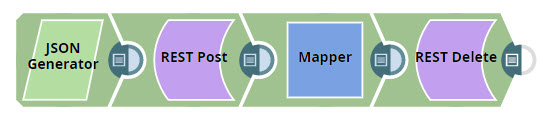
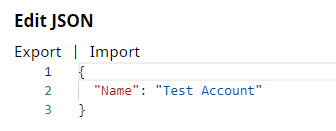
- In the JSON Generator Snap, you enter a name for the account that you want to create. In this example, you create an account called Test Account.
- You configure the REST Post Snap to create an account in your Salesforce instance using the account-name string of your choice. To do so:
- You use the URL provided by Salesforce for managing the accounts available in your instance.
- You use '$' in the HTTP entity field to specify that you want to use the string coming from the Snap upstream.
- You add an HTTP header to the Snap, instructing Salesforce to read the document coming in as a JSON file.

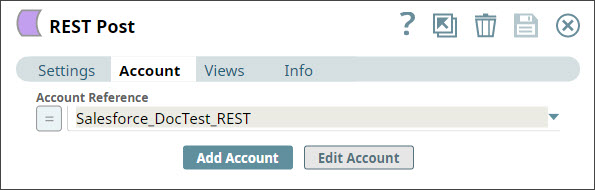
- You click the Account tab and select the account that you want to use with the Snap.
You save your changes and close the Snap. When you validate the Snap, it creates an account in your Salesforce instance and displays the following output: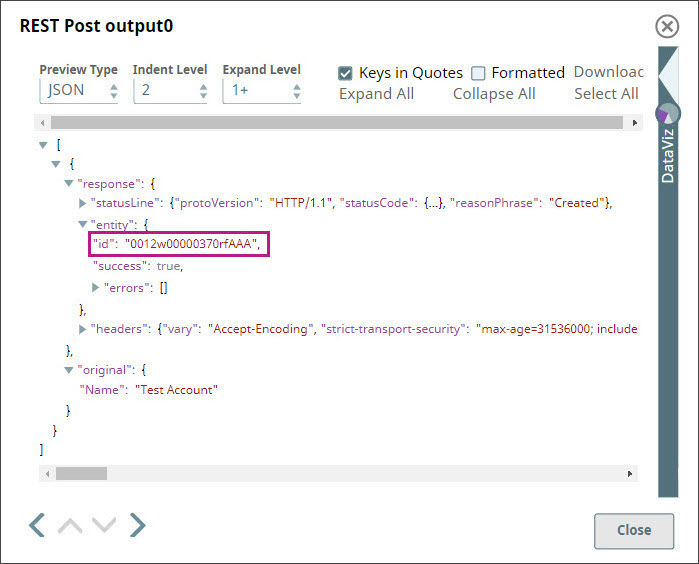
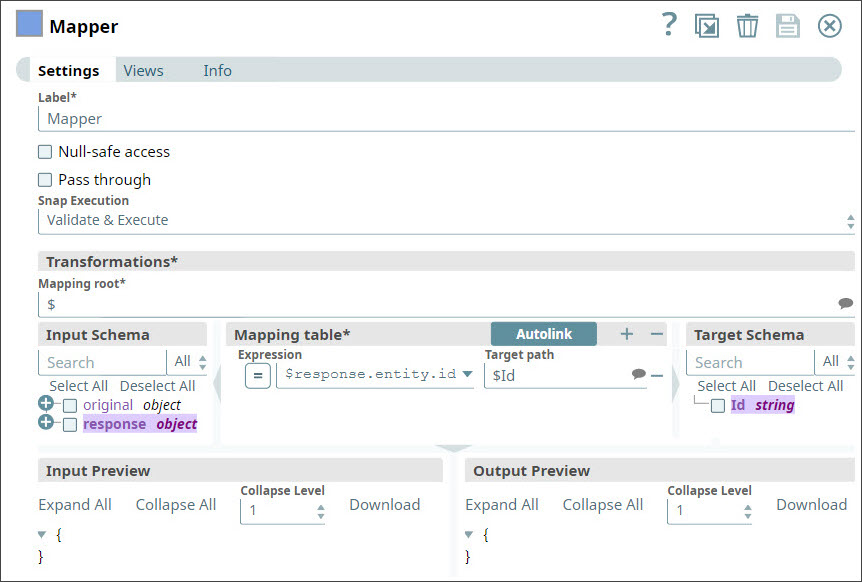
Theidfield lists out the unique identifier of the new account created by the Snap. - You now want to delete the account that you just created. To do so, you need to isolate the account ID from the REST Post Snap's output. You use a Mapper for this task.
Upon validation, the Mapper Snap offers the following output: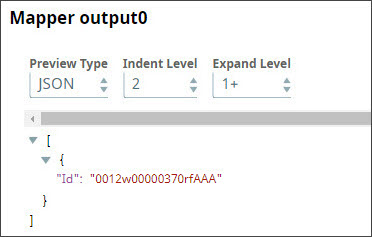
- You now use the REST Delete Snap to delete the newly-created account:
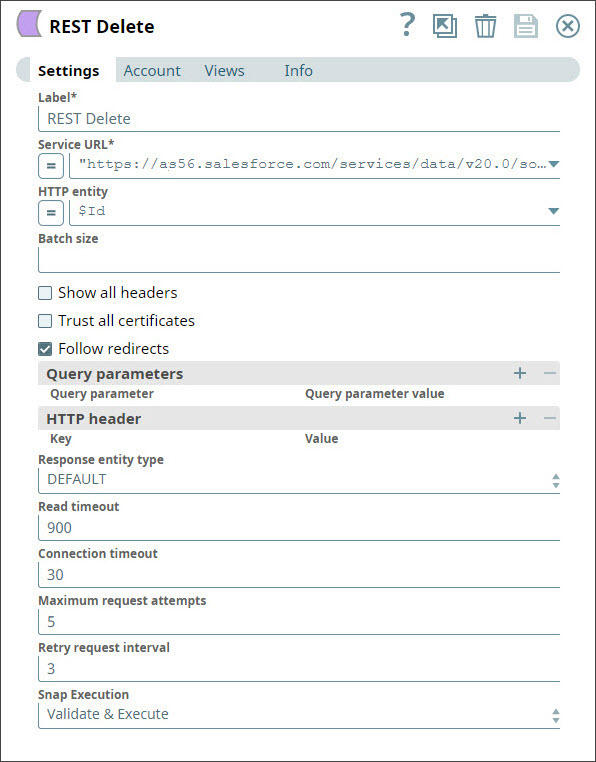
When the Snap is executed, the account is deleted.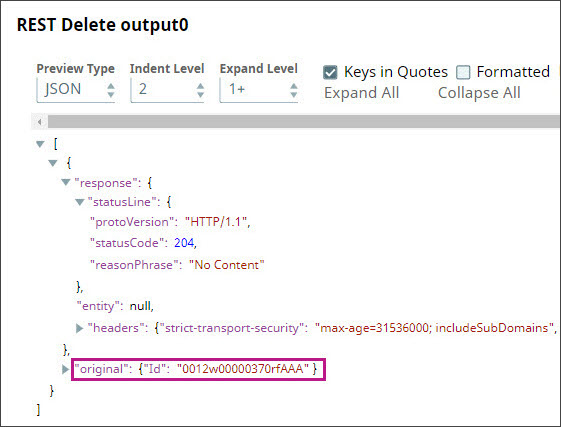
Download the Pipeline here.
Importing and Executing this Pipeline
After you download the Pipeline:
Importing this Pipeline
- Log into your SnapLogic account and navigate to Designer.
- To import the downloaded Pipeline, click the
 button on the top-left of the Canvas. The Add New Pipeline dialog appears.
 - Provide a Label for the Pipeline and select the Project into which you want to import the Pipeline.
- Click Save.
Congratulations! You just imported the sample Pipeline. You must now configure it to work with your Salesforce account.
Configuring and Executing this Pipeline
- Click the REST Post Snap to display its Settings dialog. Click the Account tab.
- Use the Account Reference drop-down to select the REST account that you want to use with this Snap. Click
 . If you do not have a previously-configured account, click Add Account. For details on creating REST accounts, see Configuring REST Accounts.
 - Click the Settings tab and update the Service URL with the URL associated with the account you selected in the previous step.
- Similarly, update the Account and Service URL details in the REST Delete Snap.
Save and validate the Pipeline. If your account details are accurate, the Pipeline should validate and execute successfully.
Downloads
Important steps to successfully reuse Pipelines
- Download and import the Pipeline into SnapLogic.
- Configure Snap accounts as applicable.
- Provide Pipeline parameters as applicable.
Have feedback? Email documentation@snaplogic.com | Ask a question in the SnapLogic Community
© 2017-2024 SnapLogic, Inc.