On this Page
The SnapLogic Free Trial offers Amazon Redshift Snap Patterns that let you load and synchronize data from sources such as Oracle, MySQL, and SQL Server directly into Amazon Redshift. Available as a 30-day free trial with no on-premises software required, the Redshift Snap Patterns are ideal for organizations considering Redshift as a low-cost, faster alternative to traditional data warehousing.
You will need:
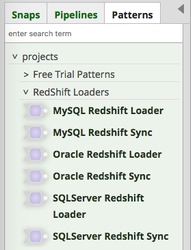
Select a Snap Pattern based on the source database you will use to load data into Amazon Redshift. The Pipeline Configuration Wizard will then display and guide you to enter the required information needed to migrate the data from your source database to Amazon Redshift.
Redshift clusters may allow incoming requests only from whitelisted IP addresses. If this is the case, please allow the SnapLogic cloud machines to talk to your Redshift cluster before running this wizard. If you are using a VPC, authorize All TCP traffic for 694702677705/fullsail-stage and 694702677705/fullsail-prod.
If you are not using a VPC, you may add CIDR records for the following IP addresses:
- 54.234.148.210
- 54.196.12.144
- 54.224.66.157
- 54.226.150.216
See the Amazon Redshift Getting Started Guide for details.
If the source database is RDS, a similar whitelisting needs to happen as well. See the Amazon RDS User Guide for details.
Initial loading pipeline
You will need to whitelist certain IP addresses as per the Amazon Redshift Getting Started Guide.
The IP addresses are listed on the first page of the Pipeline Configuration Wizard when you open the Oracle to Redshift Pattern.
Click Add Account to provide your database login information. You will need your Oracle hostname, port number, and database name. You will also need to upload a JDBC driver and specify the JDBC driver class.
Click Add Account to provide your database login information. You will need your Redshift endpoint, port number, and database name.
Supply the table name. If necessary, supply the “where” clause and set the order.
Supply the table name. Set any other settings as necessary.
Synchronising pipeline
You will need to download last_modified.json (zipped file), extract it, and upload it to the project you’re using to save this pipeline.
Click Add Account to provide your database login information. You will need your Oracle hostname, port number, and database name used for the initial loading pipeline.
Click Add Account to provide your database login information. You will need your Redshift endpoint, port number, and database name used for the initial loading pipeline.
Initial loading pipeline
You will need to whitelist certain IP addresses as per the Amazon Redshift Getting Started Guide.
The IP Addresses are listed on the first page of the Pipeline Configuration Wizard when you open the MySQL to Redshift pattern.
Click Add Account to provide your database login information. You will need your MySQL hostname, port number and database name.
Click Add Account to provide your database login information. You will need your Redshift endpoint, port number, and database name.
Supply the table name. If necessary, supply the where clause and set the order.
Supply the table name. Set any other settings as necessary.
Synchronising pipeline
You will need to download last_modified.json (zipped file), extract it, and upload it to the project you’re using to save this pipeline.
Click Add Account to provide your database login information. You will need your MySQL hostname, port number, and database name used for the initial loading pipeline.
Click Add Account to provide your database login information. You will need your Redshift endpoint, port number, and database name used for the initial loading pipeline.
Initial loading pipeline
You will need to whitelist certain IP addresses as per the Amazon Redshift Getting Started Guide.
The IP Addresses are listed on the first page of the Pipeline Configuration Wizard when you open the Oracle to Redshift pattern.
Click Add Account to provide your database login information. You will need your SQL Server hostname, port number, database name, and database version. You will also need to upload a JDBC driver and specify the JDBC driver class.
Click Add Account to provide your database login information. You will need your Redshift endpoint, port number, and database name.
Supply the table name. If necessary, supply the “where” clause and set the order.
Supply the table name. Set any other settings as necessary.
Synchronising pipeline
You will need to download last_modified.json (zipped file), extract it, and upload it to the project you’re using to save this pipeline.
Click Add Account to provide your database login information. You will need your SQL Server hostname, port number, database name and version used for the initial loading pipeline.
Click Add Account to provide your database login information. You will need your Redshift endpoint, port number, and database name used for the initial loading pipeline.
Oracle to Redshift
Oracle | Redshift |
|---|
SUPPORTED DATA TYPES |
SMALLINT | Smallint |
INTEGER | Integer |
REAL | Real |
DOUBLE PRECISION | Double precision |
DECIMAL | decimal |
CHAR | CHAR |
VARCHAR | VARCHAR |
DATE | Date |
|
|
UNSUPPORTED DATA TYPES |
VARCHAR2* | VARCHAR |
NVARCHAR2* | VARCHAR |
NCHAR* | Text |
Number* | Integer |
LONG* | Integer |
RAW* | Integer |
INTERVAL YEAR* | Doesn’t exist |
INTERVAL DAY* | Doesn’t exist |
CLOB * | Doesn’t exist |
BLOB* | Doesn’t exist |
BFILE* | Doesn’t exist |
SQL to Redshift
SQL Server | Redshift |
|---|
SUPPORTED DATA TYPES |
SMALLINT | SMALLINT |
INTEGER | INTEGER |
BIGINT | BIGINT |
DECIMAL | DECIMAL |
REAL | REAL |
DOUBLE PRECISION | DOUBLE PRECISION |
BOOLEAN | BOOLEAN |
CHAR | CHAR |
VARCHAR | VARCHAR |
DATE | DATE |
TIMESTAMP | TIMESTAMP |
|
|
UNSUPPORTED |
BIT | Doesn’t exist |
NUMERIC | Doesn’t exist |
MONEY | Doesn’t exist |
SMALLMONEY | Doesn’t exist |
SMALLDATETIME | Doesn’t exist |
TEXT | Doesn’t exist |
NTEXT | Doesn’t exist |
NCHAR | Doesn’t exist |
NVARCHAR | Doesn’t exist |
BINARY | Doesn’t exist |
VARBINARY | Doesn’t exist |
MySQL to Redshift
MySQL | Redshift |
|---|
SUPPORTED DATA TYPES |
SMALLINT | SMALLINT |
INTEGER | INTEGER |
BIGINT | BIGINT |
DECIMAL | DECIMAL |
REAL | REAL |
DOUBLE PRECISION | DOUBLE PRECISION |
BOOLEAN | BOOLEAN |
CHAR | CHAR |
VARCHAR | VARCHAR |
DATE | DATE |
TIMESTAMP | TIMESTAMP |
|
|
UNSUPPORTED DATA TYPES |
TINYINT | Doesn't exist |
BIT | Doesn't exist |
- Email trial-support@snaplogic.com with any support questions. Free trial support hours are Monday through Friday 9AM-5PM PT. You can expect responses within 24-hours.
- Search this documentation portal for additional information you need.
- Visit community.snaplogic.com to consult SnapLogic experts and watch the How To videos available in the Community’s Free Trial category.