In this article
...
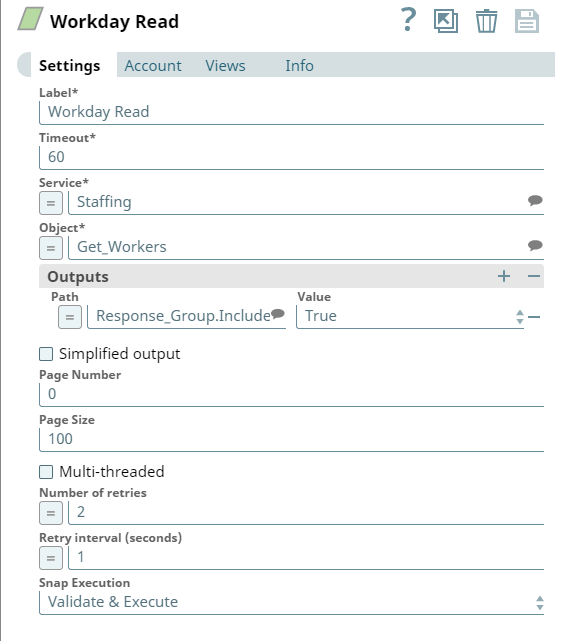
You can use this Snap to get Workday data using the Workday service name, object, and optionally, output fields. 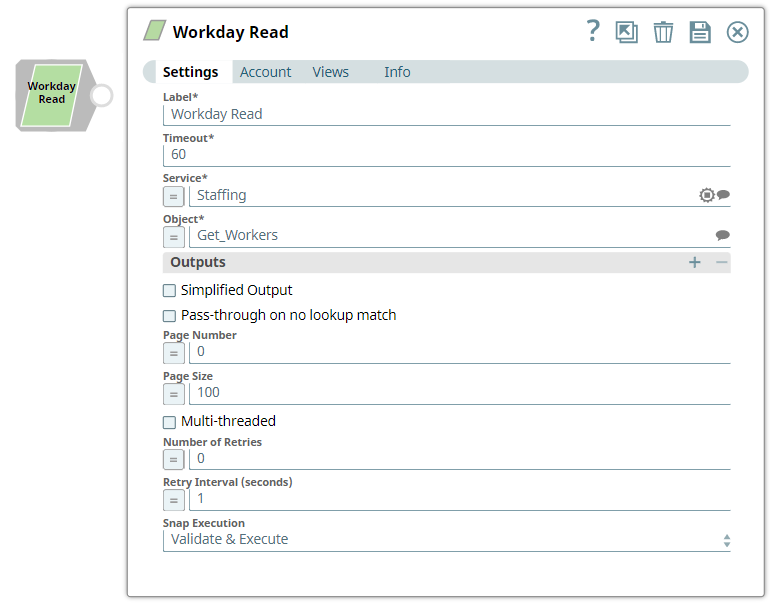
| Info | ||||
|---|---|---|---|---|
The output fields are the Include and Exclude fields typically defined by Workday in the request's Response_Group section. Output fields prefixed with include, add additional fields to the output document, whereas the output fields prefixed with exclude, excludes fields from the output document. Output fields prefixed with include add additional fields to the output document, whereas the output fields prefixed with exclude excludes fields from the output document. See Workday Web Services (WWS) Directory for information on the Workday output section to more specifically determine the nature and effect that each output field has on the output document.
ETL Transformations & Data Flow This Snap enables the following ETL operations/flows:
Here's how it works:
|
...
Field Name | Field Type | Description | |||||||
|---|---|---|---|---|---|---|---|---|---|
Label* | String | Specify the name of the Snap. You can modify this text to indicate what the Snap does. This is especially useful if you have more than one Workday Read Snap in your Pipeline. Default Value: Workday Read | |||||||
Timeout* | Integer | Specify the timeout value for each Workday SOAP request. The value of 0 means no timeout. Because Workday Read supports Workday SOAP pagination, multiple SOAP requests can occur for one execution. Consequently, the timeout can be less than the time it takes to complete writing documents to the output view. Default value: 60 | |||||||
Service* | String/Expression/Suggestion | Specify the name of the web service that you want to use. Default value: [None] | |||||||
Object* | String/Expression/Suggestion | Specify the name of the object from which you want to retrieve data. Select the object from the list of objects returned by the web service you selected in the Service field. For example, if you selected the Payroll Service, the Object field displays all the objects that were retrievable under the Payroll service from Workday. Default value: [None] | |||||||
Outputs | Use this field set to indicate the data you want the query to return from Workday.. Add each output in a separate field. Click Add
| ||||||||
| Path | String/Suggestion | Specify the output to be returned by the request. These work with the include and exclude fields defined by Workday in the request's Response_Group section and include or exclude fields in the output document. For example, the command 'Response_Group.Include_Worker_Documents' includes worker document details in the output. Default value: [None] | |||||||
| Value | Dropdown list | Specify the value to be set for the path on the request. Default Value: True | |||||||
Simplified output | If selected, the Snap simplifies output documents by removing Workday namespace attributes from key names. It also converts the nested ID collection to a simple map data. You can use a JSON Splitter Snap to further simplify the output document data structure. If not selected, the Snap produces an output in a tree structure with nested levels of information. Default Value: Not selected | ||||||||
| Page Number | Integer | If you want to retrieve data from the particular page, enter the page number here. Retain 0 to retrieve data from all the pages. Default Value: 0 | |||||||
| Page Size | Integer | Specify the number of records to fetch per page. Default Value: 100
| |||||||
| Multi-threaded | Checkbox | Select this checkbox to enable the Snap to expedite reading the requests by using multiple threads.
| |||||||
| Max Pool Size | Integer | Activates when Multi-threaded checkbox is selected. Specify the value for pool size to control the maximum number of threads in the pool for the instance. Default Value: 10 | |||||||
| Number of Retries | Integer | Enter the integer value to specify the number of attempts the snap should make to perform the selected operation in case of connection failure or timeout. Minimum value: 0 Default value: 0 | |||||||
| Retry Interval (seconds) | Integer | Enter the time interval in seconds between retry attempts. Minimum value: 1 Default value: 1 | |||||||
Snap Execution | Dropdown list |
| |||||||
Examples
...
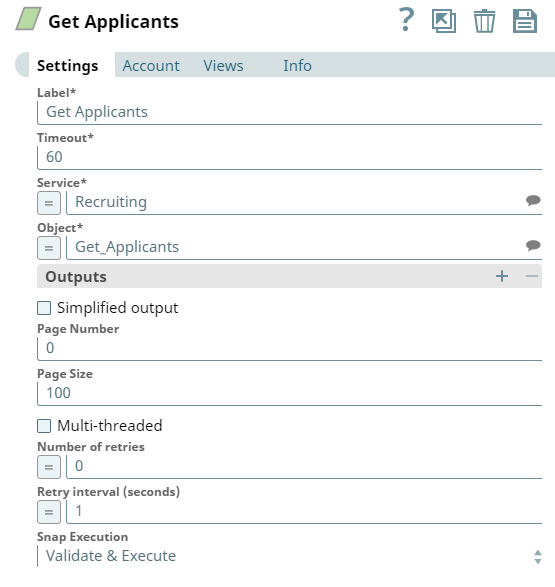
Getting Applicants from Workday
This example Pipeline demonstrates how you can specify to get applicants from Workday by specifying the number of results you want to see in a page, and the number of pages of results you want , in your Workday Read Snap the output.
...
In this pipeline, the Workday Read Snap retrieves records from the Get_Applicants object and writes the data to a JSON file. The Page size and the Page Number fields are set to their default values of 0 and 100 respectively. This means that the Read Snap
...
retrieves all the records from the Get_Applicants object when executed and
...
displays 100 records per page.
...
| Workday Snap Configuration | Output |
|---|---|
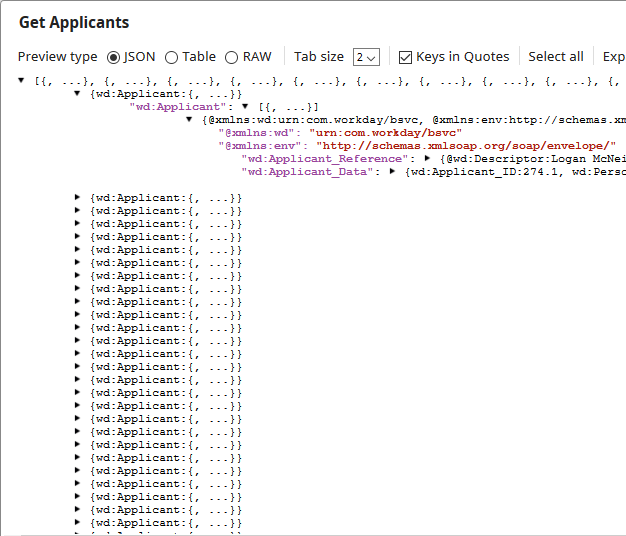
| The output preview shows |
...
| all the rows of data, starting from the first row of data onwards. | |
 |  |
| Note |
|---|
You can also use pipelinePipeline parameters to specify short strings for complicated service and objects in Workday. For step-by-step information on managing properties of pipelines, see Pipeline Properties Parameters. |
The output preview shows
...
all the rows of data, starting from the first row of data onwards.
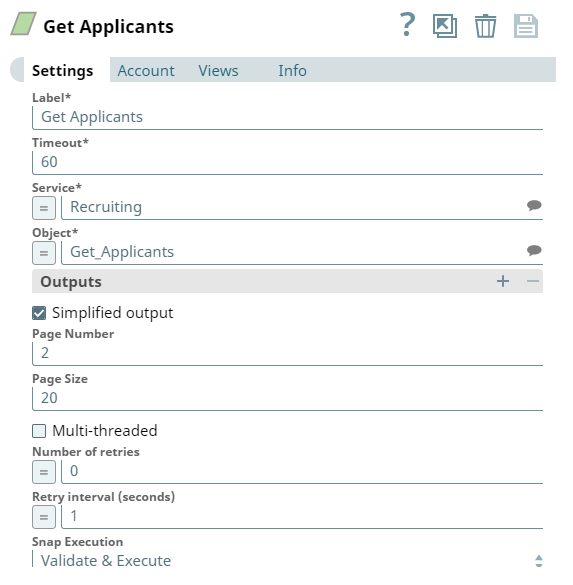
Let us now set the Page Number value to 2 and the Page Size to 20. This
...
enables the Workday Read Snap to retrieve records from the page
...
2, with 20 records in each page.
...
...
You can also use pipeline parameters to specify short strings for complicated service and objects in Workday. For step-by-step information on managing properties of pipelines, see Pipeline Properties Parameters.
The output preview shows you 20 rows of data, starting from the second page of data onwards. For instance, in the screenshot below, you can see that there are only 20 rows displayed, and that name of the worker in the first row is different from the output screenshot above:

...
Viewing the Simplified Output of Documents
This example demonstrates how to generate a simplified view of your Workday Read Snap output.
...
| title | Viewing the simplified output of documents |
|---|
...
output without the difficult-to-read attributes and metadata that typically accompany Workday output.
The
...
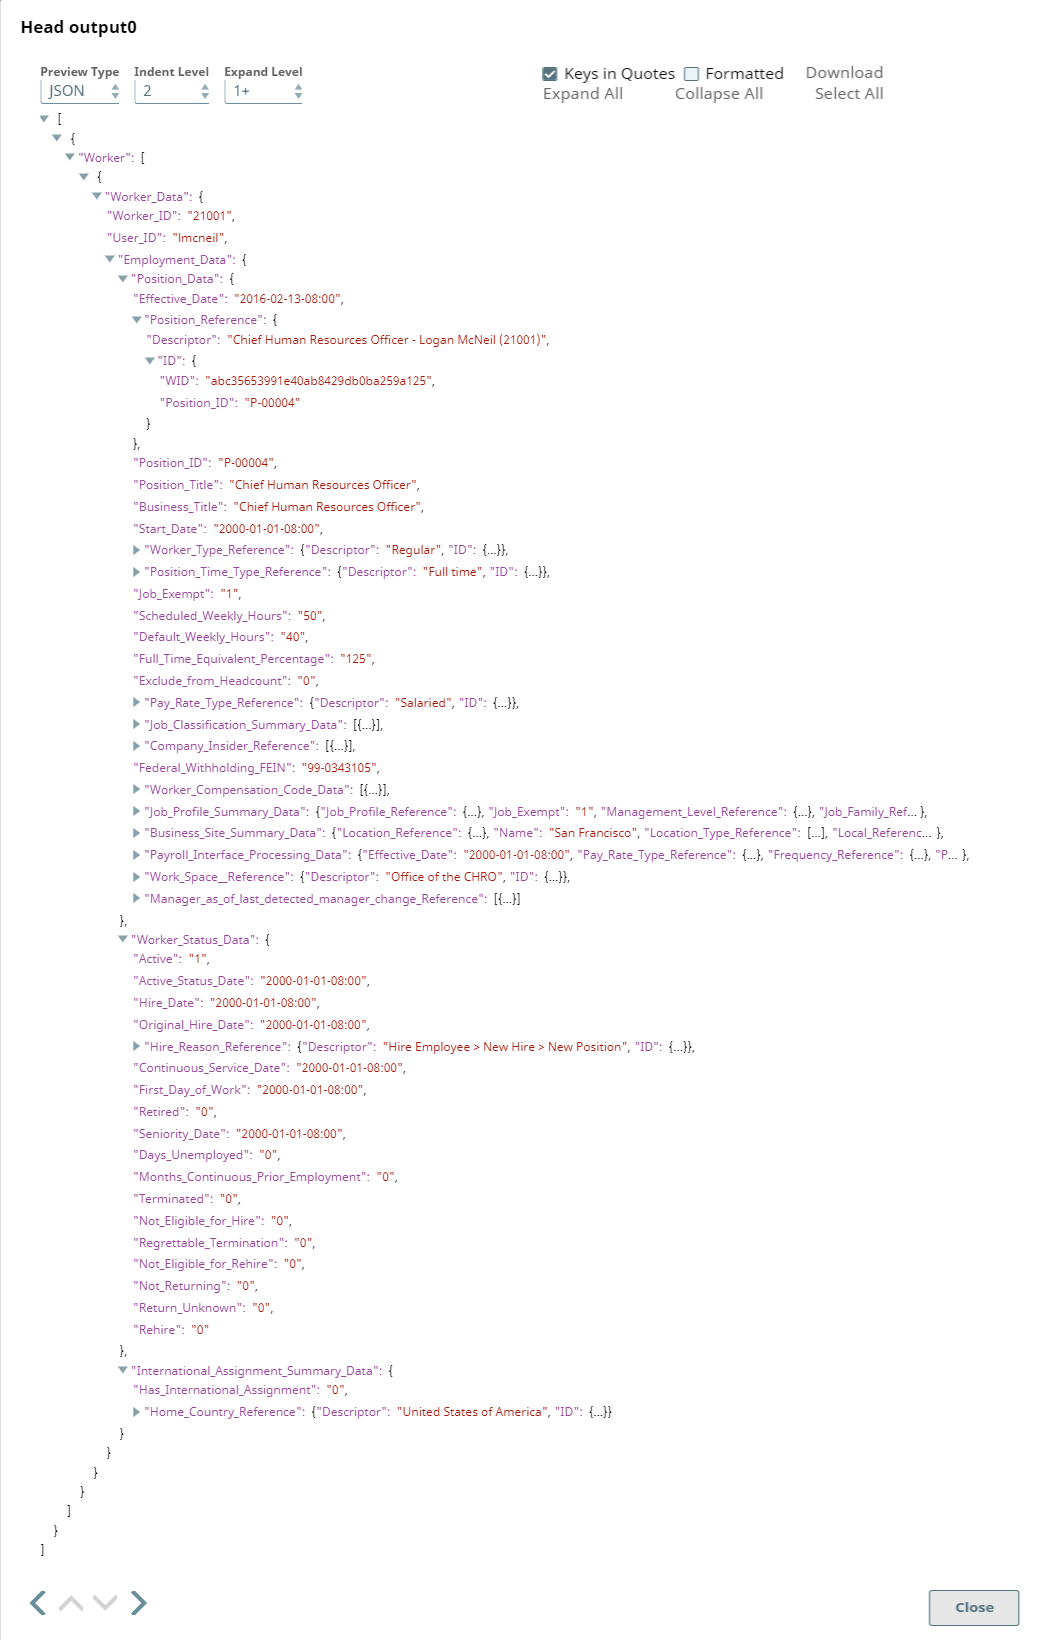
Pipeline below retrieves a list of workers, with detailed documents accompanying each worker. We shall see what the output looks like without the Simplified view restriction, and then generate a Simplified view of the output using the Workday Read Snap.
As you can see, in the screenshot above, the Simplified output
...
checkbox is not selected
...
; the output, therefore, is detailed:

We shall now select the Simplified output check box and see how the output changes. Here's the Workday Read Snap Settings popup with the Simplified output check box deselected:
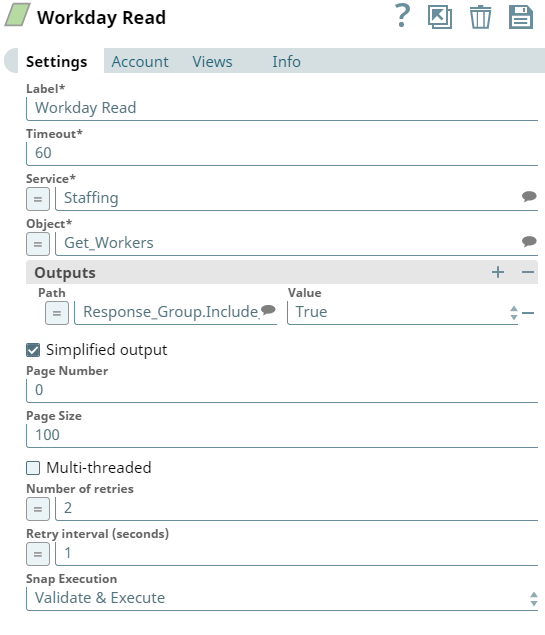
As you can see in the screenshot below, the output is much easier to read:
...
| Note |
|---|
You can also use pipeline parameters to specify short strings for complicated service and objects in Workday. For step-by-step information on managing properties of pipelines, see Pipeline Properties Parameters. See it work! |
Download the sample pipeline here.
Querying for Precise Data Using the Workday Read Snap
...
| Expand | ||||||||||||||||
|---|---|---|---|---|---|---|---|---|---|---|---|---|---|---|---|---|
| ||||||||||||||||
Once you have configured the Workday Read Snap with your Workday account details, you should be able to view the services and objects that Workday has enabled for your account. You can then use these services and objects to query the Workday database associated with your account. Let us look at some of the important ways in which you can create Workday queries using the Workday Read Snap. You can:
The following sections offer detailed guidance on how to perform each of these tasks. Retrieving all the Data Associated by Default with an ObjectExpand | | Retrieving all the Data Associated by Default with an Object |
| Note |
|---|
We recommend labeling your Snaps such that their names are indicative of their role in the Snap. This will help other users understand the purpose of the Snap better. |
Click the Suggestions icon on the right of the Service field. This displays a suggestion list containing all the Workday services accessible to your account. Select the service associated with the data you want to retrieve. You can also enter the initial letters of the service you are looking for to further filter the list of services displayed.
Similarly, click the Suggestions icon on the right of the Object field. This displays a suggestion list containing all the objects associated with the service you selected in the Service field. Select the object that contains the data you want to retrieve. You can also enter the initial letters of the object you are looking for to further filter the list of objects displayed.
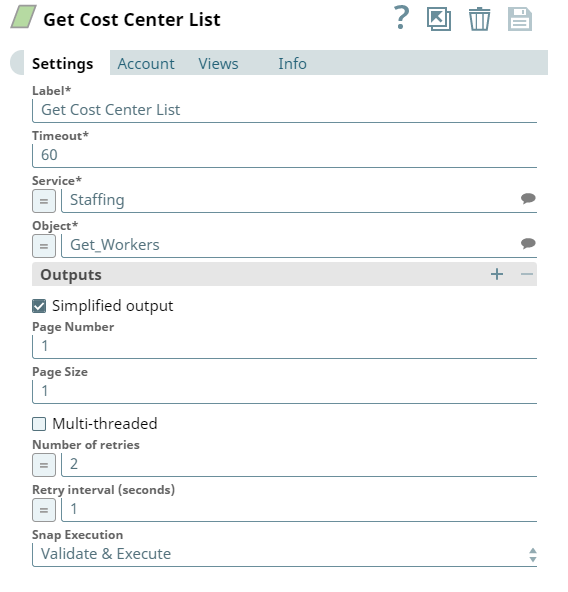
Given the size of the data typically returned as a result of an object-level request, it's typically a good idea to limit the values of the Page Number and Page Size fields to 1, especially during the testing phase. This way, only the first data record is retrieved, and you can see the result returned by the query almost immediately.
| Note |
|---|
You can also use |
Pipeline parameters to specify short strings for complicated service and objects in Workday. For step-by-step information on managing properties of pipelines, see Pipeline Properties Parameters.
- Save your changes and close the popup. The application now validates your settings and displays a preview of the data retrieved if the validation is successful.
Note that we only chose the service and object containing the data needed, and made no further specifications. The data retrieved, therefore, contains only the default data associated with the object we chose
 The sections below describe how you can specify query details that specific in terms of what they want returned
- .
Specifying Criteria for Data Inclusion and Exclusion
| Expand | ||||
|---|---|---|---|---|
| ||||
Including Specific DataUse outputs in Workday Snap settings to limit the kind of information Workday returns as the result of your query. Excluding unnecessary fields increases Snap throughput and simplifies downstream Snap pipeline development. Also, it allows you to retrieve only those pieces of information that you actually require, thereby reducing the need to search for relevant data in the query results. To only include specific data in your results:
The application now validates your changes. Once this is complete, click the icon that appears adjacent to the Workday Read Snap. This displays a preview of the data retrieved using your modified query.
You can see that this is new data, and that the data that the application retrieved using just the service and object defaults is missing. In other words, the data retrieved using inclusions is different from the content retrieved by default for the concerned object. Excluding Specific DataIn the screenshot above, you can view the data that Workday returned after being asked to include only organizational information associated with its workers. One of the data nodes at the bottom of the screenshot is "Organization_Support_Role_Data". This node contains details associated with each worker's role in the organization. If you wish to query Workday for all the organizational information associated with a worker without including historical details such as the name of the person from whom the worker took over, you can do so by combining an Exclude expression with the Include expression in the Output query. To exclude specific data from being returned as a result of a query:
As you can see in the screenshot above, the new output contains all the fields that were returned in the previous query, except for Organization_Support_Role_Data. Combining Include with Exclude expressions thus, you can control the data that Workday returns to queries. |
...