In this article
...
| Note | ||
|---|---|---|
| ||
The Linux installer comes bundled with the JRE necessary for this Snaplex. We recommend you use the patch version of Java 11 that is bundled with the installer for your Linux environment. To update your Snaplex to the Java 11, see Upgrading Your Groundplex to Java 11. |
Setting up a Groundplex
- Log into SnapLogic Manager as an Org admin.
- Navigate to the project where you want to create your Groundplex, then do and perform one of the following steps:
- Click the Snaplex tab, then click
 to display the Snaplex dialog.
OR
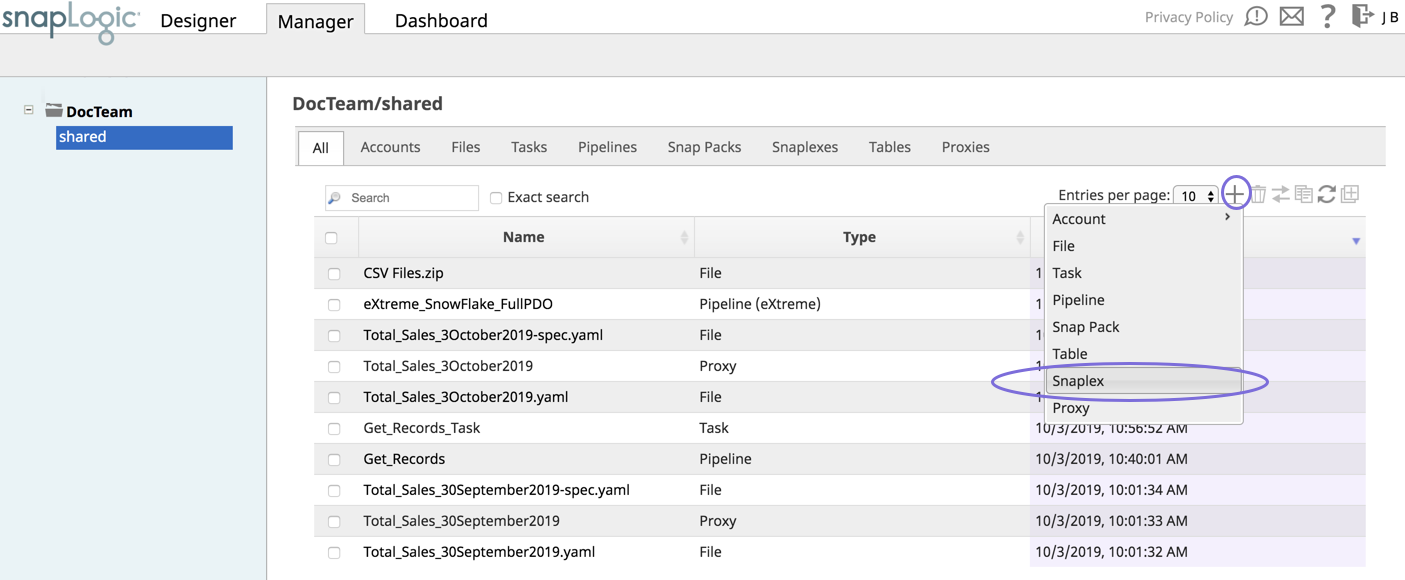
- Click to display the Assets drop-down list, then select Snaplex; the Snaplex dialog appears.
- Click the Snaplex tab, then click
- Enter the required information on the Create Snaplex form. Once completed, the Downloads tab on the Snaplex popup appears. The Downloads tab has links to the installer and configuration files.
- Download the RPM/DEB and the configuration file onto a Linux machine:
For CentOS (or Redhat) 6.3 or newer, run the following command:
$ sudo rpm -i <filename>.rpmFor Ubuntu 14.04 or newer, run the following command:
$ sudo dpkg -i <filename>.deb
Where <filename> is the name of the current installer file.
After the software is installed, place the downloaded configuration file in the
/opt/snaplogic/etcdirectory and make sure the file name ends with.slpropz. Change the .slpropzfile so that snapuser owns it by running the following commands:Code Block $ sudo chown snapuser:snapuser /opt/snaplogic/etc/myplex.slpropz $ sudo chmod 600 /opt/snaplogic/etc/myplex.slpropz
- To start the Snaplex service, run:
$ sudo /opt/snaplogic/bin/jcc.sh start - To verify the Snaplex has started, visit https://elastic.snaplogic.com/sl/dashboard.html#Health. The newly installed Snaplex node should appear in the list of nodes for the Snaplex.
...
| Info | ||
|---|---|---|
| ||
Ultra Pipelines require that you set up a FeedMaster along with the JCC (Java Component Container) nodes in your Groundplex. For details, see Deploying a FeedMaster Node. |
...
- Stop the existing JCC node by running the following command:
$ sudo /opt/snaplogic/bin/jcc.sh stop - Download the new Snaplex installer and install the Groundplex, running the RPM, DEB, or Docker installers as appropriate.
- For RPM systems, run the following command:
$rpm -U snaplogic-snaplex.rpm - For DEB systems, run the following command:
$dpkg -i snaplogic-snaplex.deb - For Docker, stop the existing container and start a new container using the latest image.
- For RPM systems, run the following command:
- Add the following entry to the
/etc/sysconfig/jccdirectory. You must create this directory and file if neither are present.export SL_JAVA_HOME=/opt/snaplogic/pkgs/openjdk-11.0.510+109-jre/ - Start the JCC node by running the following command:
$ sudo /opt/snaplogic/bin/jcc.sh start.
...
If you want to use the/myopt/myroot instead of the /opt/snaplogic as the installation folder and myuser instead of snapuser, do perform the following steps:
- Run the following commands after installing the RPM/DEB package:
$ sudo mv /opt/snaplogic /myopt/myroot$ sudo chown -R myuser /myopt/myroot
- Add the following properties in the
/etc/sysconfig/jccfile. If this file does not exist, create it.export SL_USER=myuserexport SL_ROOT=/myopt/myroot
- Restart the service with the following command:
$ sudo /myopt/myroot/bin/jcc.sh restart - To make a service using init.d, make the
/etc/init.d/snaplexfile a symlink to the/myopt/myroot/bin/jcc.shfile.
...