In this article
...
This article describes the procedures for installing an on-premise Snaplex in a Linux environment. An on-premise Snaplex is also known as a Groundplex. This document uses the term Groundplex to distinguish this type of Snaplex (on-premise) from other types, such as a Cloudplex or an eXtremeplex, which is managed by SnapLogic. However, in command syntax and references to the UI, the generic term Snaplex is used.
...
- Log into SnapLogic Manager as an Org admin.
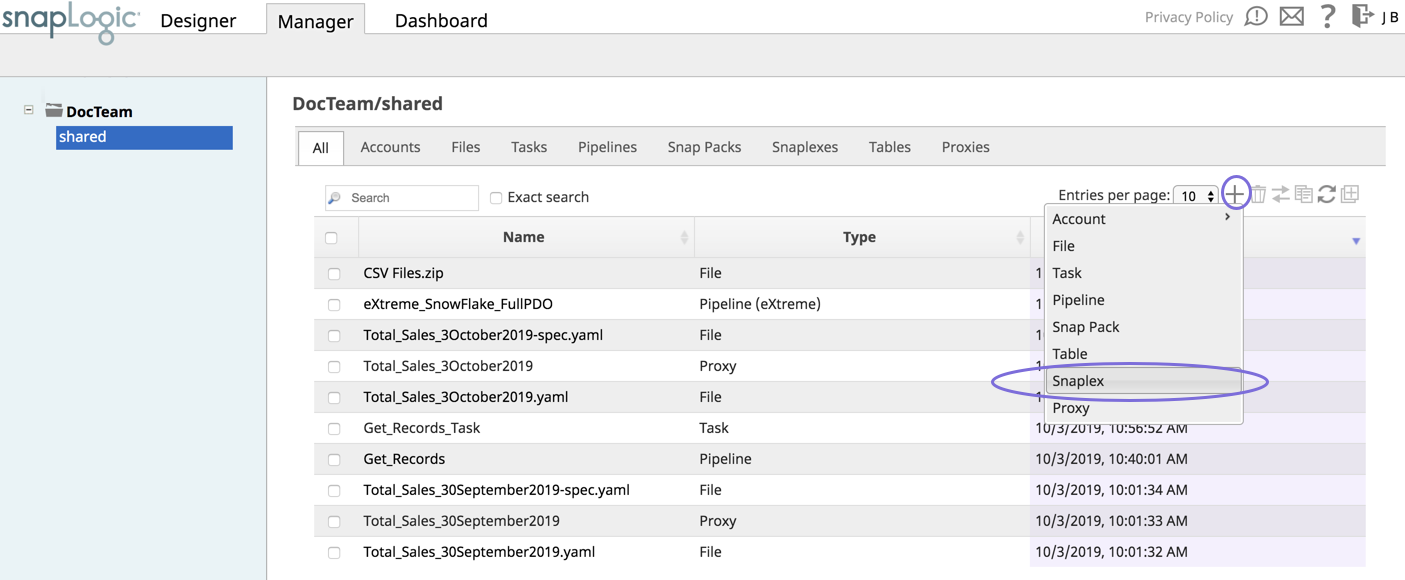
- Navigate to the project where you want to create your Groundplex, and perform one of the following steps:
- Click the Snaplex tab, then click
 to display the Snaplex dialog.
OR
- Click to display the Assets drop-down list, then select Snaplex; the Snaplex dialog appears.
- Click the Snaplex tab, then click
- Enter the required information on the Create Snaplex form. Once completed, the Downloads tab on the Snaplex popup appears. The Downloads tab has links to the installer and configuration files.
- Download the RPM/DEB and the configuration file onto a Linux machine, with
fontconfigandzipas required dependencies:For CentOS (or Redhat) 6.3 or newer, run the following command:
$ sudo rpm -i <filename>.rpmtosudo rpm -i <filename>.rpm fontconfig zipFor Ubuntu 14.04 or newer, run the following command:
$ sudo dpkg -i <filename>.deb fontconfig zip
Where <filename> is the name of the current installer file.
After the software is installed, place the downloaded configuration file in the
/opt/snaplogic/etcdirectory and make sure the file name ends with.slpropz. Change the .slpropzfile so that snapuser owns it by running the following commands:Code Block $ sudo chown snapuser:snapuser /opt/snaplogic/etc/myplex.slpropz $ sudo chmod 600 /opt/snaplogic/etc/myplex.slpropz
- To start the Snaplex service, run:
$ sudo /opt/snaplogic/bin/jcc.sh start - To verify the Snaplex has started, visit https://elastic.snaplogic.com/sl/dashboard.html#Health. The newly installed Snaplex node should appear in the list of nodes for the Snaplex.
...
| Info | ||
|---|---|---|
| ||
Ultra Pipelines require that you set up a FeedMaster along with the JCC (Java Component Container) nodes in your Groundplex. For details, see Deploying a FeedMaster Node. |
...
- Stop the existing JCC node by running the following command:
$ sudo /opt/snaplogic/bin/jcc.sh stop - Download the new Snaplex installer and install the Groundplex, running the RPM, DEB, or Docker installers as appropriate.
- For RPM systems, run the following command:
$rpm -U snaplogic-snaplex.rpm - For DEB systems, run the following command:
$dpkg -i snaplogic-snaplex.deb - For Docker, stop the existing container and start a new container using the latest image.
- For RPM systems, run the following command:
- Add the following entry to the
/etc/sysconfig/jccdirectory. You must create this directory and file if neither are present.export SL_JAVA_HOME=/opt/snaplogic/pkgs/jdk-11.0.12+7-jre/ - Start the JCC node by running the following command:
$ sudo /opt/snaplogic/bin/jcc.sh start.
...