...
Click your profile photo to display the dropdown menu.
Click Your organizations.
To the right of the organization, click Settings.
In the left sidebar, click Developer settings.
In the left sidebar, click GitHub Apps.
Click New GitHub App. The Register new GitHub App page opens:
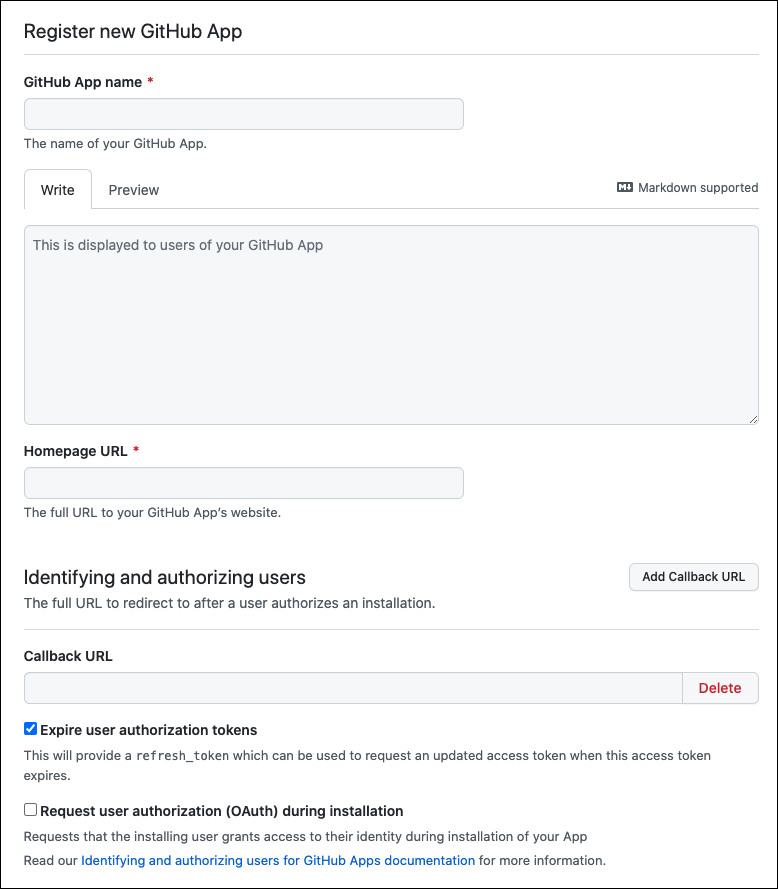
Enter For GitHub App name, enter the appropriate information to name and describe . For example,
snaplogic-app.In the Write tab, enter a description of the App.
For the Homepage URL, enter the full URL to the App’s website. Users will install the App from this page. For example:
HTTPS://www.<your-domain>.com/GHES<your-GHES-server-URL>/github-apps/snaplogic-app/.Add a Callback URL in the following format, where
<frontend_url>is the URL that you use to log in to the SnapLogic IIP:
<frontend_url>:https://elastic.snaplogic.com/api/1/rest/asset/app/oauthcallbackClick Expire user authorization tokens.
Make sure the WebHook Active box is not checked.
Set Repository permissions as follows:
Contents: Read & write
Deployments: Read & write
Issues: Read & writeMetadata: Read-only
Pull Requests: Read & write
Under Where can this GitHub App be installed, select Any Account.
Click Create GitHub App.
General information about the App displays including the App ID, which will be required for SnapLogic configuration.Install the App for the appropriate GHES organization.
Use the buttons on the About page to generate and save a Client Secret and a Private Key. Generating Private keys will automatically download them in a
.pemfile.
...