...
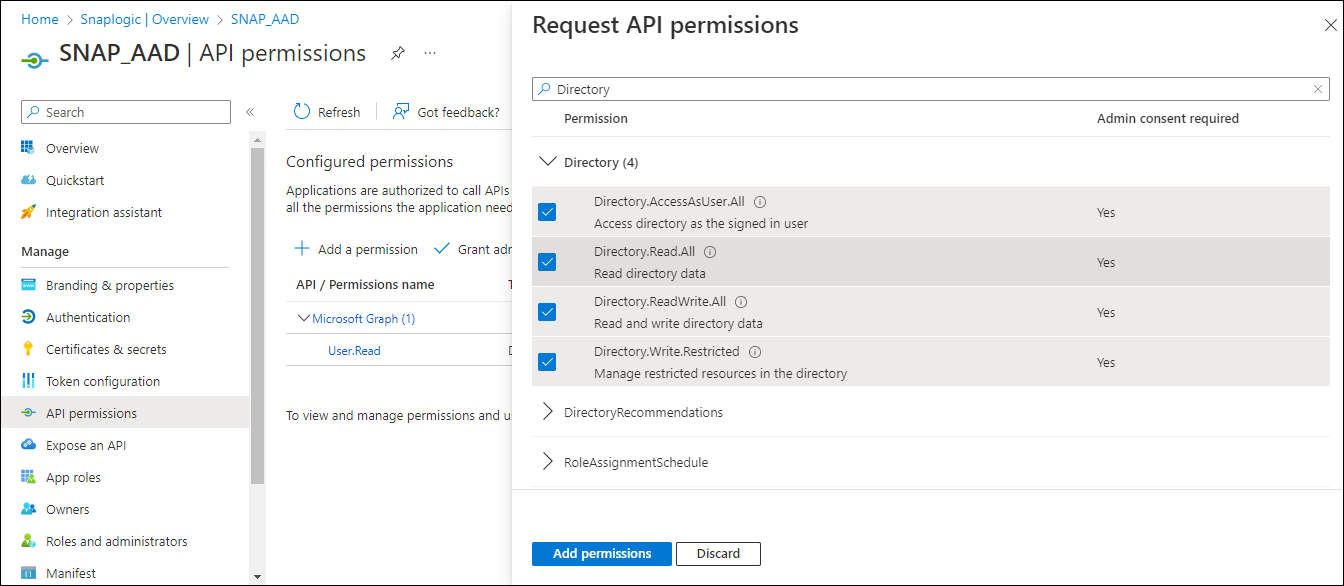
On the left navigation panel, navigate to Manage,select API permissions > Add a permission.


On the Request API permissions window, select Microsoft Graph > Delegated permissions for the OAuth2 User account and Application permissions for the OAuth2 Application Account.


Select the permissions from Files, Users, and Teams. Choose the minimum API permissions listed under Scopes and Permissions Required for Azure Active Directory.
Click Add Permissions. View all the permissions added under Configured permissions.

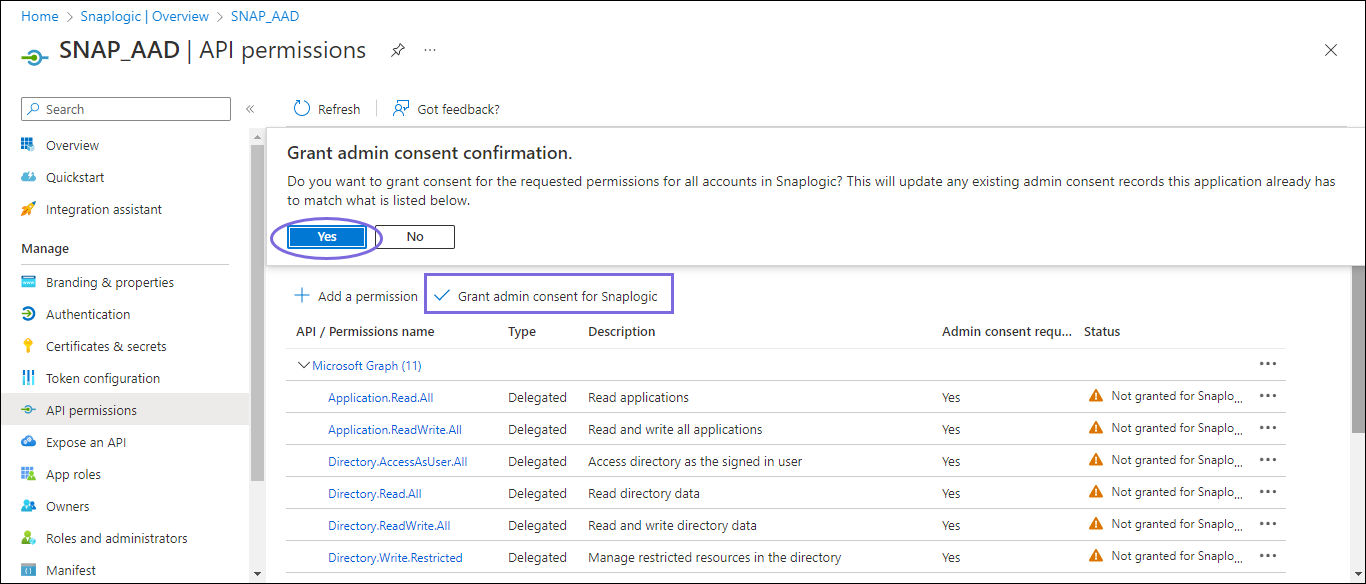
Click Grant admin consent confirmation and select Yes.

Click Overview and select Add a Redirect URI. You will be redirected to the Platform configurations page.


Under Platform configurations, click Add a platform.
Select Web and specify a valid Redirect URI https://elastic.snaplogic.com/api/1/rest/admin/oauth2callback/azureactivedirectory and click Configure. A popup message displays indicating that the application is successfully updated.

On the Platform configurations page, click Save.


Locate the Application Credentials in the Azure Portal
...
On the application page, under Essentials, note the Application (client) ID and Directory (tenant) ID needed for the Snap account.


In the left navigation panel, select Manage > Certificates & secrets.
On the Certificates & secrets page, click + New client secret.
In the Add a client secret window, enter the Description, select an option for Expires from the dropdown list, and click Add.
The Client secret value and ID are generated. This value and the ID are required to configure the OAuth2 account.

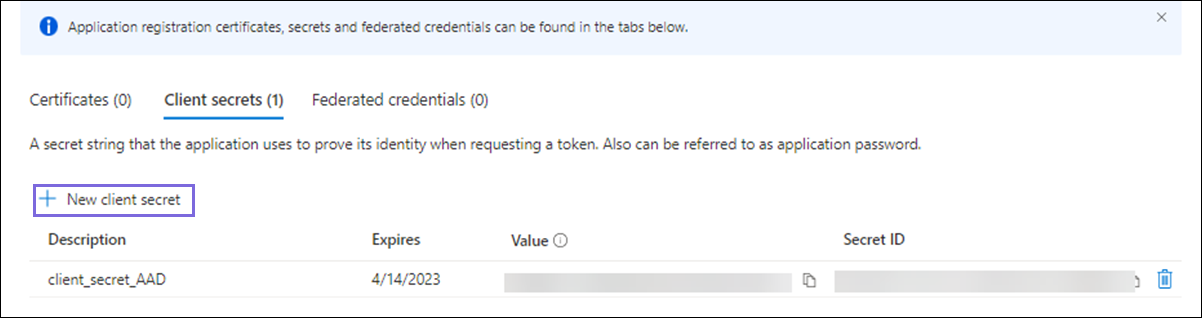
You can copy the Client secret value only after it is generated.
...