In this article
...
Log into SnapLogic Manager as an Org admin.
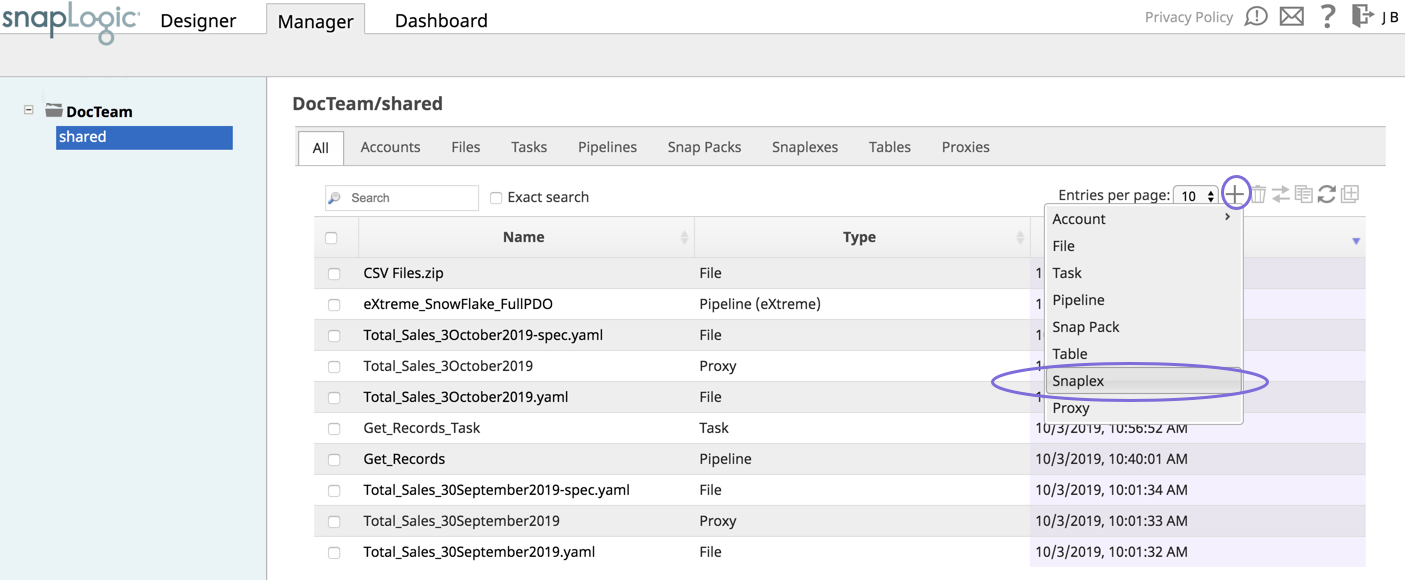
Navigate to the project where you want to create your Groundplex, and perform one of the following steps:
Click the Snaplex tab, then click
 to display the Snaplex dialog.
OR
Click
 to display the Assets drop-down list, then select Snaplex; the Snaplex dialog appears.
Enter the required information on the Create Snaplex form. Once completed, the Downloads tab on the Snaplex popup appears. The Downloads tab has links to the installer and configuration files.
Download the RPM or DEB-based installer and configuration files onto a Linux machine, where <filename> is the name of the current installer file and
fontconfigandzipare the required dependencies:For CentOS (or Redhat) 6.3 or newer, run the following commands:
$ sudo yum install fontconfig zip$ sudo rpm -i <filename>.rpmFor Ubuntu 14.04 or newer, run the following command:
$ sudo apt-get install fontconfig zip$ sudo dpkg -i <filename>.deb
After the software is installed, place the downloaded configuration file in the
/opt/snaplogic/etcdirectory and make sure the file name ends with.slpropz. Change the .slpropzfile so that snapuser owns it by running the following commands:Code Block $ sudo chown snapuser:snapuser /opt/snaplogic/etc/myplex.slpropz $ sudo chmod 600 /opt/snaplogic/etc/myplex.slpropz
To start the Snaplex service, run:
$ sudo /opt/snaplogic/bin/jcc.sh startTo verify that the Snaplex has started, visit https://elastic.snaplogic.com/sl/dashboard.html#Health. The newly installed Snaplex node should appear in the list of nodes for the Snaplex.
...
| Info |
|---|
FeedMaster InstallationUltra Pipelines require that you set up a FeedMaster along with the JCC (Java Component Container) nodes in your Groundplex. For details, see Deploying a FeedMaster Node. |
...
Obtain the certificate (.pem) file by using SSH.
Import the file by using the following command in the JCC node:
paste-code-macro /opt/snaplogic/pkgs/jre1.8.0_45/bin/keytool -import -file <path_to_pem_file_from_step_1> -alias <alias_name_optional> -keystore /opt/snaplogic/pkgs/jre1.8.0_45/lib/security/cacerts -vEnter keystore password: changeit
Note This example is an excerpt from 1.8.0_45; the directory path might vary based on the Java installation directory.
Restart the JCC node process to confirm the import.
Run the following command to list certificates from the CAcerts file:
Paste code macro /opt/snaplogic/pkgs/jre1.8.0_45/bin/keytool -list --keystore /opt/snaplogic/pkgs/jre1.8.0_45/lib/security/cacerts -v+
...
