...
In Manager, navigate to your target Project or shared folder, and in the Assets table, click
 to view the dropdown menu, then click Snaplex. The Create Snaplex dialog opens.
 Alternatively, click the Snaplex tab, then click
 to open the Create Snaplex dialog.
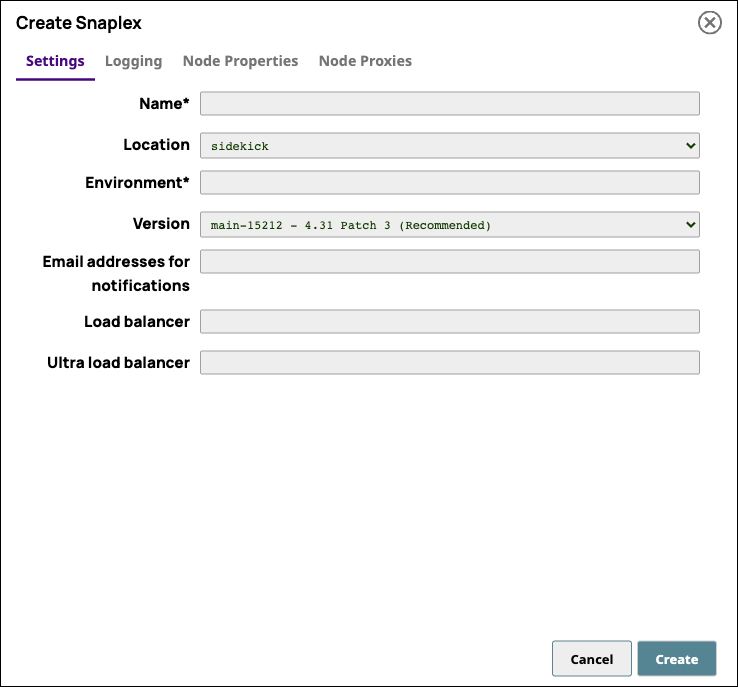
 In the Create Snaplex dialog window, make sure that the following default option is selected:
Location. Sidekick (default).
Enter values for the following required fields.
Name. Enter the name of your Groundplex.
Environment. Enter the name associated with the node resources for your Groundplex.
For the actual name of the Environment variable, only alphanumeric characters and the following special characters are allowed:- +.Version. Select the version of the SnapLogic® on which you want the Snaplex to run. By default, all new Snaplexes are configured to work with the latest version of the SnapLogic®.
Configure your load balancers:
Enter the URL of your load balancer in the Load balancer field.
If you plan to use this Snaplex for Ultra Pipeline Tasks, enter the FeedMaster using the Ultra load balancer field for configuration options as required
Click Create Snaplex.
Verify that your Snaplex is created in Manager.
...
