In this article
| Table of Contents |
|---|
...
The Snaps in the Azure Active Directory Snap Pack require an OAuth2 account to access the resources in Azure. For the OAuth2 account to authorize successfully, create, and configure an application corresponding to the account as shown in the workflow.
...
| Info |
|---|
Steps You must complete steps one to three are done in the Azure Portal and the remaining steps are done in the Snap account (SnapLogic PlatformSnapLogic®Platform). |
Prerequisites
An Azure account with a free subscription to create the application.
...
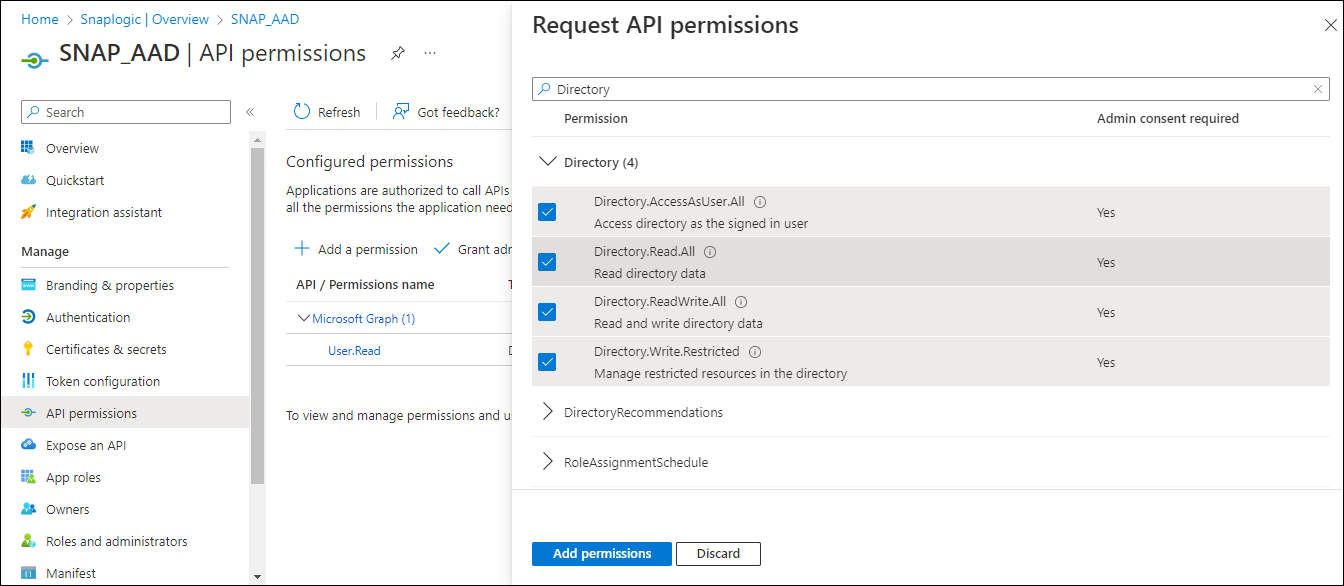
On the left navigation panel, navigate to Manage,select API permissions > Add a permission.

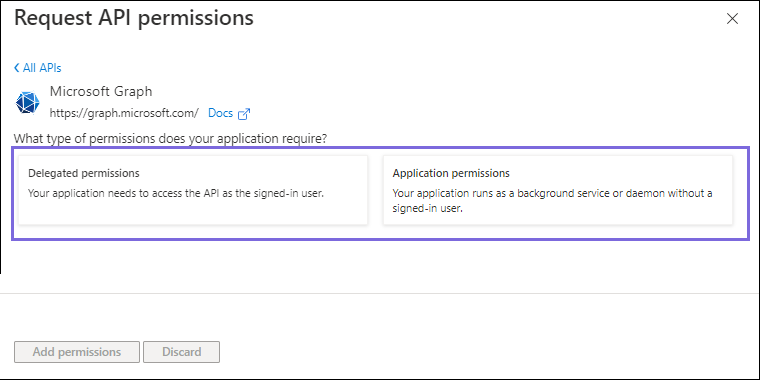
On the Request API permissions window, select Microsoft Graph > Delegated permissions for the OAuth2 User Account and Application permissions for the OAuth2 Application Account.
Select the required permissions from Files, Users/Groups, and Teams. Choose the minimum API permissions listed under Scopes and Permissions Required for Azure Active Directory.
Click Add Permissions. You can view all the permissions added under Configured permissions.
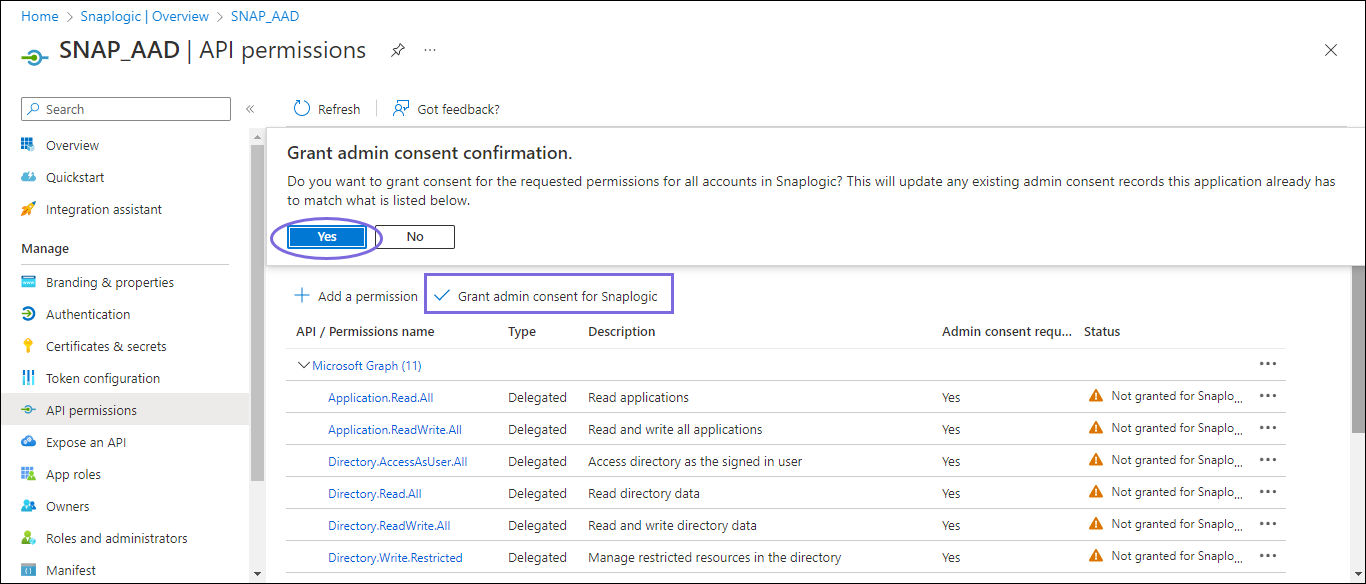
Click Grant admin consent confirmation and select Yes.
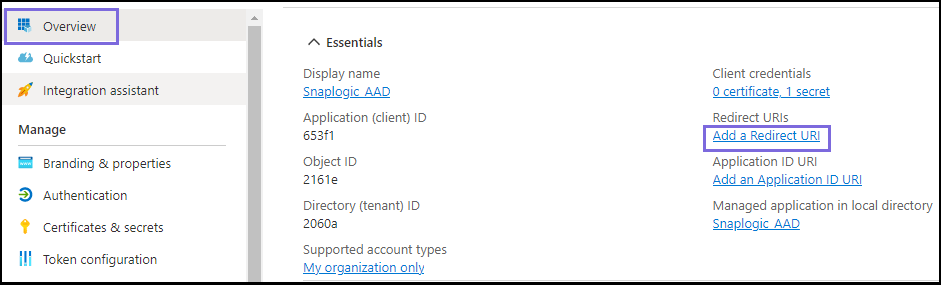
Click In the navigation panel, click Overview and select Add a Redirect URI. You will be redirected to the Platform configurations page.
Under Platform configurations, click Add a platform.
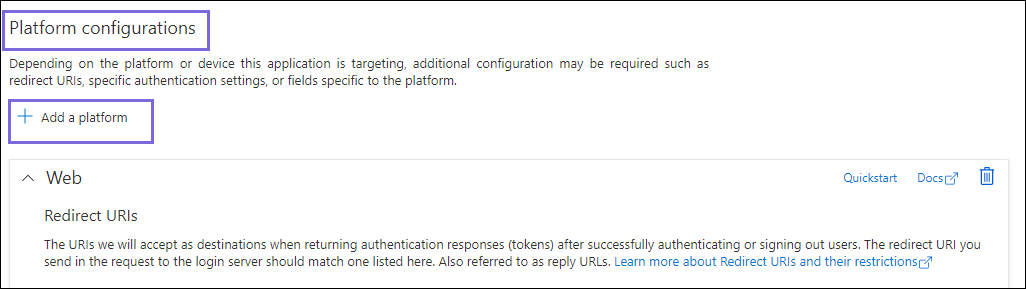
The Configure platforms window displays.
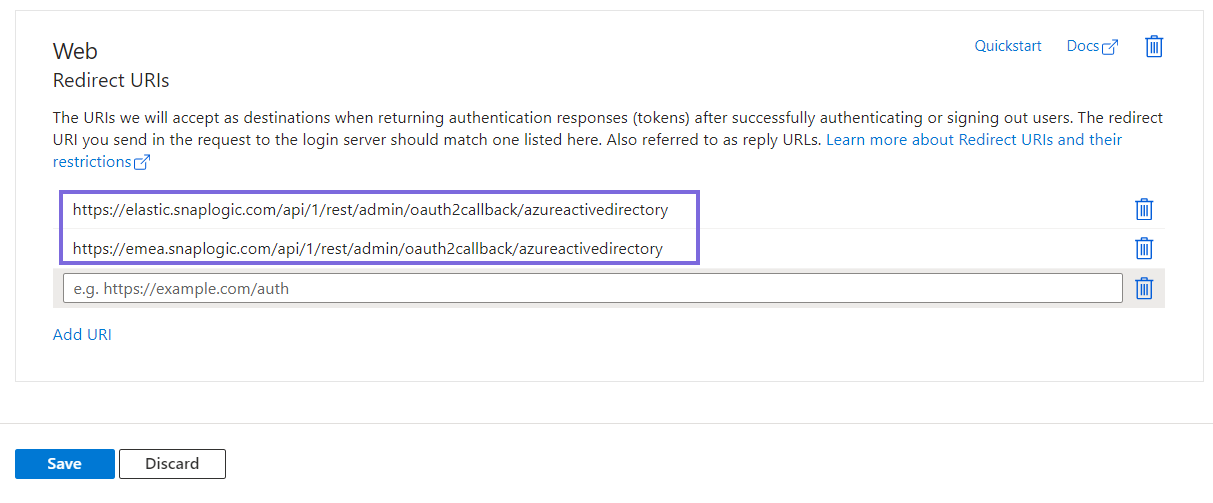
Select Web and specify either of the following Redirect URIs based on the region your server is locatedthe Redirect URI in the following format:
https://<control-plane-name>.snaplogic.com/api/1/rest/admin/oauth2callback/<snap-pack-name>
where the<control-plane-name>corresponds to the domain part of your SnapLogic URL—elastic (global control plane) or emea (EMEA control plane).
For example:https://emea.snaplogic.com/api/1/rest/admin/oauth2callback/azureactivedirectoryhttps://elastic.snaplogic.com/api/1/rest/admin/oauth2callback/azureactivedirectoryClick Configure. A popup message displays indicating that the application is successfully updated.
On the Platform configurations page, click Save. The Redirect URIs are added in the application.
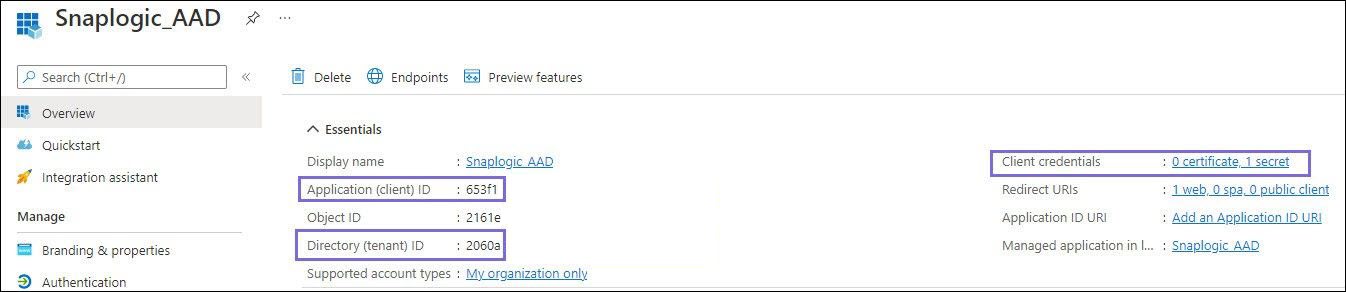
Locate the Application Credentials in the Azure Portal
...
Application (Client) ID
Directory (Tenant) ID
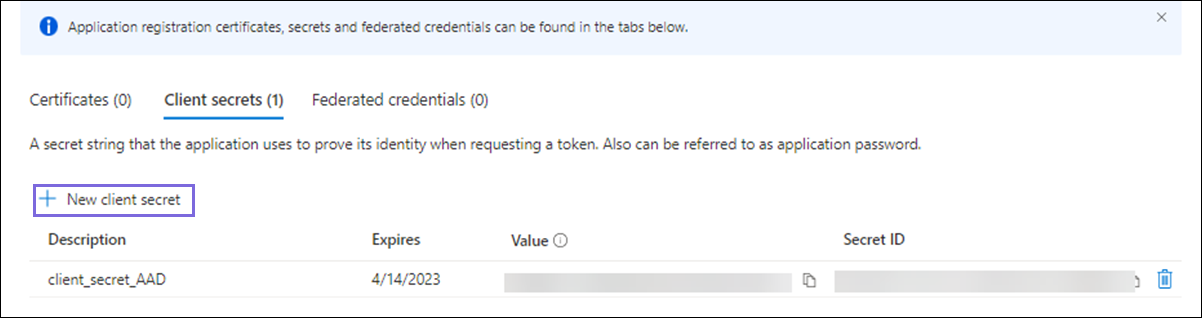
Client secret value
On the application page, under navigate to Overview.
Under Essentials, note the Application (client) ID and Directory (tenant) ID needed for the Snap account.
In the left navigation panel, select Manage > Certificates & secrets.
On the Certificates & secrets page, click + New client secret.
In the Add a client secret window, enter the Description, select an option for Expires from the dropdown list, and click Add.
The Client secret value and Secret ID are generated. This value and the ID are required to configure the OAuth2 account.
...
| Expand | ||
|---|---|---|
| ||
You can use the Azure Active Directory OAuth2 account to connect Azure Active Directory Snaps with data sources. For more details refer to Configuring Azure Active Directory Accounts . |
Related Content
Azure Active Directory Snap Pack
Azure Active Directory OAuth2 Account
...