Overview
Remote Python Script Snap has the ability to execute a Python script natively on local/remote Python executors. The script is stored inside the Snap which can be edited via the built-in script editor. However, the built-in script editor does not provide interactive features which can be found in the Jupyter Notebook. With, SnapLogic Jupyter Notebook Integration, we can connect the Python Snap to the notebook and develop the Python script inside the notebook taking advantages of all interactive features. Then, the script can be published to the pipeline when it is ready. This way, we can develop the Python script inside the notebook with sample data using local executor on your laptop, then, execute the script in pipeline with production environment.
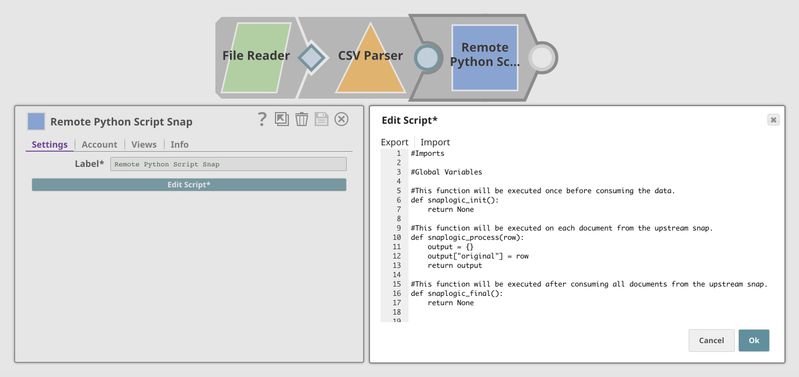
The image below shows a pipeline with a Python Snap. The Snap is shown on the left, and the built-in script editor is on the right. The built-in script editor is appropriate for quick editing but not for developing large Python scripts.
The image below shows the main menu in Jupyter Notebook, where you must specify the Python Snap you want to use, review the script, publish, and validate the pipeline.

The input, output, error, and console can be displayed as a table, JSON format, or in its raw format inside the notebook.


Installation
Python 3.6
The recommended version of Python is 3.6, which can be downloaded from here.
SnapLogic Package
The SnapLogic package can be installed using the pip command. All dependencies will be installed automatically.
Getting Started
Starting Jupyter Server
In the terminal, start the Jupyter server using the following command. Update the port number as appropriate. Once the server starts, the URL is displayed in the console along with the access token. In most cases, you will be redirected automatically.
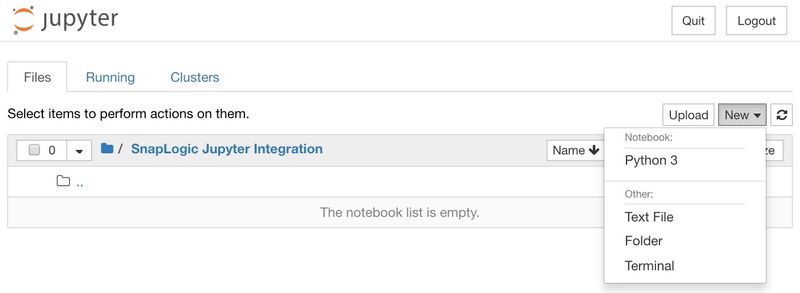
Creating Notebook
On the right, click New, then Python 3 to create a new notebook.
Using the SnapLogic - Jupyter Notebook Integration
Logging In
In the cell, execute the following script to display the login form.

Alternatively, the username and password can be passed as parameters to log in programmatically without the login form.
Displaying Main Menu
After logging in, execute the following script to launch the main menu.

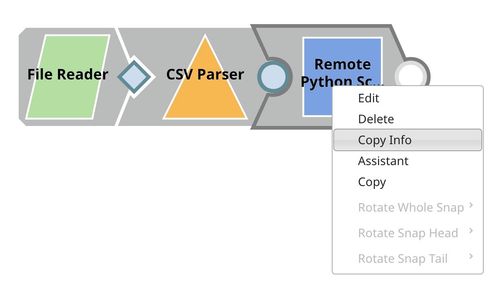
Connecting Snap
In SnapLogic Designer, right-click the Remote Python Script Snap and select Copy Info.
Then, click Paste Info to connect the Snap to the notebook.

Loading Script
Once the Snap is connected to the notebook, click Load Script from Cloud to download the script from the Snap. The script will be placed in the cell below.
Below is the starter script. There are three main functions:
- snaplogic_init
- snaplogic_process
- snaplogic_final.
The first function (snaplogic_init) is executed before consuming input data. The second function (snaplogic_process) is called on each of the incoming documents. The last function (snaplogic_final) is processed after all incoming documents have been consumed by snaplogic_process.

Publishing and Validating
Now, you can develop the script inside the notebook. Click Save Script to save the script locally. The saved script will be displayed on the right panel for review. In this case, we use the script from the Iris Flower Classification using Neural Networks tutorial. The input is Iris Flower classification dataset, and the output is Neural Networks model.
Then, we can publish the script to the pipeline by double-clicking Publish. Alternatively, double-clicking Publish & Validate will also validate the pipeline and the preview data will be generated. Input, output, and error can be viewed as a table, JSON format, or in its raw format. Moreover, the standard output from print statements or verbose operations will be displayed in the console.


Local Validation
The Publish & Validate operation can take a long time. It comprises the following steps.
- Publish the script to the pipeline.
- Perform pipeline validation.
- Pipeline description is sent to the Snaplex.
- Snaplex validates the pipeline based on the first 50 input documents.
- The preview data are encrypted and saved.
- Download the preview input, output, error, and console data to the notebook.
- Decrypt and display.
Alternatively, the Local Validate operation executes the script locally using the input data from the Publish & Validate operation. This operation can be completed within a second. Note that the result from local validation can be slightly different, since the local environment may be different from the production one on Snaplex.