...
Snaps in the Kafka Snap Pack use the Kafka SSL account to access the Azure application for streaming messages from Azure Event Hubs. For the Kafka SSL account to function without any issue, ensure to create and configure a Event hubs namespace corresponding to the account as explained in the steps below. These steps also contain the information you need to locate in the Azure portal to configure the Kafka SSL account instance for Azure Event Hubs.
Limitations
Azure Event Hubs does not support the following features:
Timestamp: Event Hubs does not allow setting timestamps for records explicitly in the Producer API.
Compression Type:All types except NONE.
Avro and Schema Registry.
Create/access an Event hubs resource in Azure Portal
Log into the Azure portal.
Navigate to Event Hubs.
In the Event Hubs page, click Create event hubs namespace.
OR
Use an existing namespace.
To use an existing namespace, select the Namespace from the resource list and click to open it.Enter the project details for the Namespace.
Click Review + create.
The namespace is validated and the details are displayed.
Click Create.
The namespace is deployed.
Locate/Define Information Required to Create your Kafka SSL Account
...
Configure the Kafka SSL Account with the following details:
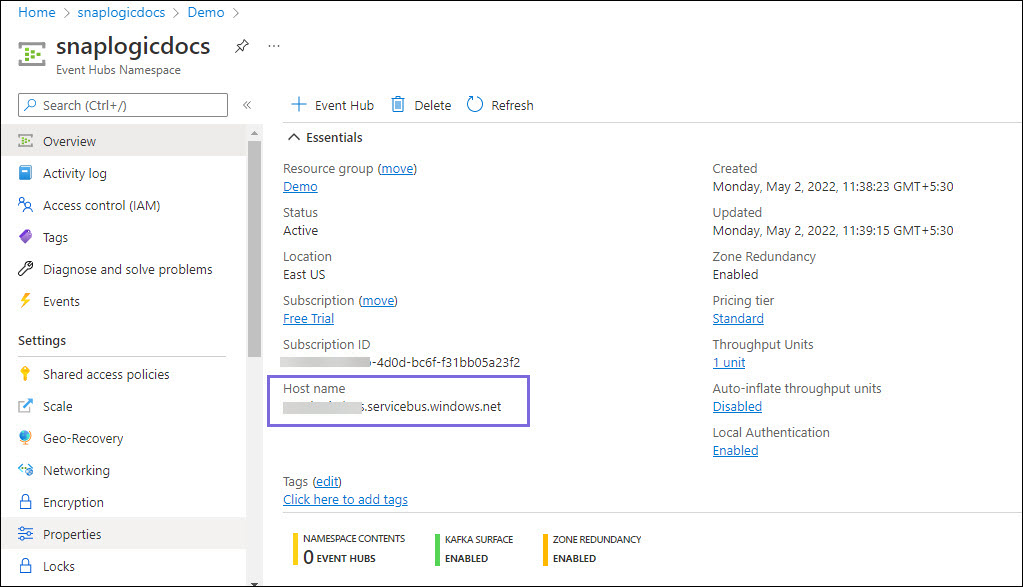
Bootstrap server: Copy the Host name from the Azure Event Hubs resource and suffix it with a colon and the standard port number 9093. For example, snaplogic-snapdev.servicebus.windows.net:9093
Security Protocol: SASL_SSL
SASL Mechanism: PLAIN
SASL Username or Key: $ConnectionString (not an expression!)
SASL Password or Secret: Copy the Connection string-primary key from Shared access policies.
Click Validate.
Once the account is validated, click Apply.
...


