In this article
| Table of Contents | ||
|---|---|---|
|
Overview
You can create an Ultra Task after you have created the Pipeline in SnapLogic Designer. You can create an Ultra Task in Designer or Manager. When you create an Ultra Task in Designer, the Pipeline is pre-selected when you open the Create Task dialog. When you create an Ultra Task in Manager, you must select a Pipeline to associate with the Task.
Creating an Ultra Task includes the following topics:
Creating an Ultra Task
Open the Create Task dialog doing one of the two following methods:
In the dialog, make the following required selections:
Name. Enter a name for the Ultra Task. This name is used in the URL when the Pipeline has unconnected inputs/outputs.
Ultra Tasks define the configuration to run an Ultra Pipeline on a Snaplex. When you activate an Ultra Task, the associated Snaplex starts one or more Pipeline instances that continuously process documents from a FeedMaster or another message queue. If you modify assets related to an active Ultra Task, in some cases, the Snaplex restarts the Pipeline instances automatically.
For high availability and disaster recovery, you can run a Pipeline in multiple regions. To do this, create multiple Ultra Tasks for the same Pipeline using the same alias. Assign each Ultra Task to a Snaplexex in a different region. When an Ultra Pipeline in one region fails, a Snaplex in another region can run the Ultra Task by invoking the Ultra Task with the same alias. Learn more about the deployment architecture for providing high availability and disaster recovery.
You can tune Ultra Task performance by specifying the number of Pipeline instances to run and the maximum number of documents that one instance should process at a time. Also, you can specify how many times a Pipeline can failbefore the Snaplex disables the Ultra Task. Configuration Options describes the fields that control these behaviors, Instances (per Snaplex), Max In-Flight, and Maximum Failures.
Prerequisites
A Snaplex with one or more FeedMaster nodes.
Write permissions for the Project Space.
A valid Pipeline.
Workflow

Use Designer or Manager to create an Ultra Task.
Invoke the Ultra Task as described in Invoking Ultra Pipelines as Tasks.
Check status by Viewing Ultra Task Execution Details. Monitor Ultra Pipeline from the Dashboard Pipeline tab.
Creating an Ultra Task
From Designer or Manager, open the Create Task dialog:
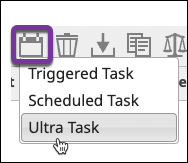
In Designer with the Pipeline open, in the toolbar, click More Tools. Click Create Task and select Ultra Task:
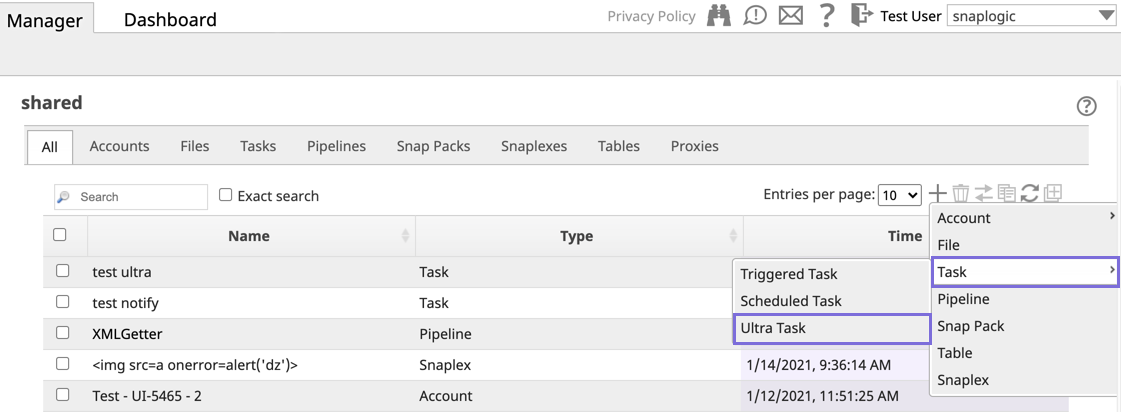
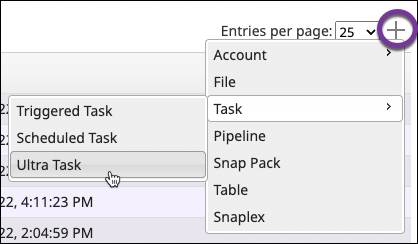
In Manager, from the left navigation, select the Project containing the Pipeline. In the toolbar, click Create and select Task > Ultra Task.
The Create Task dialog displays:

Edit the required fields:
Name. Enter a name, which can include UTF-8 alphanumeric characters and special characters !"#$%&'()*+,-.:;<=>?@[\]^_`{|}~.
Pipeline. Select the Pipeline to run from the Pipeline drop-down menu. This Pipeline is triggered when the Ultra Task is called. If applicable, edit any of the parameter values from the Pipeline.
If applicable, modify the Configuration Options in the dialog window, and click Save.
See Invoking Ultra Pipelines as Tasks for details about activating your Ultra Task.
Once activated, the associated Pipeline is started on the Snaplex using the Ultra run policy that is specified in the Task dialog window. The Ultra Pipeline consumes messages from the FeedMaster and processes input documents. The Pipeline restarts automatically after the Ultra Task or the Pipeline itself is modified and saved—including known child Pipelines and accounts that are not computed dynamically using an expression.
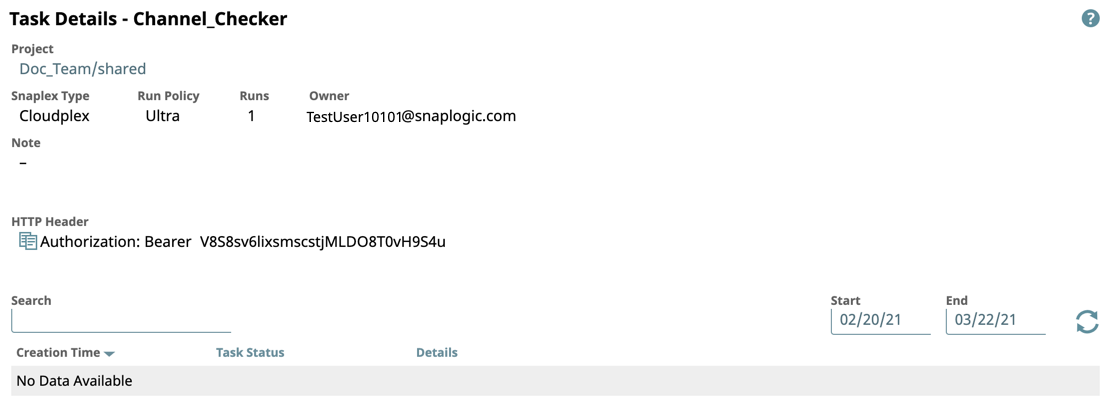
Viewing Ultra Task Details
After you create and enable your Ultra Task, you can view details about the Task.
Open the Task Details page for your Ultra Task by clicking View Details:
On the Task Details page, view Pipeline execution information for any instance by clicking Run Details.
Navigate to the Dashboard Pipeline Wall to monitor the executions details about your Ultra Task.
Multiexcerpt include macro name Duplicate Executions page Creating Scheduled Tasks
Notifications
You can createThis name is used in the URL when the Pipeline has unconnected inputs/outputs.
Pipeline. If not already selected, click the drop-down menu and select the Pipeline to be triggered by the Ultra Task.
If you choose a Pipeline that contains parameters, the parameters display in the Create Task dialog, where you can modify them. In the following example, the parameter keys path, full, and table name are displayed, with their entries as the corresponding values. In the full field, the values contain nested JSON.

Snaplex. From the drop-down menu, select a Snaplex that has a Feedmaster.
Modify the applicable optional fields as described in Configuration Options.
Click Save.
Configuration Options
Field | Description |
|---|---|
Notifications | Enables email notifications based on the status of the Scheduled Task. If your Org supports Slack notifications, you can add Slack channels or recipients. |
To use notifications:
|
|
|
|
|
|
Recipients receive notifications based on the selections in the When Task has field.
Ultra Task Configuration Options
You can configure the following settings for your Ultra Task. Each field has a default value, except where indicated.
Instances per Snaplex
You can specifyInstances (per Snaplex) | Specifies how many instances of the Pipeline should be running on a Snaplex. For example, to achieve redundancy, you can configure an Ultra instance per document. The default value is |
1. The Snaplex distributes instances across nodes. For example, If a Snaplex has five nodes and |
this value is set to 10, the Snaplex starts two instances on each node. The algorithm for distributing executions on nodes is based on |
the number of currently running Ultra Task |
instances. Each instance connects to the input queue, and receives notifications of message delivery as they come in. When multiple instances are running, the message is delivered to a single instance. If the Pipeline or node fails for any reason, then the message is unacknowledged in the queue. Consequently, when the consumer is recognized as no longer being connected, the message returns to the queue and is picked up by another instance. In the correct configuration, messages should not be lost. |
Alias |
Use an alias to run an Ultra Task in multiple regions for high availability and disaster recovery |
. Use the same alias in multiple Ultra Tasks that run the same Pipeline. When an Ultra Task in one region fails, a Snaplex in another region can run the |
Pipeline by invoking the Ultra Task that shares the Alias name. The Ultra Task that shares the Alias must be in the same project folder as the primary Ultra Task, but be deployed to different Snaplex instances. |
Bearer Token |
An automatically generated token for the HTTP Authorization header. If you clear this field, |
the Pipeline |
authenticates requests. You can also |
set the |
value |
yourself. |
Max Failures
You can indicate the maximum number of consecutive failures in a short period of time by entering a value in the Max Failures field. When this threshold is reached, the Task is automatically disabled.
The default value is ten document processing failures.
Set this value to zero if the Task should never be disabled.
Max In-Flight
You can prevent an excessive number of documents from being queued on a single, slow execution. Once the execution reaches this threshold of documents being processed, requests are distributedMaximum Failures | Specifies an optional threshold for a Pipeline failing to start. When the number of failures reaches the threshold, the Snaplex disables the Ultra Task. The default value is 10. Set the value to 0 to avoid having the Snaplex disable the Ultra Task. During development a Pipeline can be in an invalid state and fail to start multiple times. Consider setting the value for Maximum Failures to 0 until the Pipeline is ready for production. |
Max In-Flight | Specifies a threshold for documents to be processed on a single Pipeline instance. Once the execution reaches the threshold, the Snaplex distributes to other instances of the Ultra Pipeline. |
This enables you to prevent an excessive number of documents from being queued on a single, slow execution. Set the Max In-Flight value to the maximum number of documents that can be processed by |
one instance at |
a time. The default value is 200 documents. |
Set this value higher if the Ultra Task executions take a long time. |
Pipeline Parameters
You can specify Pipeline parameters. If you choose a Pipeline that contains Pipeline parameters to run in the Ultra Task, then these Pipeline parameters also appear in the Create Task window, where you can modify them. In the following example, the parameter keys path, full, and table name are displayed, with their entries as the corresponding values.

In the full field, the values contain nested JSON.
A value of 1 disables the prefetching of documents and can negatively affect performance. |
Editing an Ultra Task
Click Manager.
From the left navigation, select the Project Space to which the Ultra Task belongs.
Select the Tasks tab.
Click the Ultra Task name. The Update Task dialog displays:
Changing the Run Policy
When you create an Ultra Task, Ultra is the chosen Run Policy by default.
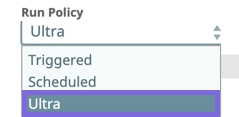
If you change the Run Policy setting to Triggered or Scheduled,
you must re-configure the Task.
See AlsoViewing Ultra Task Execution Details
After you create and enable your Ultra Task, you can view execution details.
In Manager, navigate to the Ultra Task and select Details from the dropdown menu:
On the Task Details page, view execution statistics by clicking Run Details:
