...
In the API Manager page, under the APIs & Proxies tab, click the add icon (
 ) and choose New API.
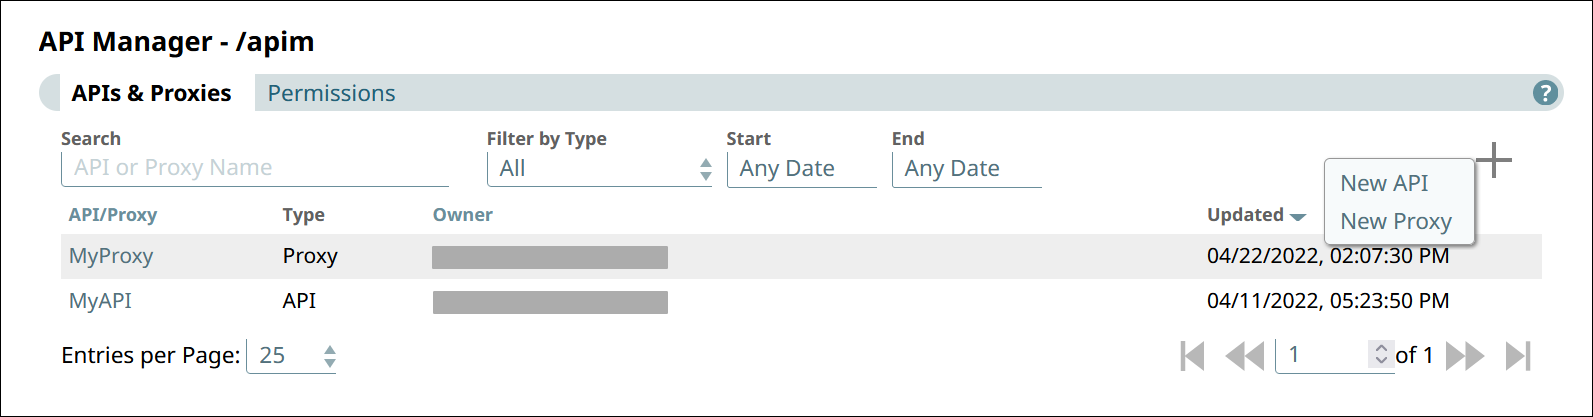
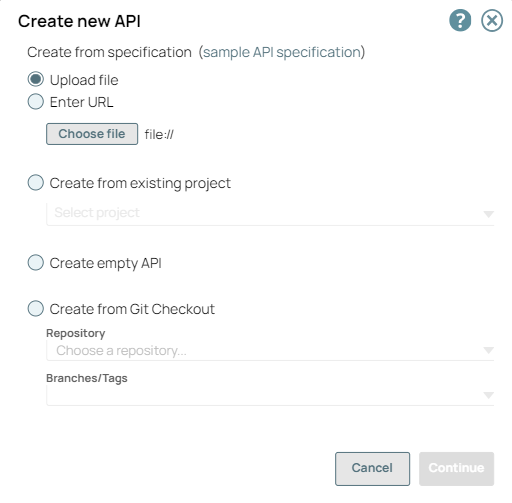
In Create New API, choose the source of the OAS file.
Upload File. Click Choose File to specify the location of the specification file to upload.

Enter URL. Enter a valid URL pointing to the location of the specification file.
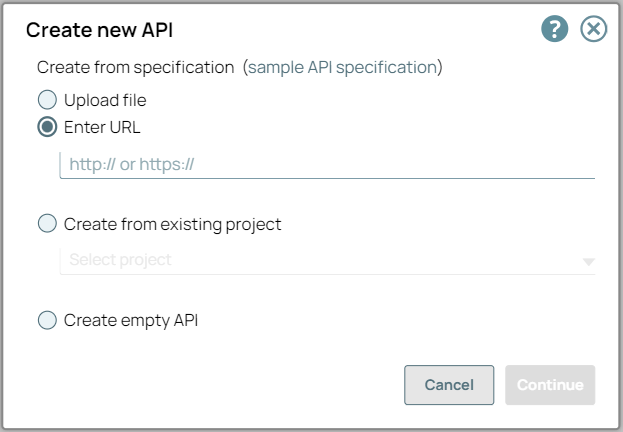
Click Continue.
In Create New API - Options, select your API Import Configurations.
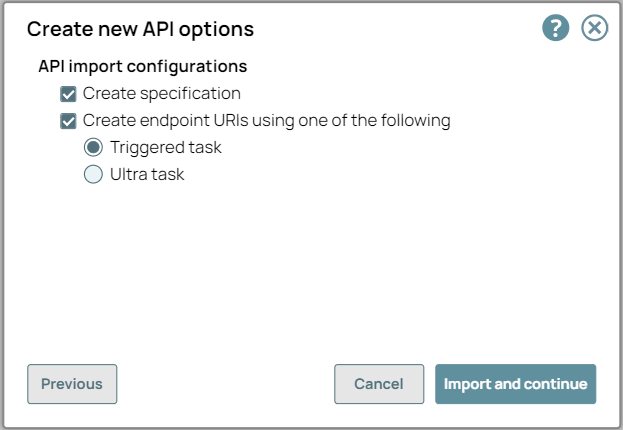
Create Specification. If selected, the imported specification is included as a File Asset in the API.
Create Endpoints from Path. If selected, endpoints for the new API are created based on its path to one of the following:
Triggered Task: Choose to make the API endpoint a Triggered Task.
Ultra Task: Choose to make the API endpoint an Ultra Task.
Click Import and Continue.
In Create New API - Details, fill in the details for the new API.
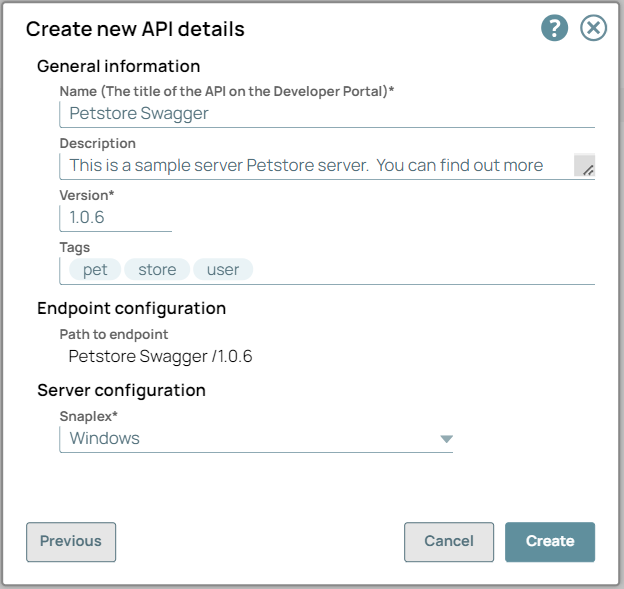
General Info
Name (Title). The name of the new API.
The name must meet the following requirements:
Must be unique.
Must begin with alphanumeric characters A-Z, a-z, or 0-9.
Cannot contain the reserved keyword
shared.Cannot contain |, <, >, [, ], {, }, #, ?, /, and \.
Must be no more than 256 characters. If the name includes double-byte characters, the maximum length is shorter.
Description. A description of the new API.
Version. The version number for the first version of the API.
Default: 1.0.
Learn more: Managing Versions of Your APIsTags. Enter any tags associated with your API. You can create the tags as required.
Endpoint Configuration » Path to Endpoint. (Read-only) The base path for the endpoint.
Server Configuration » Snaplex. The Snaplex to associate with the new API.
Click Create.
Troubleshooting Section for API Specification file
...
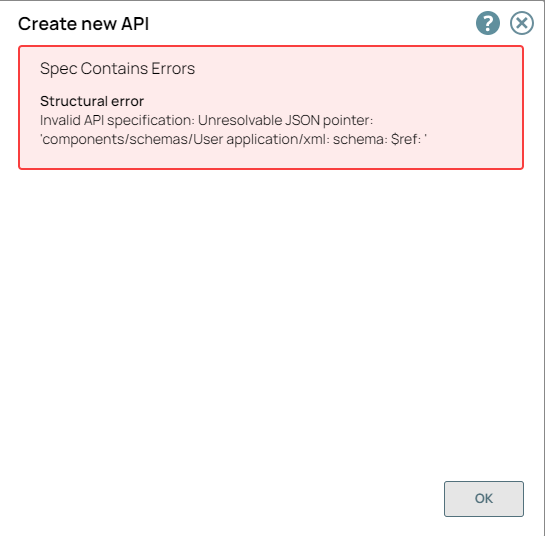
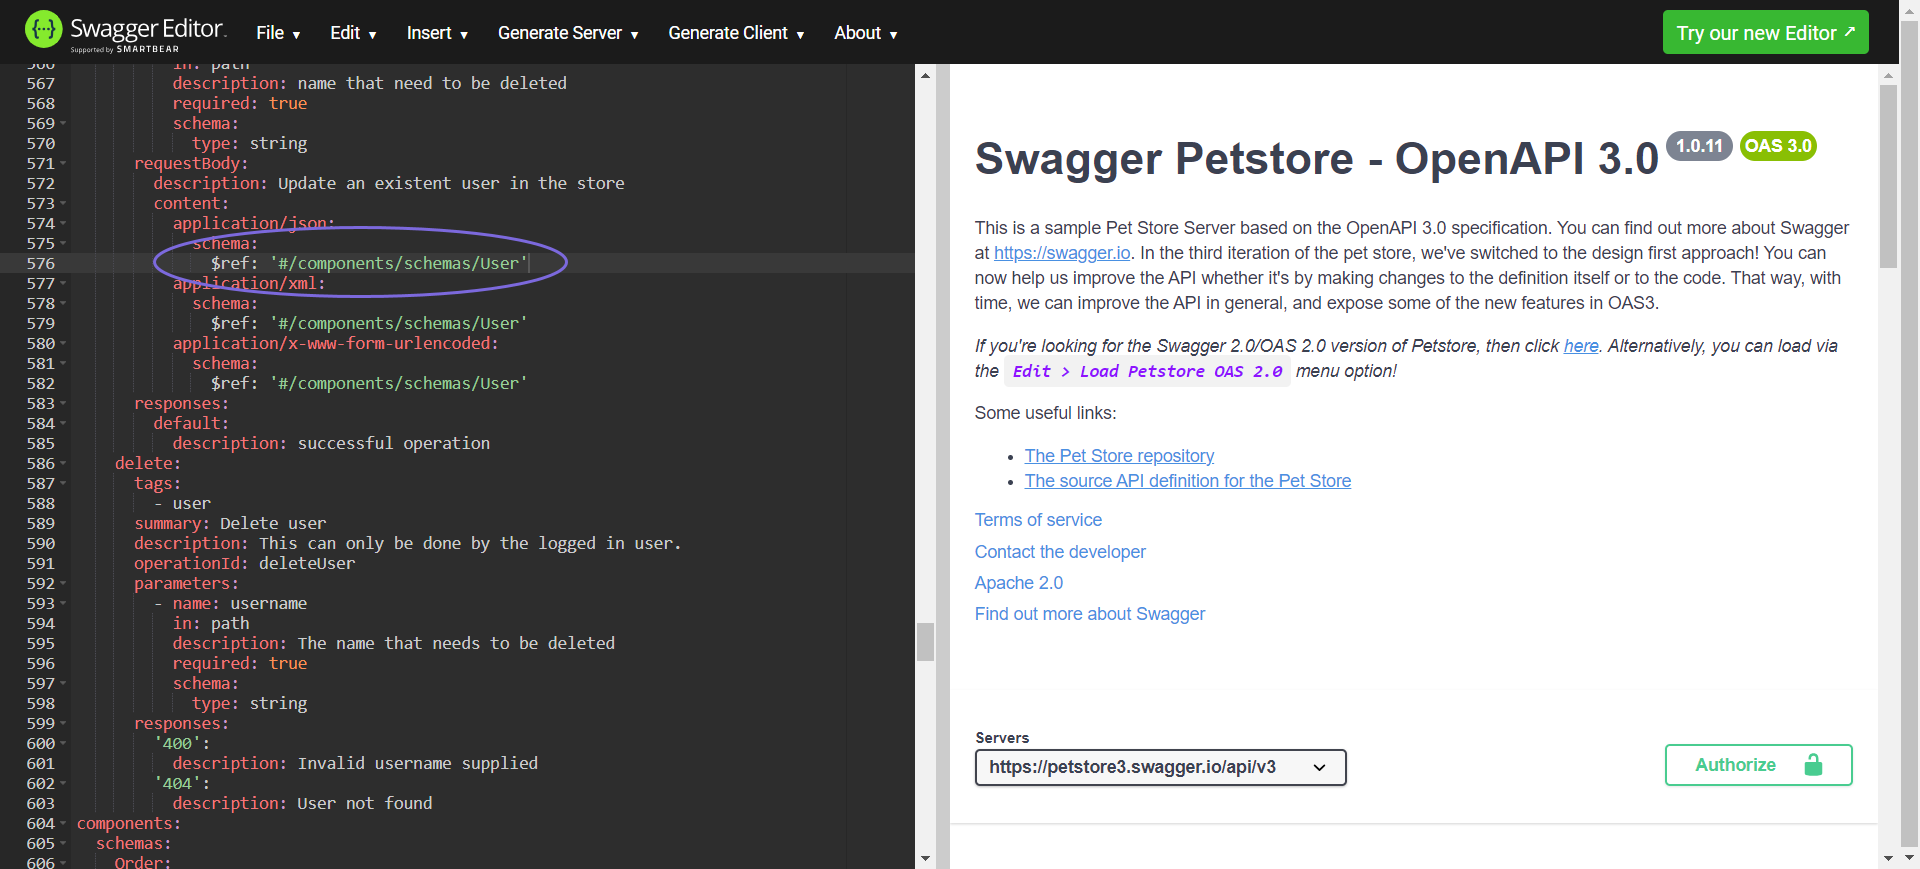
Any structural or syntax issues in the API, API Version, or Proxy specification file will give an error in the SnapLogic UI. You can change the specifications according to the error message in Swager Swagger editor or any other editor tool.
Entity | Error Messages for incorrect JSON or YAML (OAS2.0 or OAS3.0) Specifications | Description and Resolution | |||||||||||||||
|---|---|---|---|---|---|---|---|---|---|---|---|---|---|---|---|---|---|
API and Proxy |
|
|
Example Workflow
...
Create an API in the API Manager using upload option. Upload OAS 2.0 or 3.0 YAML or JSON API Specification file:
If the file contains an incorrect data or has a broken code structure then it gives an error:
You can edit the specification file in Swagger editor:
...