Creating a new Pipeline consists of the following activities:
Opening a Pipeline canvas in SnapLogic Designer
Configuring two or more linked Snaps
...
together to orchestrate a flow of data between endpoints
| Excerpt |
|---|
To create a new Pipeline: In Designer, click
on the [+] icon  to open the to open the
Configure Add New Pipeline dialog
. :
 Image Removed Image Removed Image Added Image Added
The
Configure Add New Pipeline dialog opens
.: 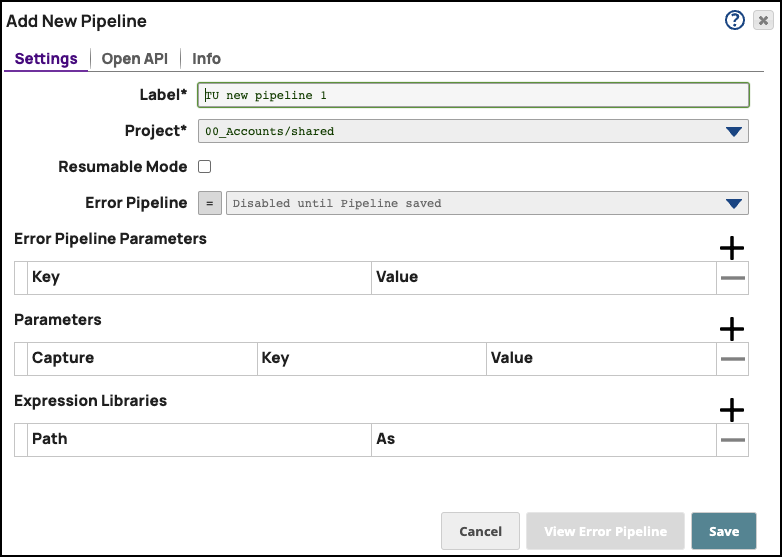 Image Added Image AddedModify the Label (
pipeline Pipeline name)
and project for the pipeline if necessary.
Unless otherwise noted, the The names of
any asset assets, projects, or project
is spaces are limited to UTF-8 alphanumeric characters and these
punctuation special characters: !"
#$%$%&'()*+,-.:;<=
>?@>@[
\]^_`{|}~.
If you
know of parameters to define for this pipeline, you can do so now or later through the Pipeline Properties dialog.
If you are using an expression library, you can add it now or later through the Pipeline Properties dialog.Click Save.
plan to save this Pipeline to a different Project from the one you last accessed, select the path to the target Project. To make this a Resumable Pipeline, select Resumable Mode. Optionally, click and add key/value pairs to define the following Pipeline Properties: Click Save. You now have a blank canvas
on which to build your
pipelinePipeline.
|
Next Steps
...
If you want to modify settings or add parameters, click to open the Edit Pipeline Properties dialog.
| Info |
|---|
You can always add and remove parameters for your Pipeline in Designer after the Pipeline is saved. |
|
Use the Snap Reference documentation to
...
do the following:
Determine the Snaps you
will need to use to build your Pipeline.
Gather
account information for Account information required to connect to your endpoints.
...
All Snap Packs and their Snaps feature a dedicated documentation page.
...
Related Content