In this article
...
In SnapLogic Manager, hover your cursor over the Project you want to export, and click
 the arrow. The Project menu appearsopens:
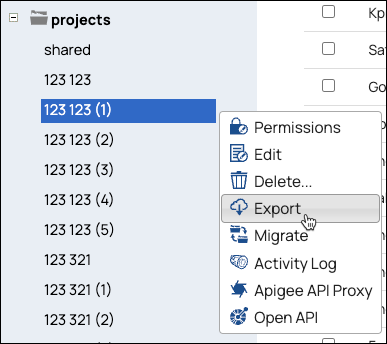
Click Select Export from the dropdown list. The Export <Project Space>/<Project Name> dialog appearsopens:
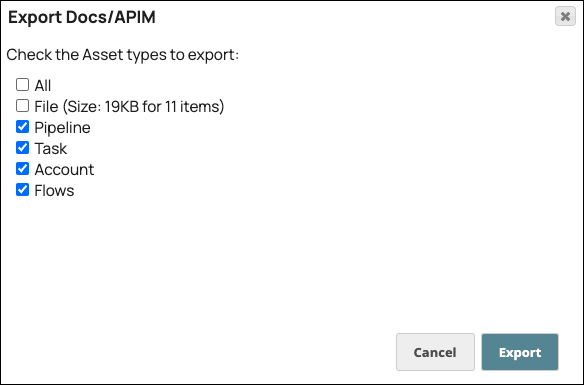
Select the Asset types that you want to export. Pipeline, Task, Account, and Flows options are selected by default. You can select All to export all assets or deselect any asset types from the project export.
Click Export to download the Project as a Zip file.
Import Projects
Known Issue
While importing a project with same name as an existing project and with the same assets tracked in Azure, the status for the updated assets is changed to Untracked.
...
In SnapLogic Manager, hover your cursor over the project space in which you want to import the project and click
. This opens the project dropdown.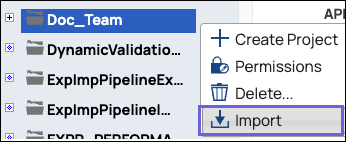
Click Import. This opens the Import Project dialog.Project Space to open the menu:
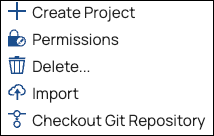
Select Import to open the Import Project dialog:
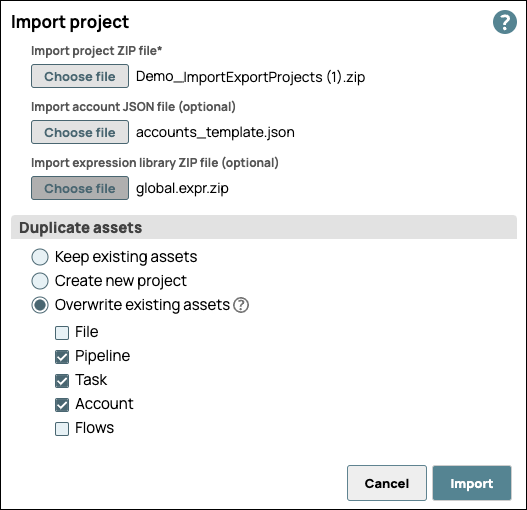
Click Choose File to upload the Project files:
Import Project Zip File*
Import Account JSON File (optional)
Import Expression Library Zip File (optional)
Select one of the following methods for handling duplicate assets within the project space or global
sharedfolder:Keep existing assets: Creates a new project and marks the duplicate imported assets with a number 1 at the end of the asset name.
Create a new project: Creates a new project with a number 1 at the end of the name and all assets from the import with their names intact. The Activity Log records the new project and/or pipeline and indicates that they are created by the import operation.


Overwrite existing assets: Allows you to select which assets (files, pipelines, tasks, accounts, and flows if applicable) to import and replaces any duplicate existing assets with the imported ones. The Activity Log records the new project and/or pipeline and indicates that they are created by the import operation.
When the file upload is complete, click Import. A confirmation message appears on the page, and the new project appears in the list of projects on the left.
You might need to do the following:Add files that are referenced if they were not a part of the project's export.
Edit the Tasks to select the Snaplex on which they must run.
...