On this Page
| Table of Contents | ||||
|---|---|---|---|---|
|
Problem Scenario
Taxonomy is the science of classifying organisms including plants, animals, and microorganisms. In September 1936, R. A. Fisher published a paper named "The Use of Multiple Measurements in Taxonomic Problems". In this paper, four measurements (sepal length, sepal width, petal length, and petal width) of 150 flowers are included. There are 50 samples of each type of Iris flowers: Iris setosa, Iris versicolor, and Iris virginica. The author demonstrated that it is possible to find good enough linear functions of measurements that can be applied to distinguish types of Iris flowers.
Description
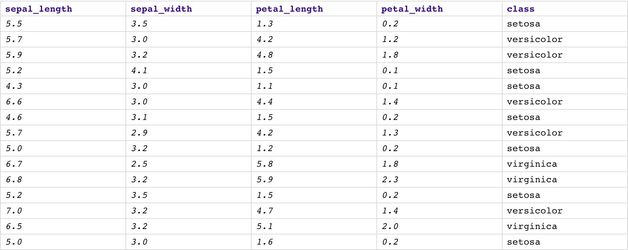
Almost 100 years have passed, Iris dataset is now one of the best-known datasets for people who study Machine Learning and Data Science. This dataset is a multiclass classification setting with four numeric features. The screenshot below shows a preview of this dataset, there are three types of Iris flowers: setosa, versicolor, and virginica. The numbers indicating the size of sepal and petal are in centimeters. More details about this dataset can be found here. If you are familiar with Python, you can also get this dataset from Sci-Kit Learn library as described here. We will use Logistic Regression algorithm to tackle this multiclass classification problem. We will also build the model and host it as an API inside the SnapLogic platform. If you are interested in applying Neural Networks on this dataset using Python inside SnapLogic platform, please go here.
The live demo is available at our Machine Learning Showcase.
Objectives
- Cross Validation: Use Cross Validator (Regression) Snap from ML Core Snap Pack to perform 10-fold cross validation with Logistic Regression algorithm. K-Fold Cross Validation is a method of evaluating machine learning algorithms by randomly separating a dataset into K chunks. Then, K-1 chunks will be used to train the model which will be evaluated on the last chunk. This process repeats K times and the average accuracy and other statistics are computed.
- Model Building: Use Trainer (Classification) Snap from ML Core Snap Pack to build the logistic regression model based on the training set of 100 samples; then serialize and store.
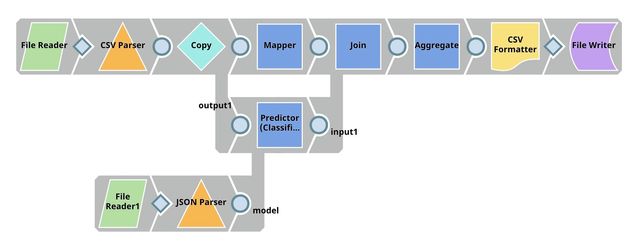
- Model Evaluation: Use Predictor (Classification) Snap from ML Core Snap Pack to apply the model on the test set containing the remaining 50 samples and compute accuracy.
- Model Hosting: Use Predictor (Classification) Snap from ML Core Snap Pack to host the model and build the API using Ultra Task.
- API Testing: Use REST Post Snap to send a sample request to the Ultra Task to make sure the API is working as expected.
...
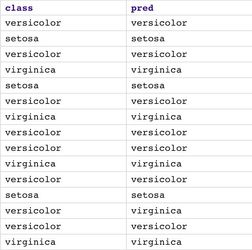
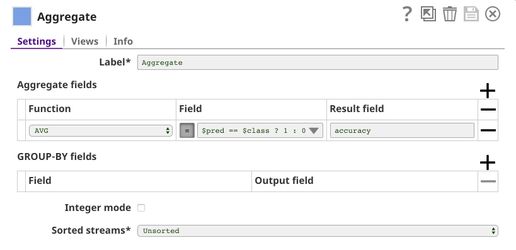
The predictions from the Predictor (Classification) Snap are merged with the real flower name (answer) from the Mapper Snap which extracts the $class field from the test set. The result of merging is displayed in the screenshot below (lower-left corner). After that, we use the Aggregate Snap to compute the accuracy which is 94%. The result is then saved using CSV Formatter Snap and File Writer Snap.
Model Hosting
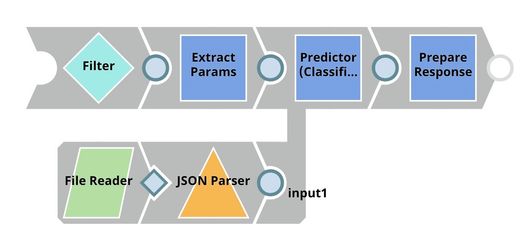
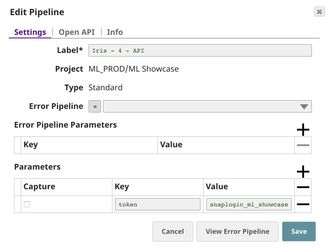
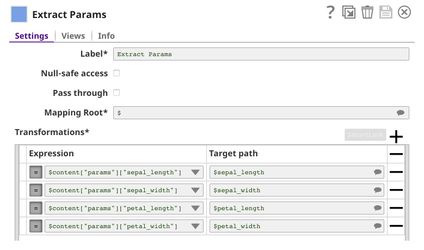
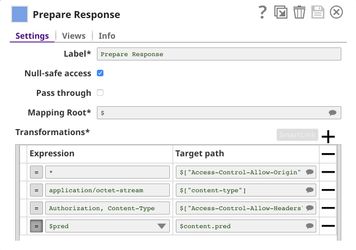
This pipeline is scheduled as an Ultra Task to provide a REST API that is accessible by external applications. The core components of this pipeline are File Reader, JSON Parser and Predictor (Classification) Snaps that are the same as in the Model Evaluation pipeline. However, we set Max output to 3 and select Confidence level. Instead of taking the data from the test set, the Predictor (Classification) Snap takes the data from API request. The Filter Snap is used to authenticate the request by checking the token that can be changed in pipeline parameters. The Extract Params Snap (Mapper) extracts the required fields from the request. The Prepare Response Snap (Mapper) maps from prediction to $content.pred which will be the response body. This Snap also adds headers to allow Cross-Origin Resource Sharing (CORS).
Building API
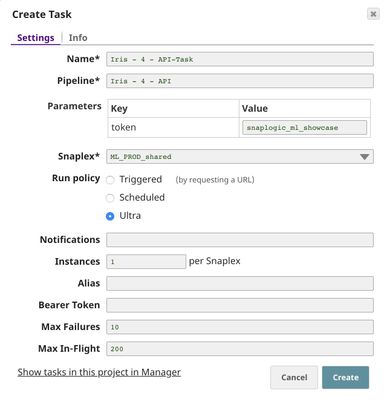
To deploy this pipeline as a REST API, click the calendar icon in the toolbar. Either Triggered Task or Ultra Task can be used.
Triggered Task is good for batch processing since it starts a new pipeline instance for each request. Ultra Task is good to provide REST API to external applications that require low latency. In this case, the Ultra Task is preferable. Bearer token is not needed here since the Filter Snap will perform authentication inside the pipeline.
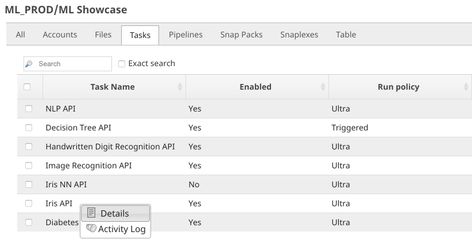
In order to get the URL, click Show tasks in this project in Manager in the Create Task window. Click the small triangle next to the task then Details. The task detail will show up with the URL.
API Testing
In this pipeline, a sample request is generated by the JSON Generator. The request is sent to the Ultra Task by REST Post Snap. The Mapper Snap is used to extract response which is in $response.entity.
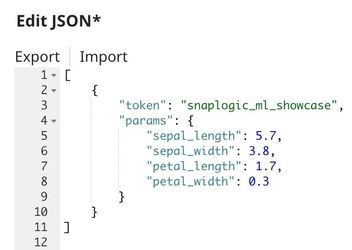
Below is the content of the JSON Generator Snap. It contains $token and $params which will be included in the request body sent by REST Post Snap.
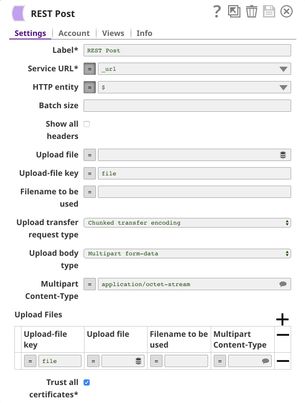
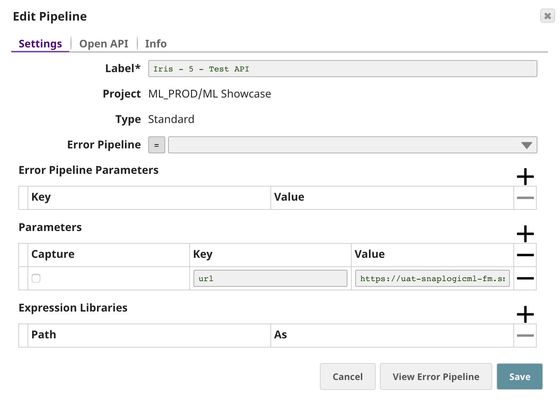
The REST Post Snap gets the URL from the pipeline parameters. Your URL can be found in the Manager page. In some cases, it is required to check Trust all certificates in the REST Post Snap.
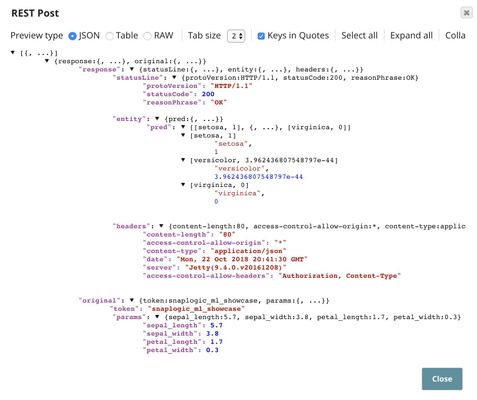
The output of the REST Post Snap is shown below. The last Mapper Snap is used to extract $response.entity from the request. In this case, the prediction is Iris setosa. Since we set Max output to 3 and select Confidence level, the prediction contains the confidence level of top 3 flower types. In this case, the model is pretty confident in setosa since the confidence level is 1 while it is almost 0 for versicolor and 0 for virginica.
Downloads
| Attachments | ||||||
|---|---|---|---|---|---|---|
|
