In this article
Overview
You can create an Ultra Task after you have created the Pipeline in SnapLogic Designer. You can create an Ultra Task in Designer or Manager. When you create an Ultra Task in Designer, the Pipeline is pre-selected when you open the Create Task dialog. When you create an Ultra Task in Manager, you must select a Pipeline to associate with the Task.
Creating a Task includes the following tasks and topics:
Creating an Ultra Task
- Open the Create Task dialog doing one of the two following methods:
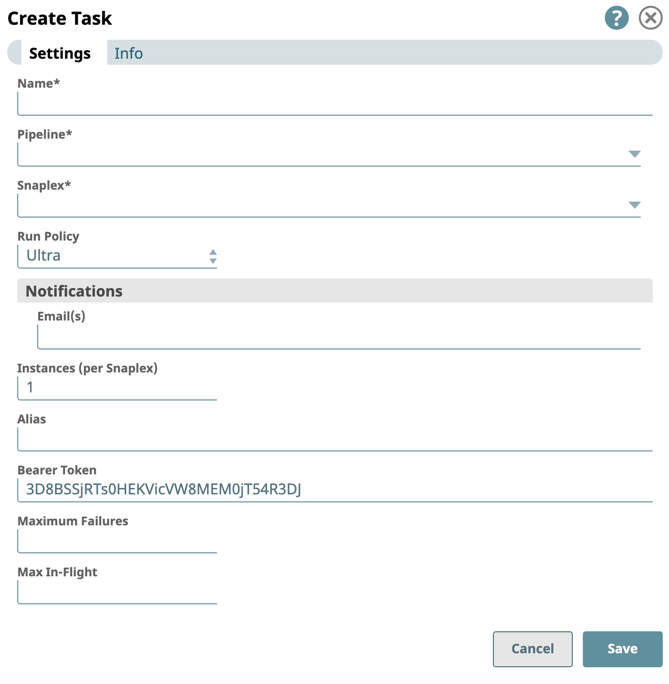
- In Designer, click to expand the toolbar, and click to display the drop-down menu, then select Task > Ultra Task to display the dialog:
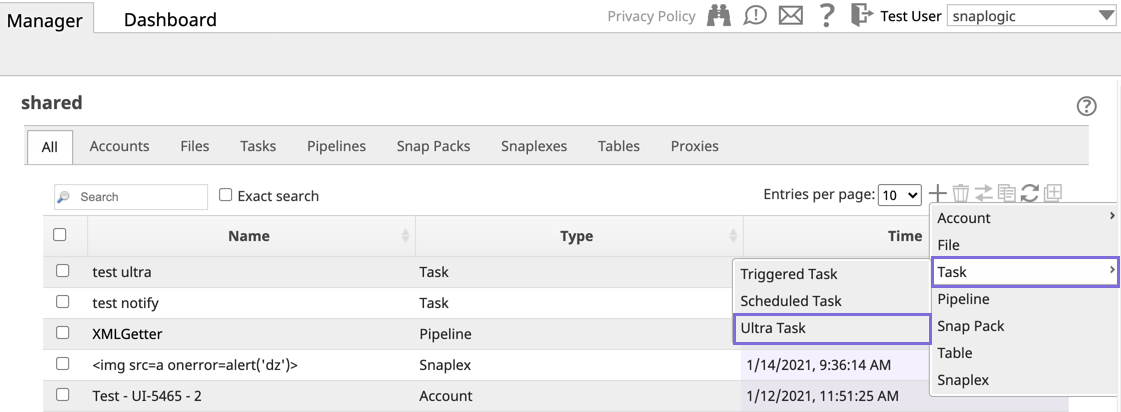
- In Manager, navigate to the target Project, click to display the drop-down menu, then select Task > Ultra Task to display the dialog.
- In Designer, click to expand the toolbar, and click to display the drop-down menu, then select Task > Ultra Task to display the dialog:
- In the dialog, make the following required selections:
Name. Enter a name for the Ultra Task. This name is used in the URL when the Pipeline has unconnected inputs/outputs.
Unless otherwise noted, the names of any asset or project is limited to UTF-8 alphanumeric characters and these punctuation characters !"#$%&'()*+,-.:;<=>?@[\]^_`{|}~.
Pipeline. Select the Pipeline to run from the Pipeline drop-down menu. This Pipeline is triggered when the Ultra Task is called. If applicable, edit any of the parameter values from the Pipeline.
- Snaplex. Select the Snaplex on which to run the Pipeline from the Snaplex drop-down menu. The Snaplex must have a FeedMaster associated with it.
- If applicable, modify the Configuration Options in the dialog window, and click Save.
- To enable the Ultra Task, navigate in Manager to the Project Folder where the Ultra Task resides, and complete the following substeps.
- Click the Tasks tab in the asset toolbar menu.
- Select the target Ultra Task, and click Enable.
- You can activate your Ultra Task through a variety of methods.
See Invoking Ultra Pipelines as Tasks for details about activating your Ultra Task.
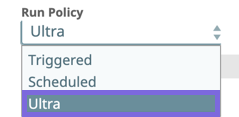
Once activated, the associated Pipeline is started on the Snaplex using the Ultra run policy that is specified in the Task dialog window. The Ultra Pipeline consumes messages from the FeedMaster and processes input documents. The Pipeline restarts automatically after the Ultra Task or the Pipeline itself is modified and saved—including known child Pipelines and accounts that are not computed dynamically using an expression.
Viewing Ultra Task Details
After you create and enable your Ultra Task, you can view details about the Task.
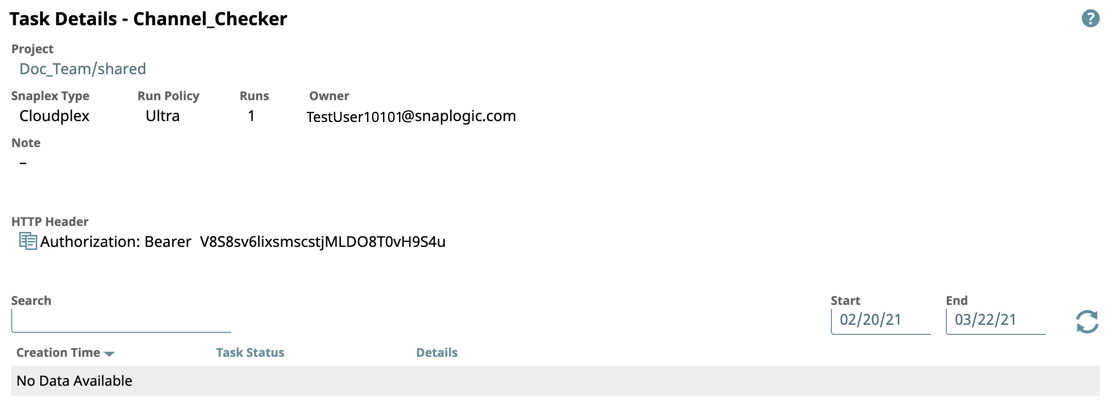
- Open the Task Details page for your Ultra Task by clicking View Details:
- On the Task Details page, view Pipeline execution information for any instance by clicking Run Details.
- Navigate to the Dashboard Pipeline Wall to monitor the executions details about your Ultra Task.
Ultra Task Configuration Options
You can configure the following settings for your Ultra Task. Each field has a default value, except where indicated.
Notifications
You can create email notifications based on the status of the Scheduled Task. If your Org supports Slack notifications, you can add Slack channels or recipients. To add recipients for Task notifications:- In Notifications, enter each recipient's email address, separated by commas.
- If Slack notifications are configured for your Org, then the following fields support dropdown lists containing your Slack channels and users. For each field, you can also type to invoke suggested recipients in the field.
- Direct Message(s). Select Slack recipients from the dropdown list.
- Channels. Select Slack channels as recipients from the dropdown list.
- Select the status event for which Notifications are sent from the When Task has selector:
- Started. The Task is activated.
- Completed. The Task is completed.
- Failed. The associated Pipeline did not execute.
- Stopped. The associated Pipeline has stopped abruptly and the Task is no longer running.


