In this article
Overview
You can create application entries and subscribe to APIs in the Developer Portal.
An application entry in the Developer Portal is a declaration of your intent to use one or more of the APIs. The application entry holds the Client ID and Client Secret that the server needs to identify your application as an approved consumer of the APIs that it is subscribed to.
New subscriptions must be approved by an Org admin in the Applications tab of the Subscription Manager.
Create an Application Entry
In the Developer Portal, go to the Applications page, and click Create New Application.

In the Create Application dialog, enter the Application Name, and select Web or Mobile in the Type field. You can also add a description.

If you want to subscribe to an API, click Create and Continue. This will open the Create Subscription dialog.
If not, click Create and Exit to create your application and exit the Create Application dialog.
Create Subscription
In the Create Subscription dialog, use the API Search field to find an API you want to subscribe to and click the API card to select it.
After selecting all the APIs you want, click Continue.
NOTE: You can subscribe only to APIs that allow subscription.
In the Subscription tab, you can add an optional comment to your selected APIs. Click Continue.

In the Register tab, you will see a summary page of your application and the APIs you selected.
Click Register to submit your application and subscription request.
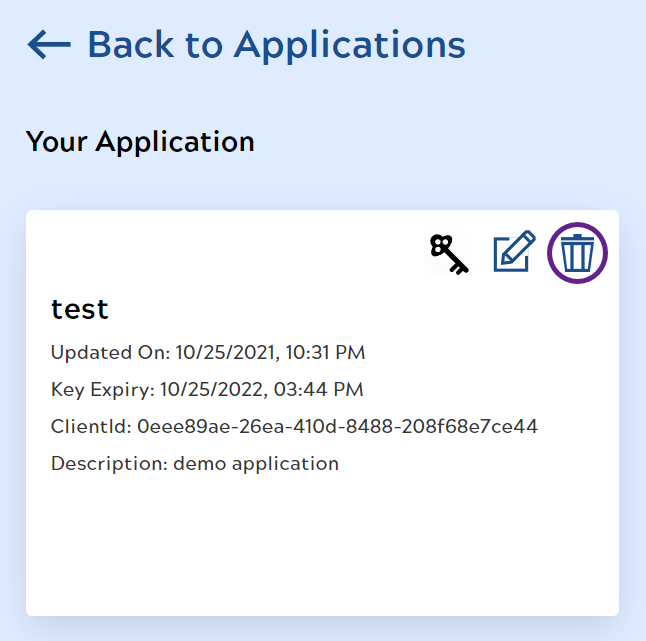
On the Applications page, applications with pending or approved API subscriptions have a key icon, in addition to the edit and delete icons.

To show the status of the subscription, click on the application card. The status can be Active, Revoked, or Pending.

Edit an Application
In the Developer Portal, go to the Applications page, click the edit icon to edit your application.
You can change the Application Name, Type, or Description.

You can also manage your Client Secret.
Click the copy icon (
 ) under Client Secret to copy it to your clipboard. Your subscription must already be approved.
Click Refresh Secret to increase the expiration date of your secret key by a year.
Click Regenerate Secret to generate a new secret key and refresh the expiration. Regenerating the secret key updates the secret key of all subscriptions associated with this application. The new secret key will automatically be saved whether you click Save or not.
Click Save.
Access the API Using Your Application’s Client Secret
After your API subscription is approved, you can use your application's client secret as your API Key to access an approved API.
Edit your application to copy the Client Secret to your clipboard.
When you configure your application to send a request, add the following Authorization request header:
Authorization: token <client secret>
Replace
<client secret>with the value stored in your clipboard.
IMPORTANT: This must be the only Authorization request header in your application.
Learn more about the Authorization request header.
Delete an Application
Click the delete icon to remove an application and all its API subscriptions. Click Confirm to delete the application.