On this Page
Snap type: | Write | |||||||
|---|---|---|---|---|---|---|---|---|
Description: | This Snap updates an asset with the information from another asset of the same type. | |||||||
| Prerequisites: | [None] | |||||||
| Support and limitations: | Works in Ultra Task Pipelines. | |||||||
| Account: | Accounts are not used with this Snap. | |||||||
| Views: |
| |||||||
Settings | ||||||||
Label | Required. The name for the Snap. You can modify this to be more specific, especially if you have more than one of the same Snap in your pipeline. | |||||||
Asset type | Required. Select the type of asset that you want to update from the following options:
Default value: ACCOUNT. | |||||||
Asset path | Required. Absolute path for the asset in the form of: <org>/<project_space>/<project>/<asset> Examples: /myorg/Engineering/Status/LatestDefects Default value: [None] | |||||||
Snap execution | Select one of the three modes in which the Snap executes. Available options are:
| |||||||
Starting from version 4.27, Metadata Snaps validate Pipeline fields against the schema. If a SnapLogic Create Snap or a SnapLogic Update Snap would modify an existing Pipeline schema, an error is thrown to avoid affecting downstream processes that depend on the same Pipeline schema.
Examples
Updating a Snaplex Programmatically
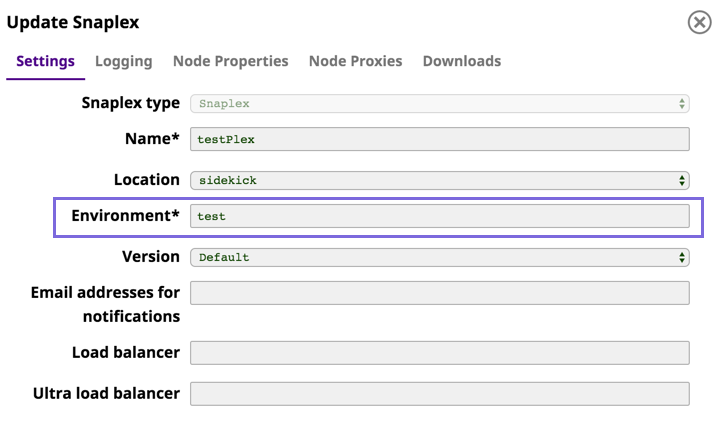
This simple example demonstrates how you can use the SnapLogic Metadata Update Snap to programmatically update Snaplex information.

The Snaplex for this Pipeline is called Test. Because other Snaplexes might share the same environment name, you might want to rename the Environment.
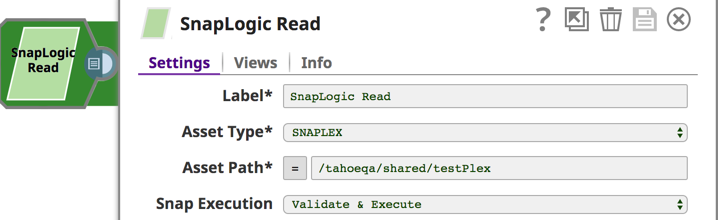
In the SnapLogic Read Snap, set the Asset Type to Snaplex and specify the path.
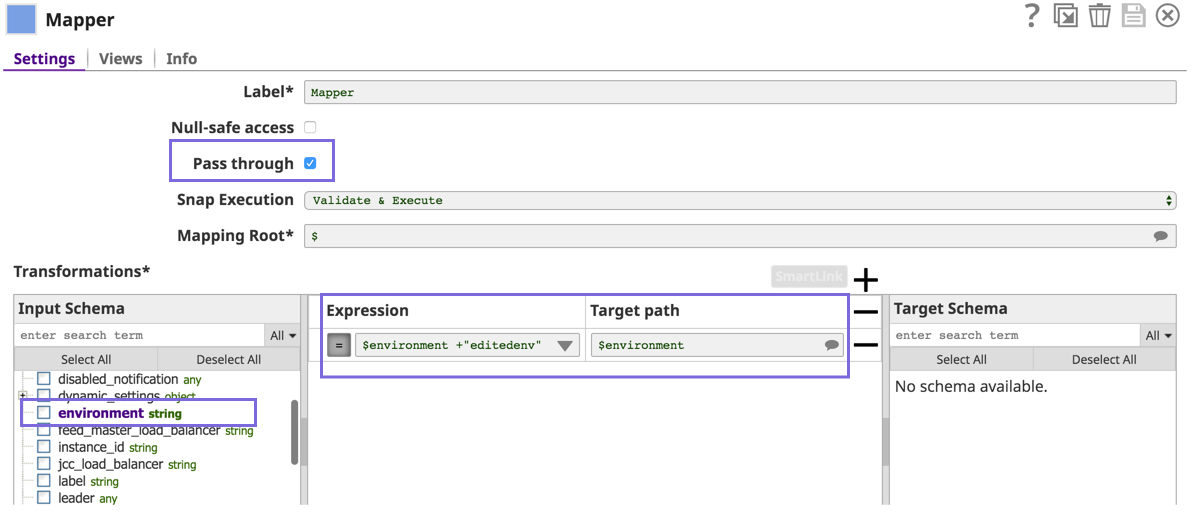
In the Mapper Snap, you select the Input Schema element environment, and enter the expression to change the Environment name. Note that the Pass through option is selected.
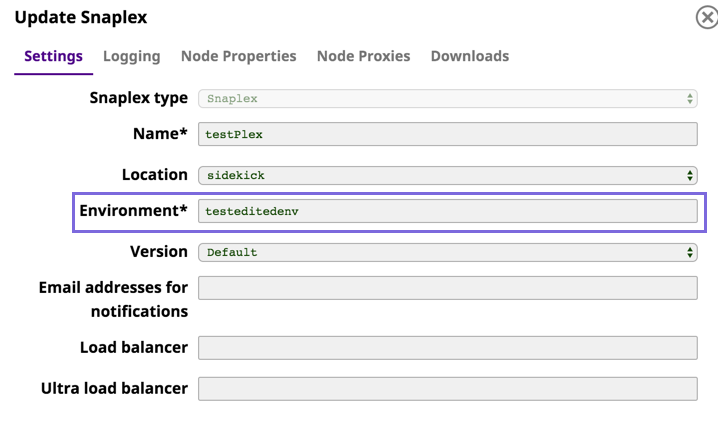
In the Update Snap, you write the changes to the Snaplex and specify its file path.

When you go to the target folder in SnapLogic Manager, you can see that the Snaplex Environment name is changed.
Managing Access Permissions to Projects and Project Spaces Programmatically
This example demonstrates how you can use the SnapLogic Metadata Update Snap to programmatically manage user access or group access permissions to a project or project space.
Updating User and Group Access Permissions to a Project or Project Space Programmatically
This example helps you create a pipeline which will, when executed, update the access permissions of a specific user or group to a project or project space.
Download and open the Permissions_Updater sample pipeline and review its structure to better understand this example.
This task primarily involves updating the "acl" (access control list) values associated with the project concerned. To do so, you need to:
- Read the project's existing permissions information.
- Append new permissions information.
- Update the project with the new permissions.
You can perform all these tasks by creating a permissions manager pipeline. To create a permissions manager pipeline:
- Create a project and add a pipeline to the project.
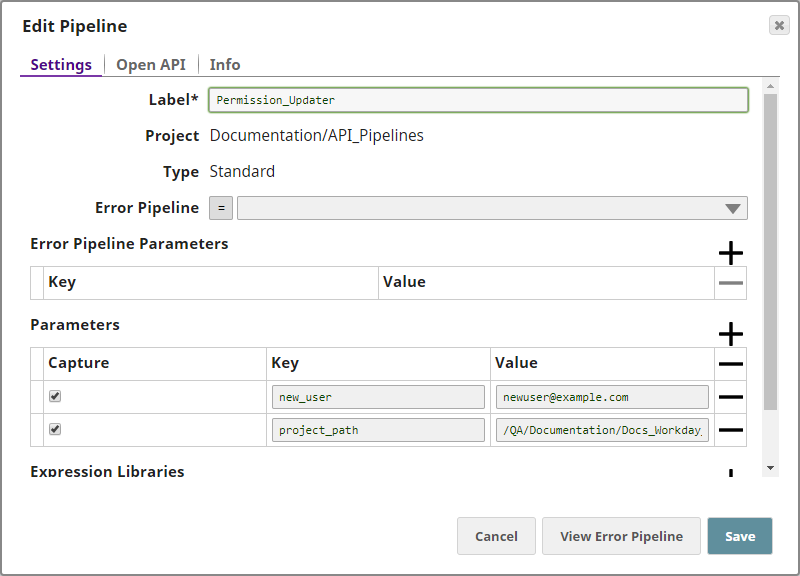
Now that your pipeline is created, you need to specify the variables–and corresponding values–that you plan to use in the pipeline Snaps. In this scenario, you have two variables: the email ID of the user or group whose permissions you need to specify, and the project or project space to which you want to grant access. To specify these variables: - Click the
 button on the Pipeline Toolbar to display the Pipeline Properties popup.
 - Update the Parameters fieldset of the Pipeline Properties popup as follows:
- Declare a variable that will contain the new user's email ID.
- Key: new_user
- Value: <Email ID of the new user / group>
- Declare a variable that contains the path to the project that you want to update.
- Key: project_path
- Value: <Path to the project / project space that you want to update. Structure: /<organization>/<project_space>/<project_name>
- Declare a variable that will contain the new user's email ID.
- Save your changes and close the popup.
You have now listed out the email ID of the user / group whose permissions you want to update, and you have identified the project / project space on which these permissions must be applied. You now add a Snap that will read the identified project's existing user permissions. To do so: - Add a SnapLogic Read snap to the pipeline and update it using the following details:
- Asset Type: PROJECT
- Asset Path: (Click the
 button before adding the value.) _project_path. This is a reference to the pipeline parameter that we created in Step 3 above.
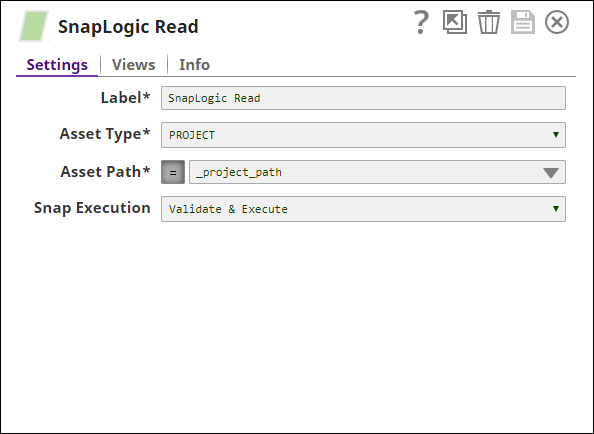
When this Snap is executed, it retrieves all the data related to the project / project space, including its permission details.
You now need to append new permissions to the existing ones. To do so: - Add a Mapper Snap to the pipeline and update the following fields:
Expression: Enter the following expression:
This expression contains the new permission values that you want to add under the "acl" key in the project. Depending on the actual permissions you want to assign to the user, remove 'R', 'W', or 'X'.
- Target Path: $acl
Save your changes and close the popup.
You can see in the screenshot above that while the Input preview data field lists only one set of permissions, the Output preview data lists two permission sets. The second one is the new permission set added.
You now have all the details needed to update the project properties retrieved using the SnapLogic Read Snap. To update the project:
- Add a SnapLogic Update Snap to the pipeline and update the following fields:
- Asset Type: PROJECT
- Asset Path: (Click the
 button before adding the value.) _project_path
Save your changes and close the popup.
Once this Pipeline is executed, the project located at _project_path will be updated with the revised permissions specified in the Mapper Snap in Step 5 above. You can now flexibly update the properties of any project / project space from the same pipeline by changing any of the following values:
| Location | Variable | Description |
|---|---|---|
| Pipeline Parameters | new_user | The email ID whose permissions need to be managed. |
| project_path | The path of the project / project space to which you want to assign permissions. | |
| Mapper Snap | 'R','W','X' | The permissions you want to grant to the user defined in new_user. |
Updating Access Permissions of Multiple Users or Groups to Multiple Projects or Project Spaces Programmatically
This example helps you create a pipeline which will, when executed, update the access permissions of multiple users or groups to multiple project spaces.
Download and open the Multiple_Permissions_Updater ZIP file and review its structure to better understand this example.
This task primarily involves updating the "acl" (access control list) values associated with the project space concerned. To do so, you need to:
- List out the various users and groups to whom you want to apply new permissions, along with the projects or project spaces on which these permissions are applicable.
- Read each project's existing permissions information.
- Append the new permissions.
- Update the projects with the new permissions.
You can perform all these tasks by creating:
- A parent pipeline that takes a CSV file containing user email IDs and project permission details as input, and
- A child pipeline that applies the access permissions received from the parent pipeline.
Creating the Parent Pipeline
To create the parent pipeline:
- Add a CSV Generator Snap and add user details and associated project permissions as shown below:
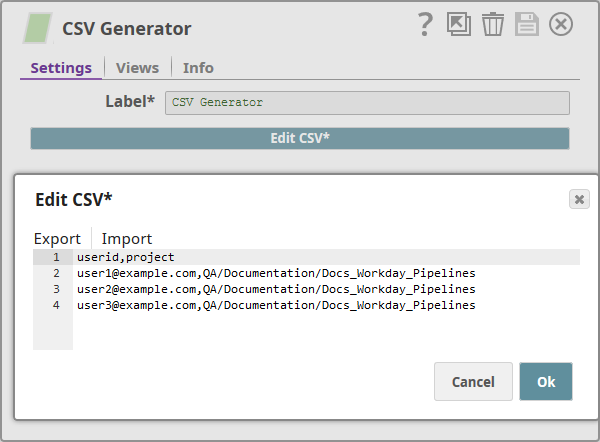
For an example of the CSV data, see the permissions.csv file in the ZIP file you downloaded. - Add a CSV Formatter and a CSV Parser Snap. These Snaps read the CSV data and prepares it for use in the downstream Snap.
- Add a Pipeline Execute Snap and configure it as shown below:

Basically, your configurations trigger a child pipeline called Permission_Updater and pass user and project information from the input CSV file to the child pipeline. - Save the pipeline.
Creating the Child Pipeline
- Create a project
- and add a pipeline
- to the project.
Now that your pipeline is created, you need to specify the variables–and corresponding values–that you plan to use in the pipeline Snaps. In this scenario, you have two variables: the email ID of the user whose permissions you need to modify / create, and the project space to which you want to grant access. To specify these variables: - Click the button on the Pipeline Toolbar to display the Pipeline Properties popup.
- Update the Parameters fieldset of the Pipeline Properties popup as follows:
- Declare a variable that will contain new users' email IDs
- Key: new_user
- Value: <Email ID of the new user>
- Key: project_space_path
- Value: <Path to the project space that you want to update. Structure: /<organization>/<project_space>
The data in the Values fields are actually placeholders, placed there because Value is a mandatory field. The actual user and project data comes in from the parent pipeline.
- Declare a variable that will contain new users' email IDs
- Save your changes and close the popup.
You have now configured the new pipeline to take user and permissions input from the parent pipeline. You now add a Snap that will read each project's existing user permissions. To do so: - Add a SnapLogic Read snap to the pipeline and update it using the following details:
- Asset Type: PROJECT (You do not need to change this value even if you are updating permissions for project spaces.)
- Asset Path: (Click the button before adding the value.) _project_path. This is a reference to the pipeline parameter that we created in Step 3 above.
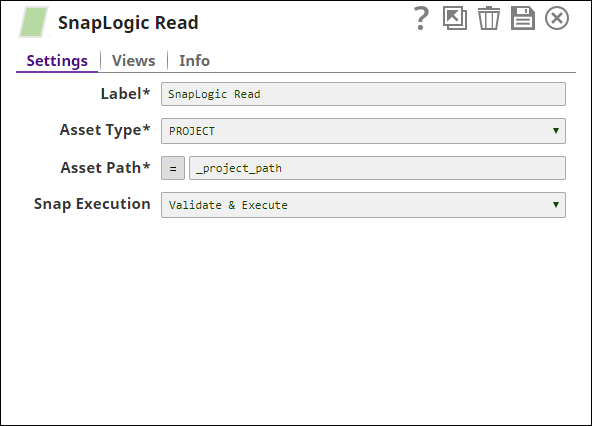
When this Snap is executed, it retrieves all the data related to each project listed out in the parent pipeline CSV file, including its permission details.
You now need to append new permissions to the project. To do so: - Add a Mapper Snap to the pipeline and update the following fields:
Expression: Enter the following expression:
This expression contains the new permission values that you want to add under the "acl" key in each project / project space. Depending on the actual permissions you want to assign to the user / group, remove 'R', 'W', or 'X'.
- Target Path: $acl
Save your changes and close the popup.
You can see in the screenshot above that while the Input preview data field lists only one set of permissions, the Output preview data lists two permission sets. The second one is the new permission set added.
You now have all the details needed to update the project properties received from the parent pipeline. To update each project space with the revised permission details:
- Add a SnapLogic Update Snap to the pipeline and update the following fields:
- Asset Type: PROJECT
- Asset Path: (Click the button before adding the value.) _project_path
Save your changes and close the popup.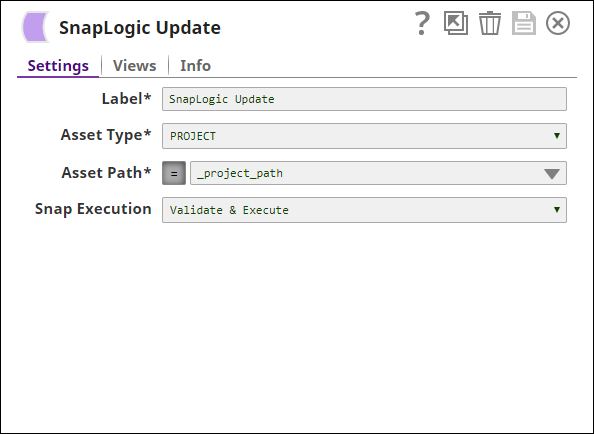
Once this pipeline is executed, each project located at _project_path will be updated with the revised permissions specified in the Mapper Snap in Step 5 above. You can now flexibly update the properties of any project from the same pipeline by changing any of the following values:
| Location | Variable | Description |
|---|---|---|
| Pipeline Parameters | new_user | The email ID whose permissions need to be managed |
| project_path | The path of the project to which you want to assign permissions | |
| Mapper Snap | 'R','W','X' | The permissions you want to grant to the user defined in new_user |
Enable/Disable a Task using SnapLogic Update
In this example, you create a Pipeline that enables or disables a Task.
Download this Pipeline.
For this example, you create a sample Task Pipeline that writes today's date to a file in the SnapLogic database. You then make it available as a Task. For details on creating Tasks, see the Tasks page.
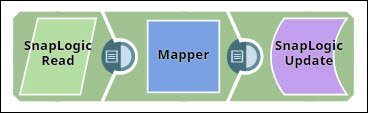
You now design a Pipeline that can change the status of the Task you created above. This Pipeline comprises the following Snaps:
- SnapLogic Read: Reads the asset to be updated; in this case, a task.
- Mapper: Updates the task's properties and passes the updated information to the downstream Snap.
- SnapLogic Update: Updates the Task read by the SnapLogic Read Snap using the Task details received from the Mapper Snap.
You configure the Snaps as follows:
- You configure the SnapLogic Read Snap to read the Task you created in the beginning:
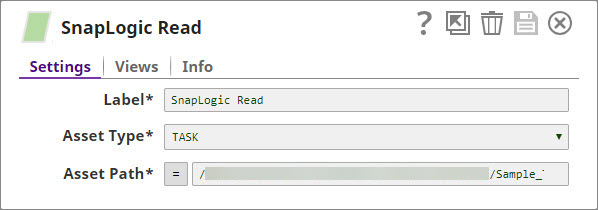
The Snap reads the target Task and offers its details as input to the Mapper Snap. - You configure the Mapper Snap to update the parameters.enabled attribute of the Task to false. You also instruct the Snap to pass the input data over to the output
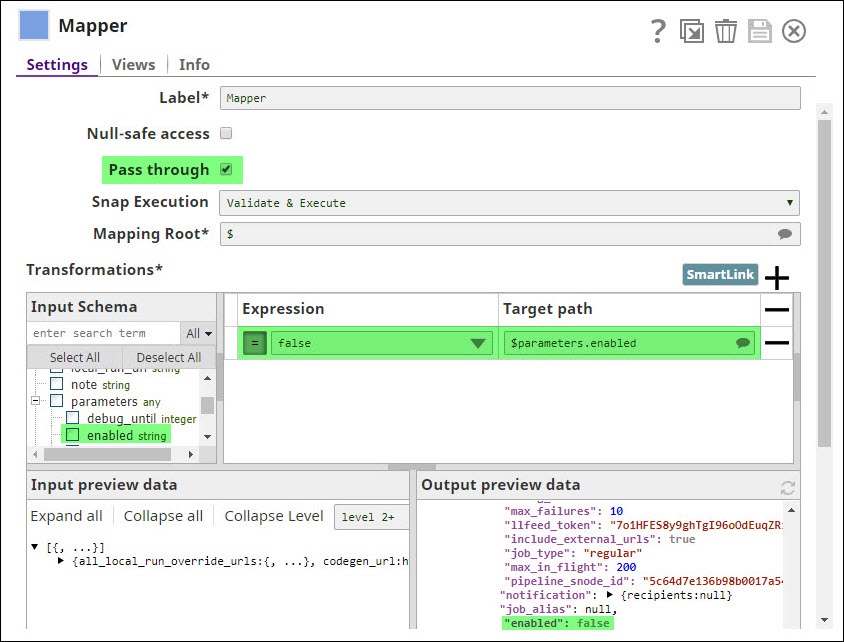
The Task parameter enabled is now set to false. - Use the SnapLogic Update Snap to change the task's properties using the updated details.
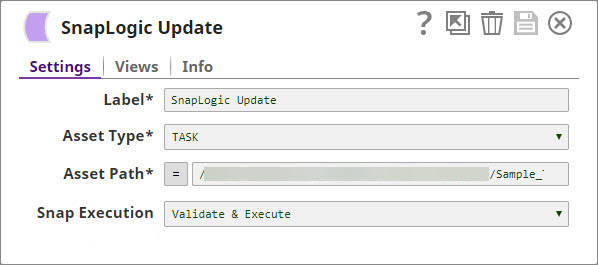
This Snap uses the output of the Mapper Snap to update the target task's properties.
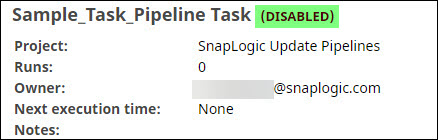
To verify whether the Task has been updated as expected, navigate to the project that contains the Task in SnapLogic Manager, click the ![]() icon adjacent to the Task, and click Details.
icon adjacent to the Task, and click Details.
Download this Pipeline.
Downloads
Important steps to successfully reuse Pipelines
- Download and import the Pipeline into SnapLogic.
- Configure Snap accounts as applicable.
- Provide Pipeline parameters as applicable.