In this article
What is an Error Pipeline?
A Pipeline that you can create specifically for handling errors—it processes error documents produced by other Pipelines in your environment. The Error Pipeline runs even if errors are not encountered in the Snaps from the main Pipeline.
Benefits of an Error Pipeline
- Allows you to write the errors of all your Pipelines (in production) to a single document for ease in resolving those errors.
- Allows you to standardize error handling across your Pipelines.
Handling Errors
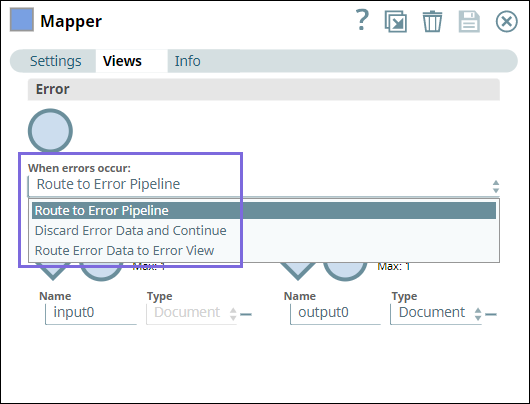
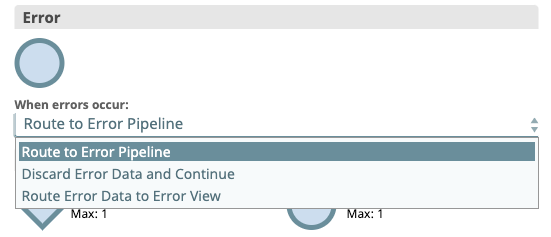
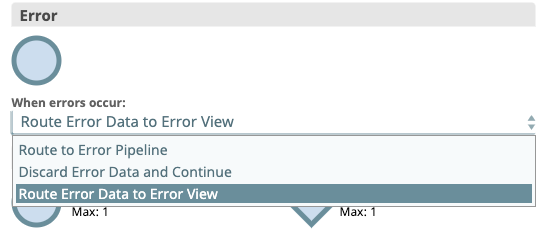
You can configure the error view in your Snaps to handle errors in one of the following ways:
- Route to Error Pipeline: Select this option to route the errors to an Error Pipeline.
- Discard Error Data and Continue: Discards errors if any and continues with the Snap execution.
- Route Error Data to Error View: Routes the error data to an error view without stopping the Snap execution.
Creating an Error Pipeline
You can create an Error Pipeline the same way as you create your regular Pipeline. See Creating a Pipeline for more information. However, an Error Pipeline must have a single unlinked document input view. The error documents from the main Pipeline are sent into this view.
Error Pipelines for Ultra Pipelines
When creating an Error Pipeline for an Ultra Pipeline with unlinked views, your Ultra Pipeline must have an unlinked output view and produce output documents that can be used as the response to the original request.
Adding an Error Pipeline to a Parent Pipeline
- Open the main Pipeline and click the Edit Pipeline Properties
 icon. By default, the dialog opens the Settings tab.
 - On the Error Pipeline list, select the Error Pipeline to which you want to route the errors.
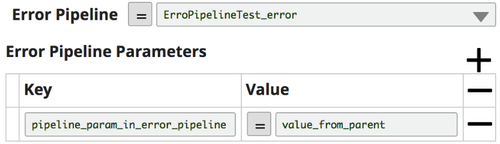
- Enter the Error Pipeline Parameters (key-value pairs) to evaluate and pass to the Error Pipeline.
- Click Save to save the Pipeline for reuse. A confirmation prompt appears, informing you that default error behavior will change. Click Yes to confirm and No to close the dialog.
You can invoke the Error Pipeline from any given Pipeline from the same dialog (similar to the way that child Pipelines are invoked).
If you remove an Error Pipeline from the main Pipeline without replacing it with another one, the main Pipeline reverts to the default error behavior.
Viewing the Error Pipeline from a Main Pipeline
- In the main Pipeline, click the Edit Pipeline Properties
 icon to open the Edit Pipeline dialog.
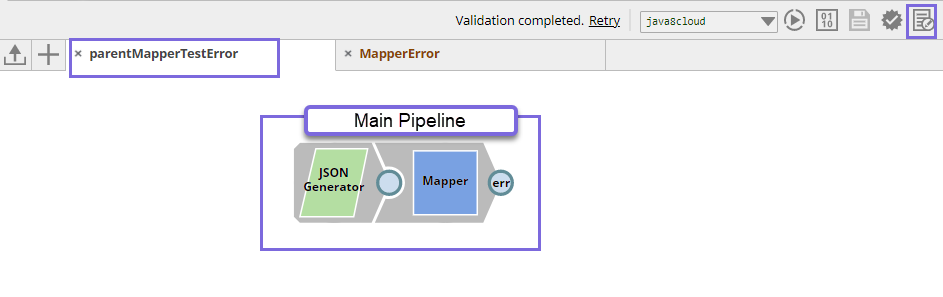
- Click View Error Pipeline.
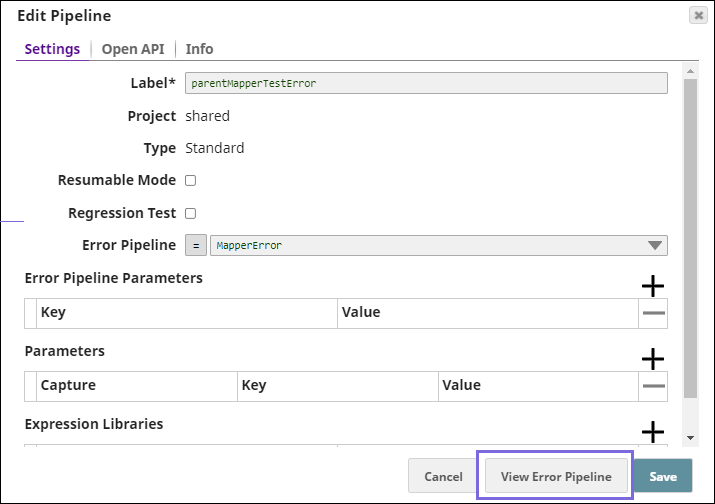
The selected Pipeline is displayed.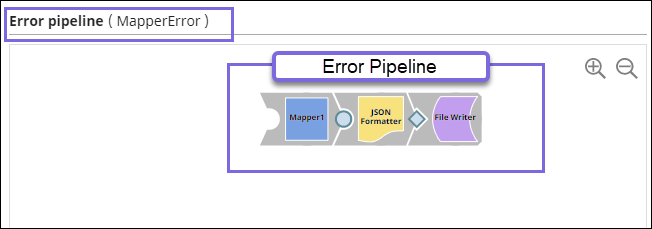
Linking Output to Error Pipeline
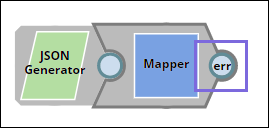
On the Snap's context menu, click Link Output to Error Pipeline. The Snap displays err in the Snap's connector. Remember to have a single unlinked document input view to allow error documents from the main Pipeline to be sent to this view.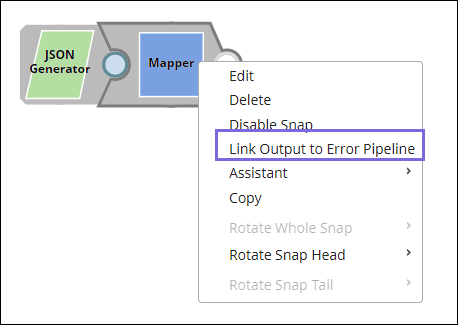
Verifying the Snap Configuration
Verify all the Snaps in the Pipeline are configured. Snaps with a default Error View are automatically updated when you add an Error Pipeline, but you can still add a custom Error View to a Snap.
- Select Edit from the Snap context menu.
- Verify that Route to Error Pipeline is selected.
Snaps are automatically updated when you add an Error Pipeline, but you can still add a custom Error View to a Snap.
Adding Output to an Error Pipeline
If you need to customize an error document before sending it to the Error Pipeline, you can change the Snap to Route Error Data to Error View and then add any Snaps needed to do the customizations.
After you add the Snaps, you can then connect their unlinked output views to the Error Pipeline by selecting Route to Error Pipeline from the Snap's context menu.
When you link a Snap output view to the Pipeline Error View, the Integration Assistant is disabled.
Example
Triggering an Error Pipeline From the Main Pipeline
Having Error Pipelines is an efficient way to handle error data of your Pipelines, which enables you to read the errors in a single log and take further action.
This is typically a two step process:
Creating and configuring the main Pipeline.
Creating and configuring the Error Pipeline.
Creating the Main Pipeline
Create a simple Pipeline containing the JSON Generator and Mapper Snaps.

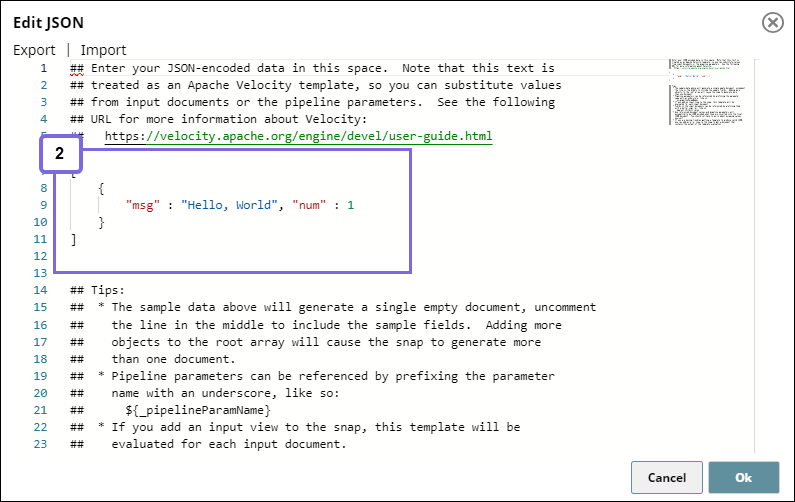
- Configure the JSON Generator Snap with the message Hello World and number 1.
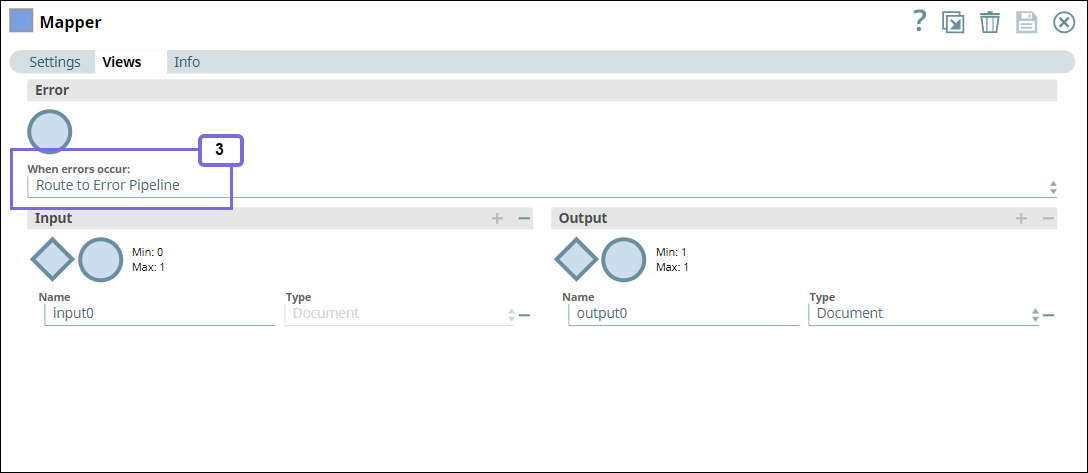
- Configure the Mapper Pipeline as follows. We intentionally specify the $status in the Mapping table, wherein there is no status object in the input data, so that the Snap results in an error. We configure the Snap to Route to Error Pipeline under Views tab.

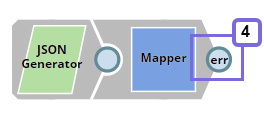
- Link the output from the Error Pipeline to this Pipeline. Right-click the Mapper Snap’s context menu and select, Link Output to Error Pipeline. You can see
errin the Mapper connector.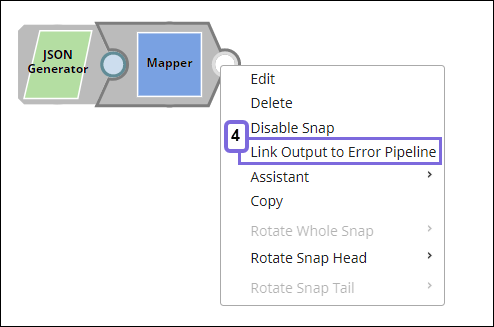
- Click the Edit Pipeline Properties
 icon in the status bar of the Main Pipeline, and select the Error Pipeline that you want to link, and click Save.
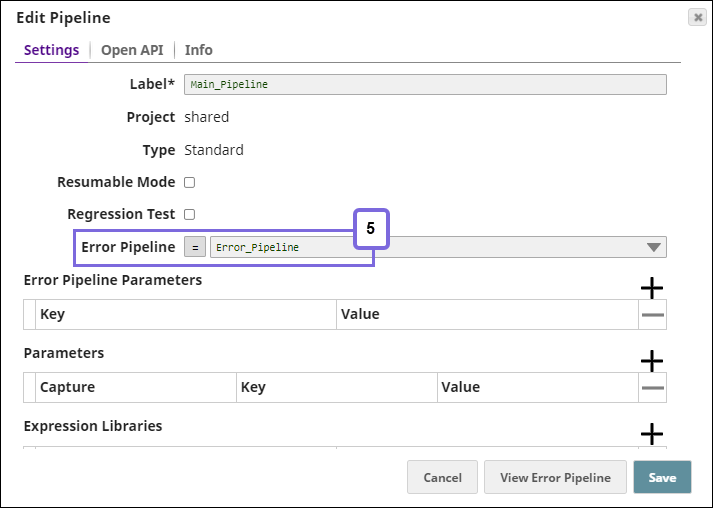
Creating and configuring Error Pipeline
Create a Pipeline containing the Mapper, JSON Formatter, and File Writer Snaps.
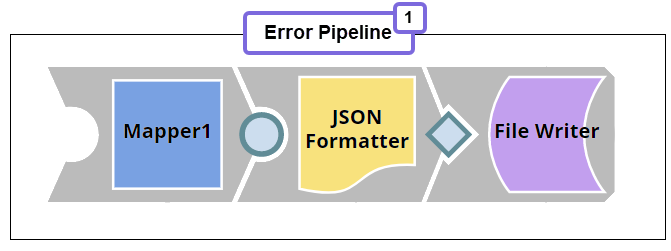
- Configure the Mapper Snap to gather data from the main Pipeline.
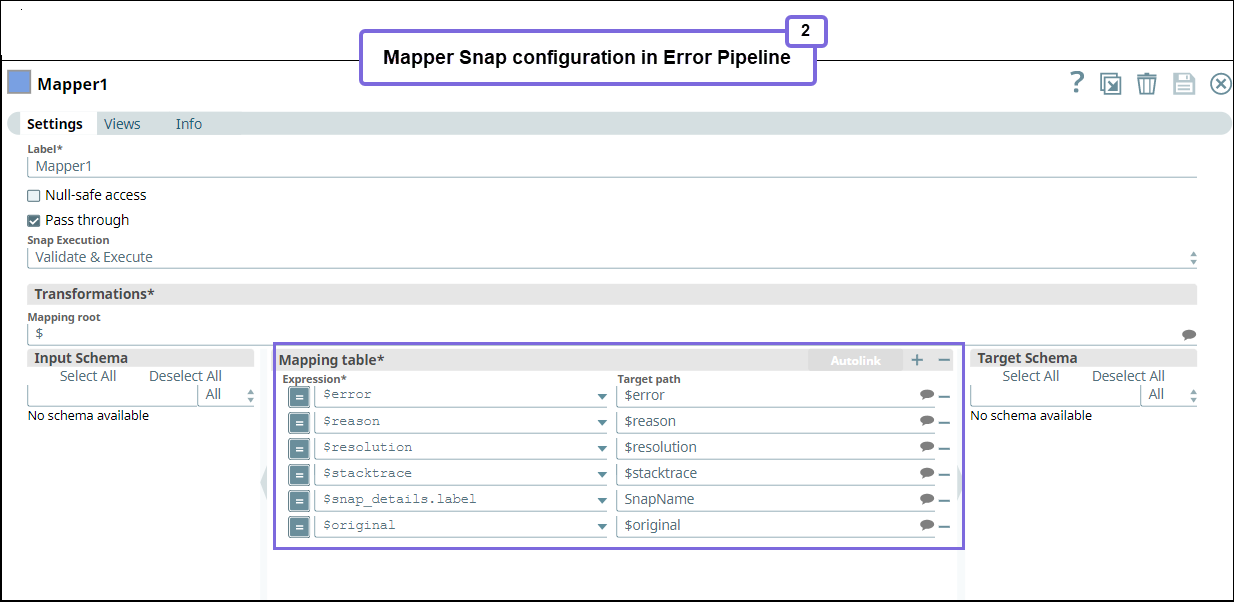
Next, we connect a JSON Formatter Snap to the Mapper Snap to format the document output into JSON format and write the file to SL database using the File Writer Snap.
Now we have completed the configuration of both the Main and Error Pipelines.Run the Main Pipeline to route the error data the Error Pipeline.
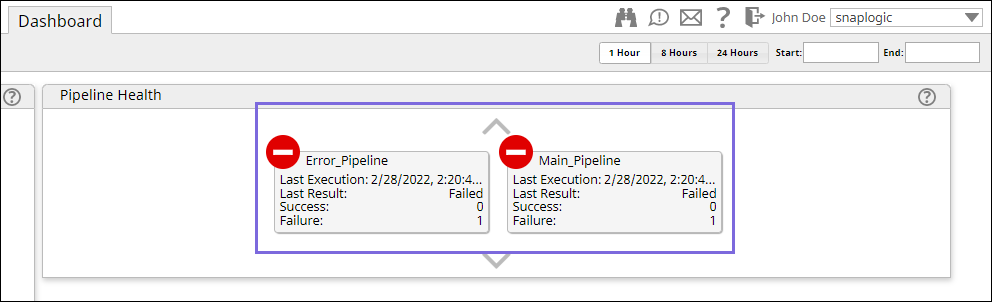
After you run, you will see the following error in the preview of the Pipeline Execution Statistics.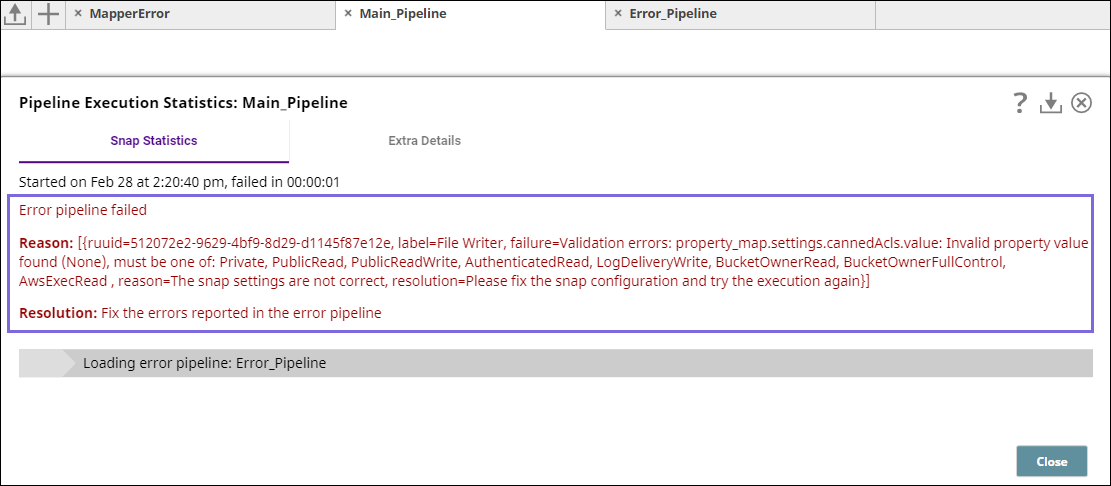
You can navigate to the SnapLogic Dashboard to view the Pipeline details.