On this Page
You can create an account from Designer or Manager. In Designer, when working on pipelines, every Snap that needs an account prompts you to create a new account or use an existing account. The accounts can be created in or used from:
- Your private project folder: This folder contains the pipelines that will use the account.
- Your Project Space’s shared folder: This folder is accessible to all the users that belong to the Project Space.
- The global shared folder: This folder is accessible to all the users within an organization in the SnapLogic instance.
Account Configuration
In Manager, you can navigate to the required folder and create an account in it (see Accounts). To create an account for binary files:
- Click Create > Binary > SSH Auth.
- Enter an account label and other required information.
- (Optional) Enter additional information on this account in the Notes field of the Info tab.
- Click Apply.
Account Settings
The Binary SSH Auth account supports the following SFTP key exchange algorithms:
- diffie-hellman-group-exchange-sha1
- diffie-hellman-group1-sha1
- diffie-hellman-group14-sha1
- diffie-hellman-group-exchange-sha256
- ecdh-sha2-nistp256
- ecdh-sha2-nistp384
- ecdh-sha2-nistp521
As far as SFTP server supports any of these algorithms, the JSch (SSH Java client) library and SFTP file server will be able to identify and work with the appropriate algorithm during login.
Label | Required. User provided label for the account instance | |
|---|---|---|
Username | Required. Account username. | |
Private key | Required. Private key part of SSH authentication. Private key header and footer are required. | |
Key passphrase | Required. Passphrase used to decrypt the private key. | |
For an SSH account, you will need to generate a public/private key for snapuser on the Groundplex, add the private key and username to the ssh account settings in SnapLogic, add public key to the sftp machine for that user. When using an SSH Account, the header and footer must be in the private key:
-----BEGIN RSA PRIVATE KEY----- -----END RSA PRIVATE KEY-----
Account Encryption
| Standard Encryption | If you are using Standard Encryption, the High sensitivity settings under Enhanced Encryption are followed. | |
|---|---|---|
| Enhanced Encryption | If you have the Enhanced Account Encryption feature, the following describes which fields are encrypted for each sensitivity level selected per each account.
| |
Example
Creating SSH Key Using PuTTY Key Generator
For Windows:
The PuTTYgen application is required for this to work. It can be downloaded by following this link.
Steps for generating SSH keys using PuTTY Key Generator.
- Start the PuTTY Key Generator application
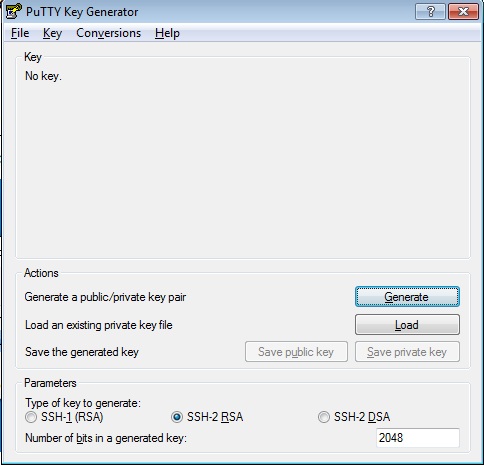
- In the Parameters section
- Select SSH-2 RSA in Type of key to generate.
- Enter the information in Number of bits in a generated key.
- In the Actions section click on Generate.
- PuTTY Key Generator uses randomness in mouse movements to generate a unique secure key. Move the mouse around till the progress bar fills up completely.
- The public and private key will now be generated.
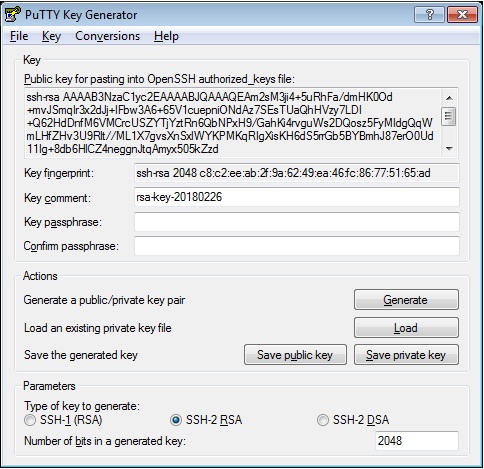
- Fill the Key comment and Key passphrase as needed.
- Save the private and public key files to a secure and private location by clicking on the Save public key and Save private key buttons.
- Send the Public Key to the SFTP host.
- Store the keys and passphrase into the password/key vault.
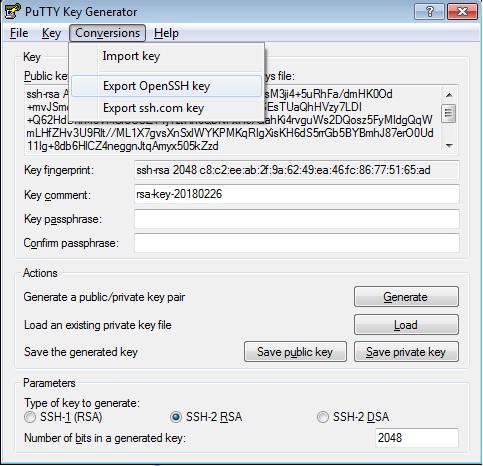
PuTTY Key Generator uses the PPK format for keys. If a standard OpenSSH key format is required for the SFTP client, click on Conversions menu and then on Export OpenSSH Key.