...
APIs and Proxies appear in this list. You can view details about the API or Proxy by clicking it. You can also set permissions on your API.
Known Issue
Lint issues occur when working with reference accounts, associated JAR files, and error pipelines in older Snaplex versions.
Workaround - Update the Snaplex to the latest version to resolve the lint issue.
Create the API using Design First
In the API Manager page, under the APIs & Proxies tab, click the add icon (
 ) and choose New API.
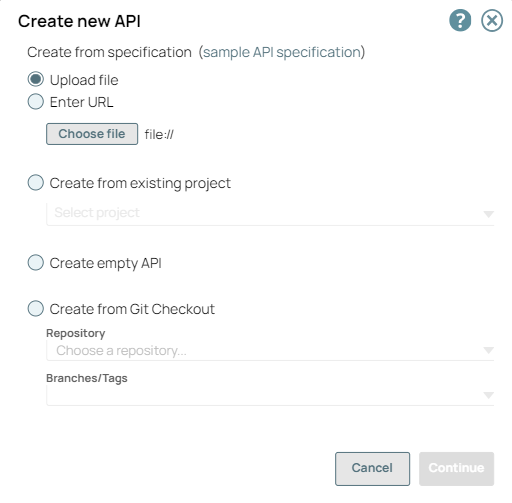
In Create New API, choose the source of the OAS file.
Upload File. Click Choose File to specify the location of the specification file to upload.

Enter URL. Enter a valid URL pointing to the location of the specification file.
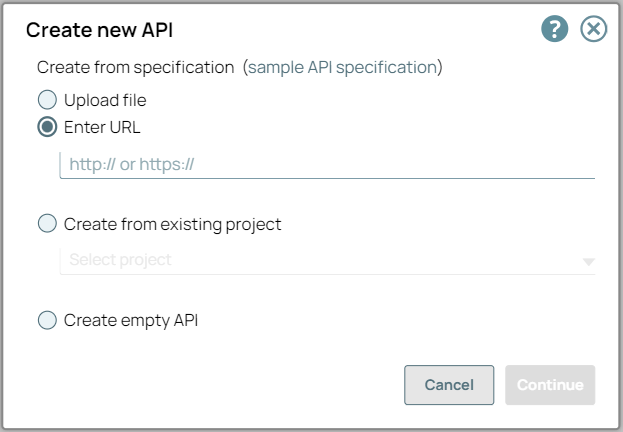
Click Continue.
In Create New API - Options, select your API Import Configurations.
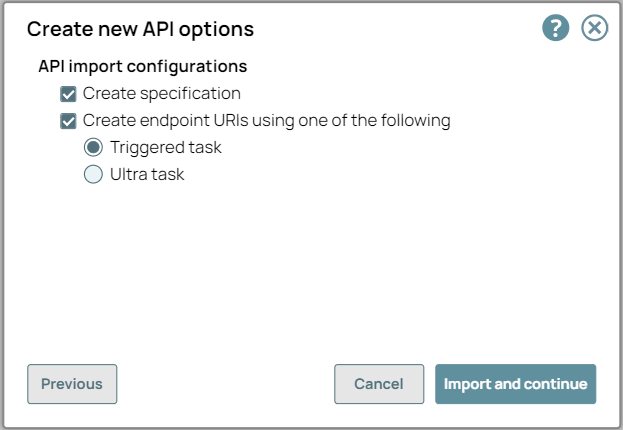
Create Specification. If selected, the imported specification is included as a File Asset in the API.
Create Endpoints from Path. If selected, endpoints for the new API are created based on its path to one of the following:
Triggered Task: Choose to make the API endpoint a Triggered Task.
Ultra Task: Choose to make the API endpoint an Ultra Task.
Click Import and Continue.
In Create New API - Details, fill in the details for the new API.
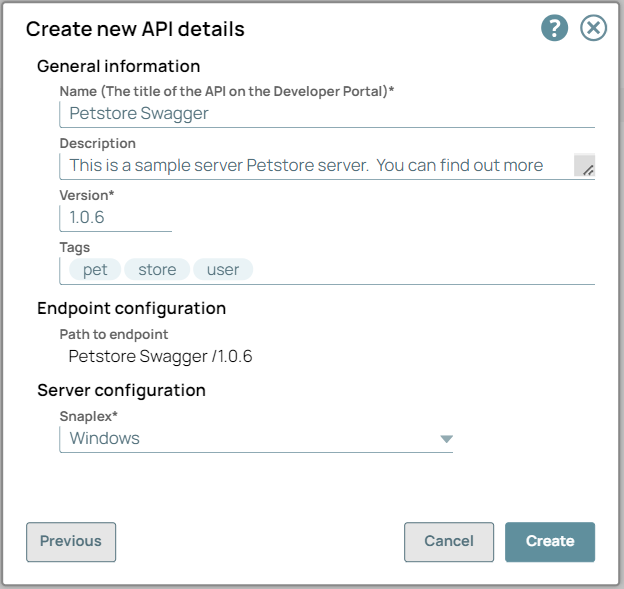
General Info
Name (Title). The name of the new API.
The name must meet the following requirements:
Must be unique.
Must begin with alphanumeric characters A-Z, a-z, or 0-9.
Cannot contain the reserved keyword
shared.Cannot contain |, <, >, [, ], {, }, #, ?, /, and \.
Must be no more than 256 characters. If the name includes double-byte characters, the maximum length is shorter.
Description. A description of the new API.
Version. The version number for the first version of the API.
Default: 1.0.
Learn more: Managing Versions of Your APIsTags. Enter any tags associated with your API. You can create the tags as required.
Endpoint Configuration » Path to Endpoint. (Read-only) The base path for the endpoint.
Server Configuration » Snaplex. The Snaplex to associate with the new API.
Click Create.
Troubleshooting Section for API Specification file
Any structural or syntax issues in the API, API Version, or Proxy specification file results in an error in the SnapLogic UI. You can change the specifications according to the error message in the Swagger editor or any other editor tool.
Entity | Error Messages for Incorrect JSON or YAML (OAS2.0 or OAS3.0) Specifications | Description and Resolution | |||||||||||||||
|---|---|---|---|---|---|---|---|---|---|---|---|---|---|---|---|---|---|
API and Proxy |
|
|
Example Workflow
Create an API in the API Manager with the upload option. Upload the OAS 2.0 or 3.0 YAML or JSON API Specification file:
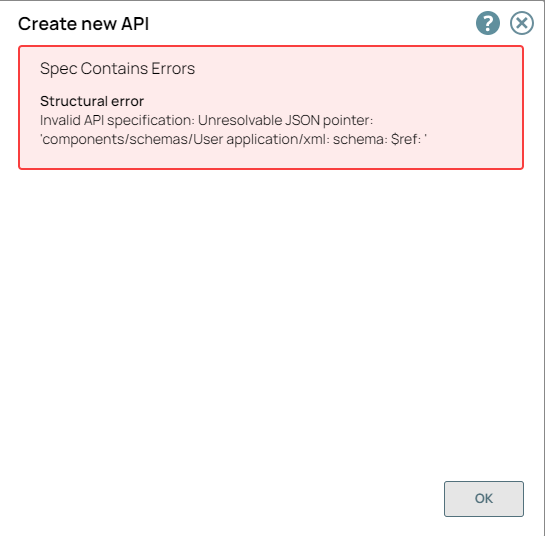
If the file contains an incorrect data or a broke code structure, an error occurs:
You can edit the specification file in the Swagger editor:
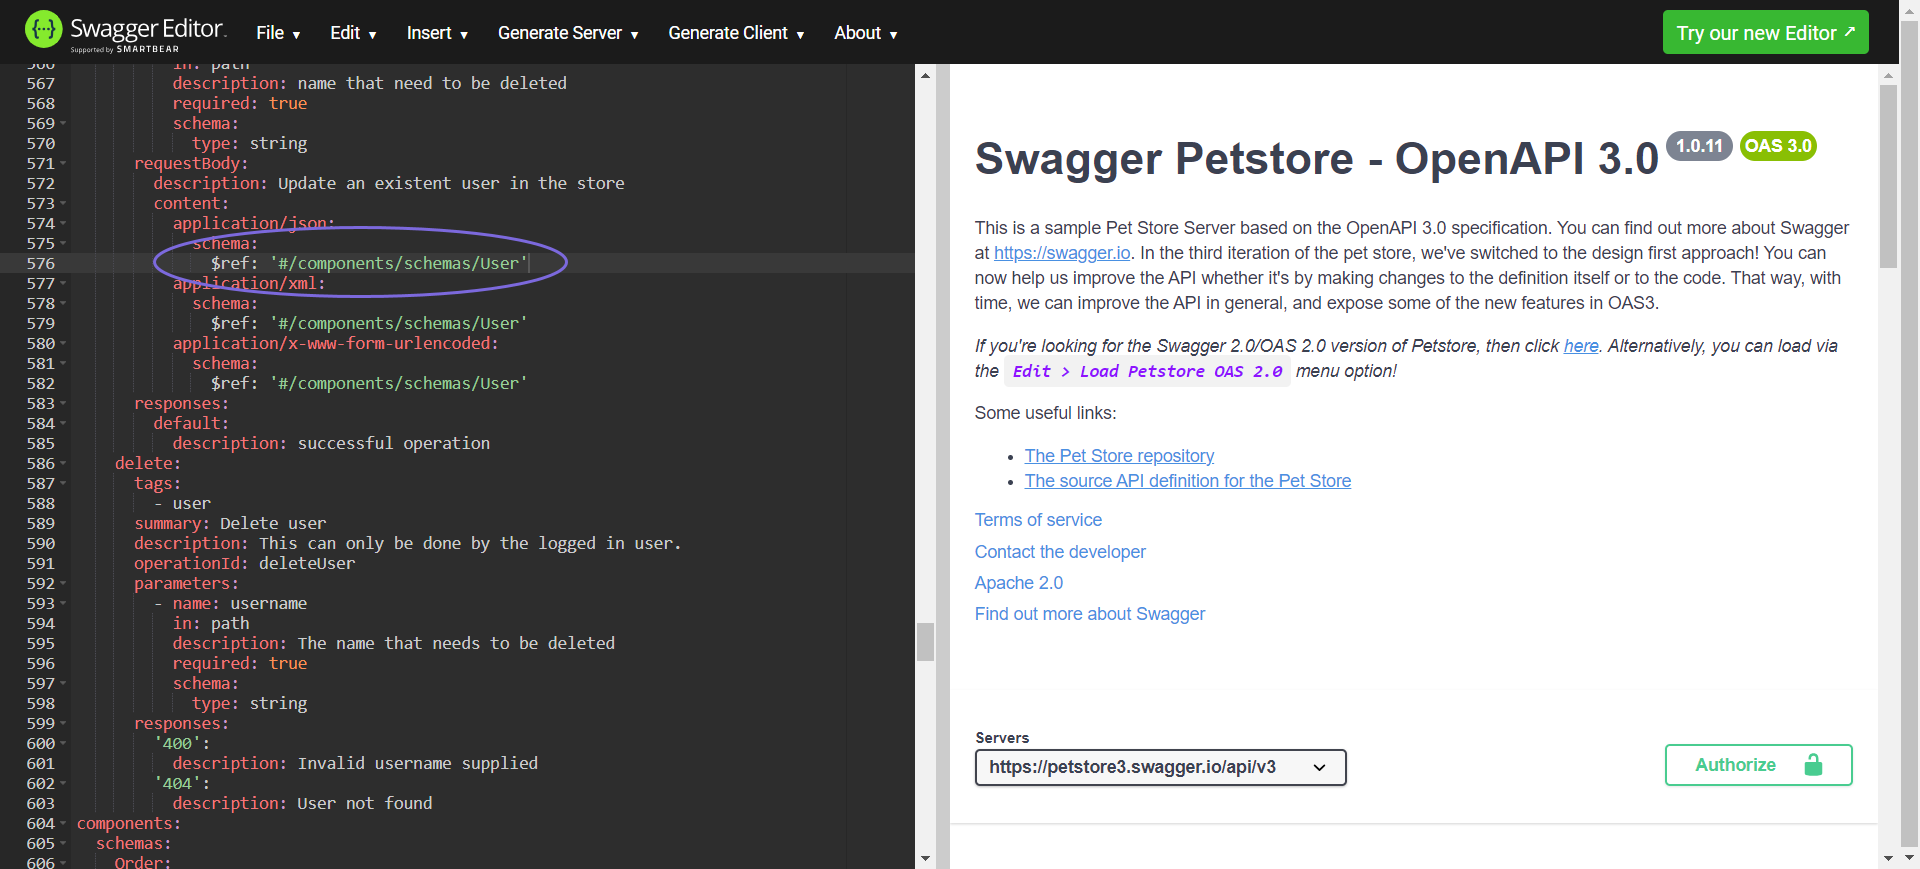
After all the errors in the Swagger editor are fixed, the API is successfully created with the edited API specification file.
| Info |
|---|
When you upload a incorrect data API or Proxy specification file it displays error messages in the Create New API, Create Proxy, Swagger Editor of Publish API and Publish Proxy wizards. |
Create the API from Existing Project Assets
In the API Manager page, under the APIs & Proxies tab, click the add icon (
) and choose New API.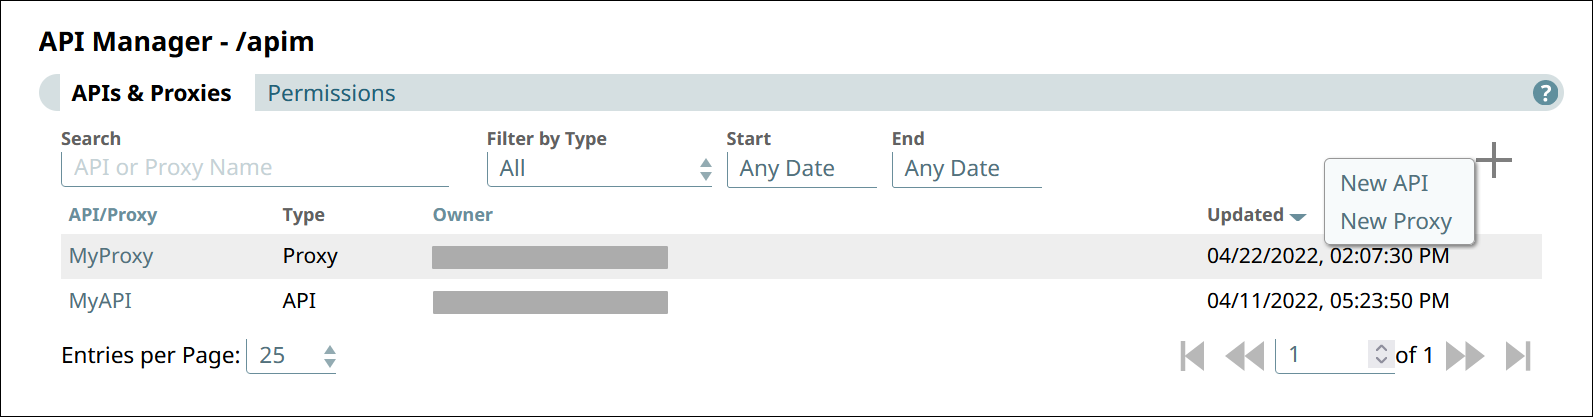
In Create New API, choose Create from Existing Project and select the Project.
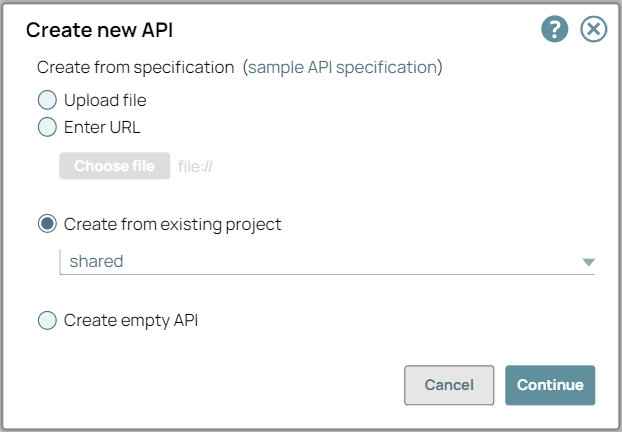
Click Continue.
In Create New API - Select Assets, select the types of assets you want to import to the new API. An Asset selected at the root level also imports the leaf-level Assets.
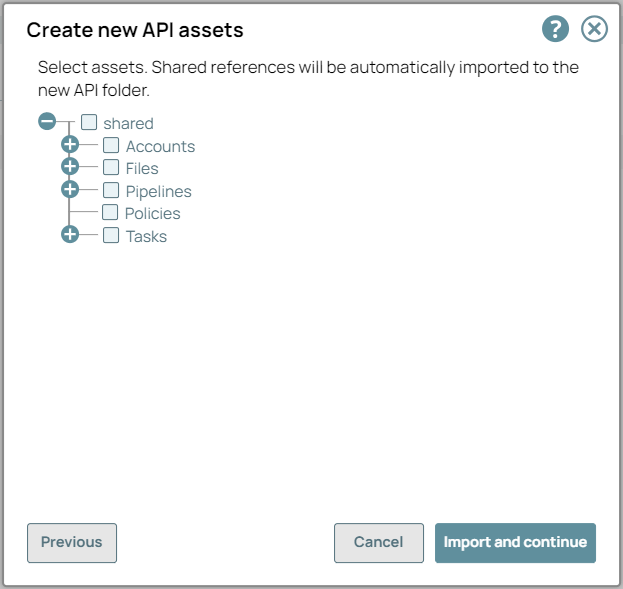
Click Import and Continue.
In Create New API - Details, fill in the details for the new API.
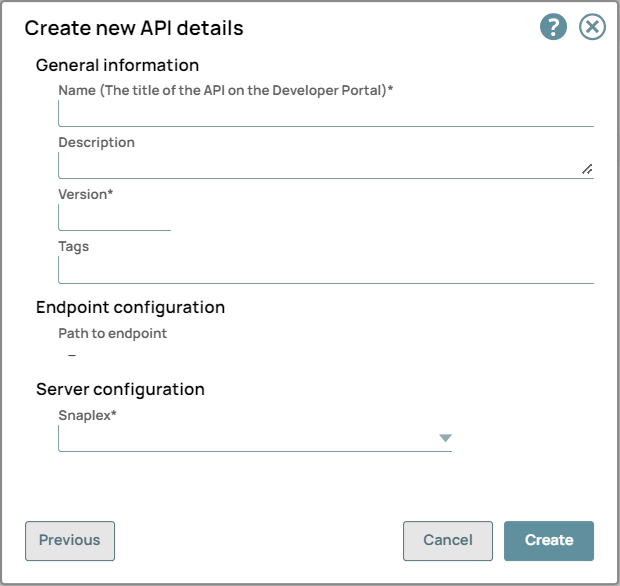
General Info
Name (Title). The name of the new API.
The name must meet the following requirements:
Must be unique.
Must begin with alphanumeric characters A-Z, a-z, or 0-9.
Cannot contain the reserved keyword shared.
Cannot contain |, <, >, [, ], {, }, #, ?, /, and \.
Must be no more than 256 characters. If the name includes double-byte characters, the maximum length is shorter.
Description. A description of the new API.
Version. The version number for the first version of the API.
Default: 1.0.
Learn more: Managing Versions of Your APIsTags. Enter any tags associated with your API. You can create the tags as required.
Endpoint Configuration » Path to Endpoint. (Read-only) The base path for the endpoint.
Server Configuration » Snaplex. The Snaplex to associate with the new API.
Click Create.
| Info |
|---|
|
Create the API from a Git repository
...
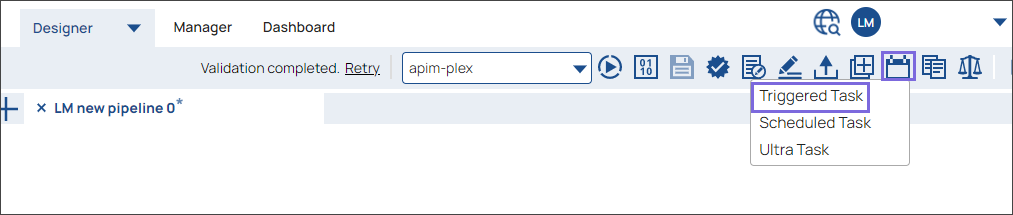
Choose one of the following ways to open the dialog for a Triggered or Ultra Task:
In the Designer tab, click the Task icon from the expanded toolbar.
In the Manager tab, navigate to the target project or global
sharedfolder, and In the assets table, do one of the following:To create an APIM API from a task:
For an existing Task, click on the target Task.
Click
and in the dropdown, select Task > Triggered or Task > Ultra. Alternatively, click the Tasks tab, then click and in the dropdown, select Triggered or Ultra.
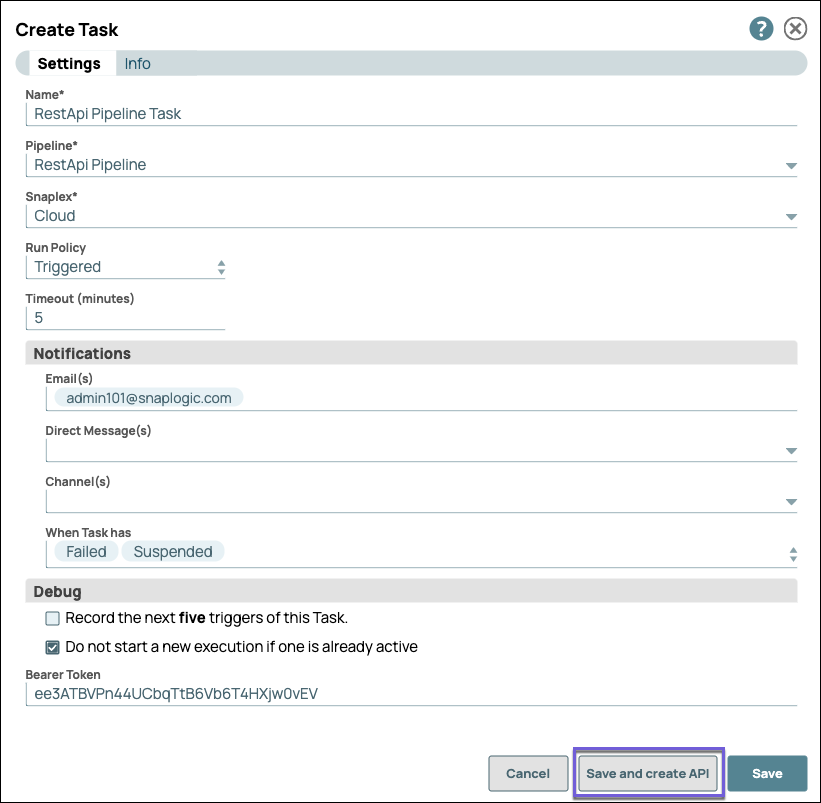
The task dialog for the task type you selected appears.Fill out the Task form with the appropriate information, then click Save and create API.
To create an APIM API from a project or Project Space share folder, click
to display the dropdown list, select Create API: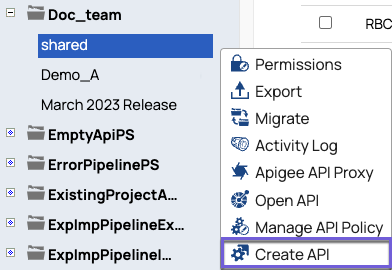
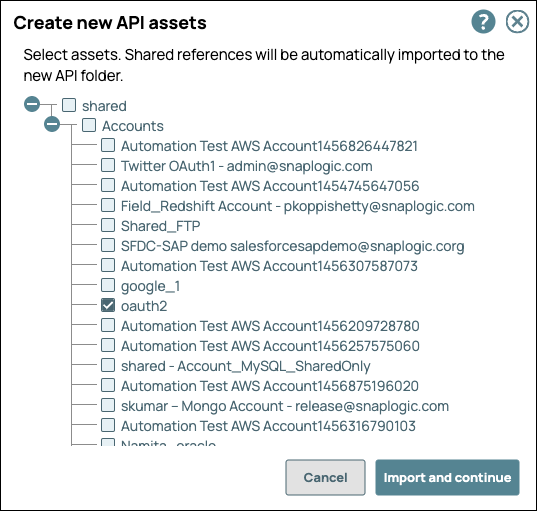
In the Create new API assets, select the target assets to include in your API, and then click Import and continue.
In the Create new API details, enter the details.
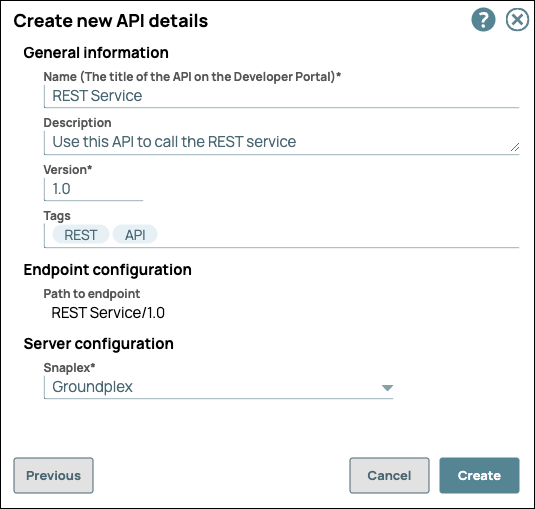
Name (Title). The name of the new API.
The name must meet the following requirements:
Must be unique.
Must begin with alphanumeric characters A-Z, a-z, or 0-9.
Cannot contain the reserved keyword
shared.Cannot contain |, <, >, [, ], {, }, #, ?, /, and \.
Must be no more than 256 characters. If the name includes double-byte characters, the maximum length is shorter.
Description. A description of the new API.
Version. The version number for the first version of the API.
Default: 1.0.
Learn more: Managing Versions of Your APIsTags. Enter any tags associated with your API. You can create the tags as required.
Endpoint Configuration » Path to Endpoint. (Read-only) The base path for the endpoint.
Server Configuration » Snaplex. The Snaplex to associate with the new API.
Click Create.
Navigate to the API Manager to verify API creation.
Edit an API name
Rename the API to align with the company standards and best practices. Save the extra effort instead of copying the API to rename it and then deleting the old one.
Navigate to API Manager > API > API details:

Click Edit Details to rename the API:
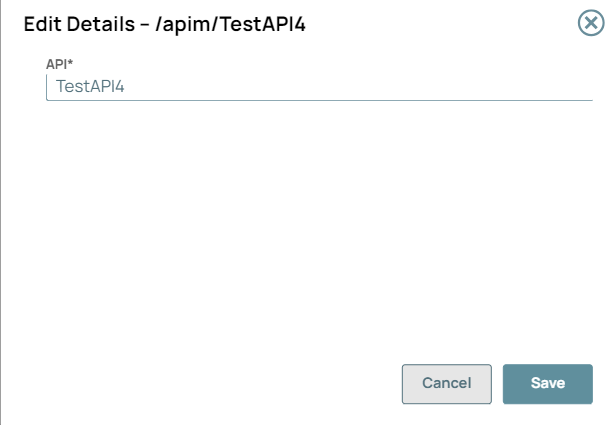
Click Save. A message “API details has been updated successfully” displays in the UI.
You can only rename the unpublished APIs. Published APIs cannot be renamed because that would change the endpoint URL of the API.
Unpublish the API to edit the API name.
Special characters such as |, <, >, [, ], {, },#, ?, /, and \. cannot be used.
| Anchor | ||||
|---|---|---|---|---|
|
...
To test the Try it out button for your API: Discovering APIs in the API Catalog
Troubleshoot for “Try It Out” functionality
Areas to troubleshoot when an error occurs | Error messages in the console | Resolution | ||
|---|---|---|---|---|
CORS |
|
| ||
Network Failure |
| Check the Network Connectivity. | ||
URL scheme in CORS settings dialogue box |
|
| ||
FeedMaster and Load Balancer |
|
|
Deleting an API from the API Manager Console
To delete an API, you must delete all versions and the assets in those versions. For details, see the following topics:
Related Content
...