Overview
You must configure Eloqua accounts to enable Eloqua Snaps to connect to Eloqua instances.
See Accounts to learn more about SnapLogic Accounts.
Snap Compatibility
| Snap | Eloqua Basic Auth Account | Eloqua OAuth2 Account |
|---|---|---|
| Eloqua Create | √ | √ |
| Eloqua Delete | √ | √ |
| Eloqua Form Submission Data | √ | √ |
| Eloqua Query | √ | √ |
| Eloqua Query Activities | √ | √ |
| Eloqua Read | √ | √ |
| Eloqua Update | √ | √ |
Configuring Eloqua Accounts
You can configure Eloqua accounts in SnapLogic using either the Designer or Manager.
Using SnapLogic Designer
- Log in to Snaplogic to open the Designer.
- Drag an Eloqua Snap to the canvas.
- Click the Snap to open the Snap's settings.
- Click the Account tab.
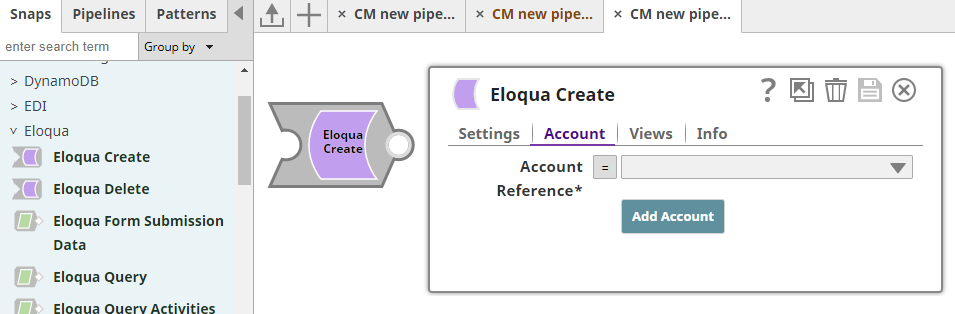
- Select the account that you want to use from the Account Reference drop-down list, or click Add Account to create a new account.
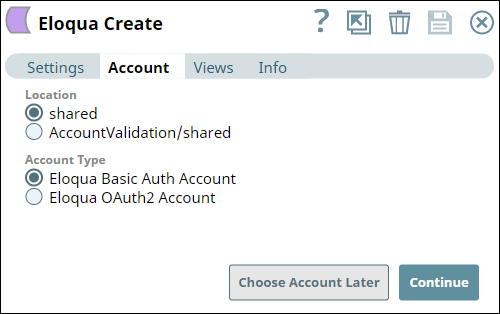
The account types that are compatible with the selected Snap appear under Account Type. For details about Snaps and compatible Account types, see Snap Compatibility. Select the location where you want to create the account, and then select the account type.
Click Continue to open the account Settings.
Enter the required account details. For detailed guidance on how to provide information associated with each account type, use the following links:
Child pages (Children Display) Optionally, enter additional information on this account in the Notes field of the Info tab.
- Click Validate to verify the account information, if applicable.
- Click Apply to complete configuring the Eloqua account.
Using SnapLogic Manager
- Log in to Snaplogic. Click the Manager tab.
- Navigate to the project with which you want to associate the new account. Click
 > Account > Eloqua, followed by the appropriate account type.
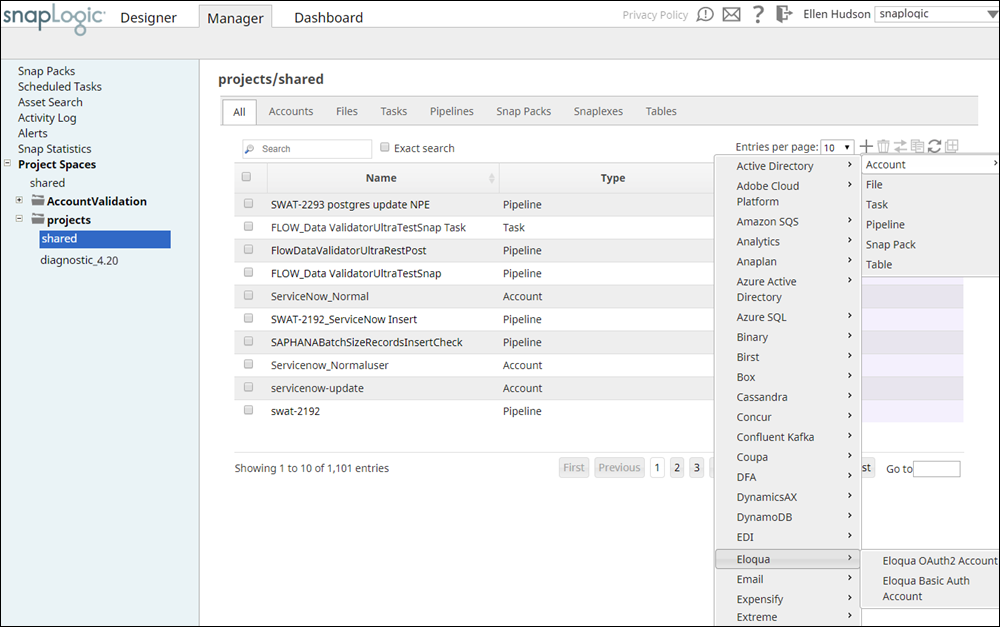
The Create Account page associated with the selected account type appears. - In Settings, enter the required account details. For detailed guidance on how to provide information associated with each account type, use the following links:
Child pages (Children Display) - Optionally, enter additional information on this account in the Notes field of the Info tab.
- Click Validate to verify the account information, if applicable.
- Click Apply to complete configuring the Eloqua account.
| Warning |
|---|
You should avoid updating the account credentials while Pipelines using that account are being executed. This may lead to unexpected results, including locking your Eloqua account. |
| Insert excerpt | ||||||
|---|---|---|---|---|---|---|
|