You are viewing an old version of this page. View the current version.
Compare with Current
View Page History
« Previous
Version 11
Next »
Configure two or more Snaps linked together to orchestrate a flow of data between endpoints.
To create a new pipeline:- In Designer, click on the [+] icon to the left of the tabs. The Configure New Pipeline dialog opens.
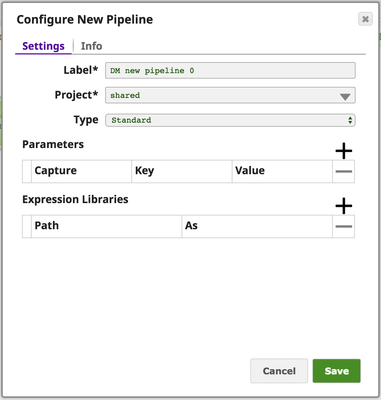
- Modify the Label (pipeline name) and project for the pipeline if necessary.
Unless otherwise noted, the names of any asset or project is limited to UTF-8 alphanumeric characters and these punctuation characters !"#$%&'()*+,-.:;<=>?@[\]^_`{|}~. - If you know of parameters to define for this pipeline, you can do so now or later through the Pipeline Properties dialog.
- If you are using an expression library, you can add it now or later through the Pipeline Properties dialog.
- Click Save.
You now have a blank canvas on which to build your pipeline.
Next Steps
- Determine what you want your pipeline to do. Use the Snap Reference documentation to determine what Snaps you will need to use.
- Gather account information for your endpoints.
See Also