In this article
Overview
You can create and manage multiple versions of your APIs. A version of an API contains SnapLogic assets such as Pipelines, Tasks, and Open API Specification files. Clicking an API on the API Details page opens the Version Details page, where you can view details about the version and add API policies. You can also search through assets in a Version and view Permission sets.
When you are viewing an API version, you can navigate to the API Details and API Management landing page by clicking the respective folders in the folder path.
The following example illustrates the path of an API version:
API Manager - /apim/API_Test/1.1
From this view, you can click on any component in the path to navigate to that level of the API Management hierarchy:
API Management > API Manager: Landing Page
API: API_Test
Version: 1.1
Prerequisites
Your Org must have a subscription to the API Management feature; otherwise, the API Management UI is not enabled.
You must have Write permissions to create an API.
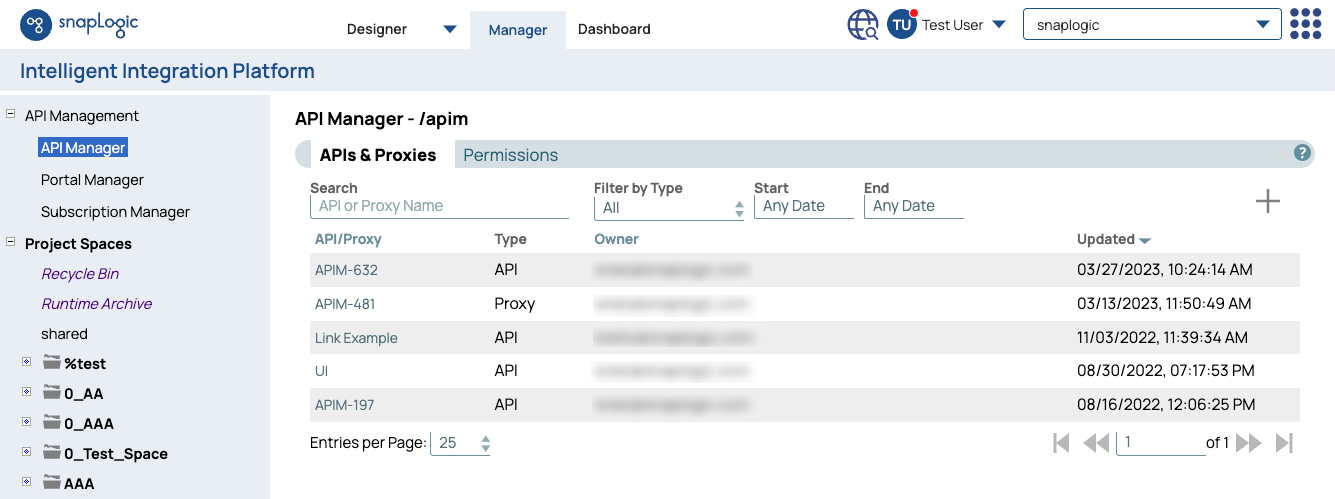
API Manager
You can navigate to the API Manager console by clicking Manager > API Management > API Manager.
Creating an API Version Using Design First
Navigate to API Management > API Manager, and click the target API to display the API Details page.
Click the Versions tab, then click
 to display the Create Version dialog window.
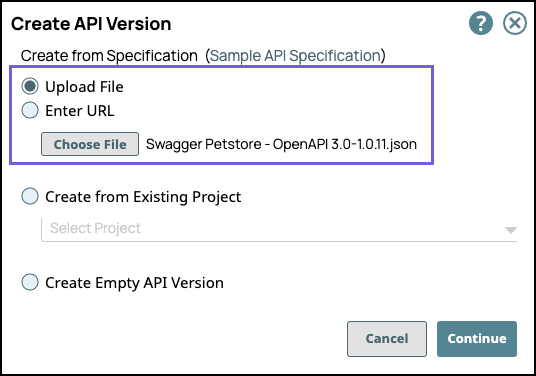
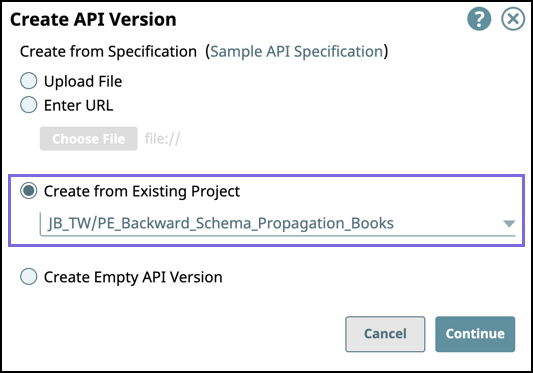
In the Create API version dialog window, import the API Specification by selecting one of the following options, then click Continue:
Select Upload File to choose a file from your local machine. Both JSON and YAML file formats are supported.
Select Enter URL to refer to the API specification by URL.
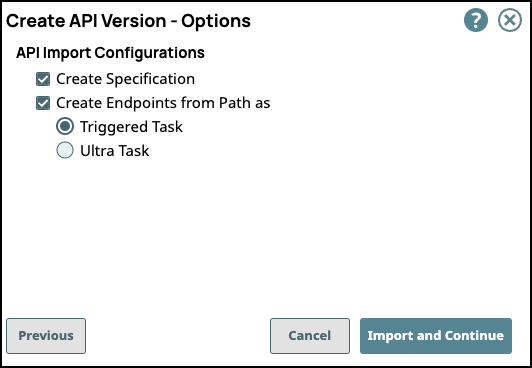
Select/deselect the Import Configuration options, then click Import and Continue.
The options for import are selected by default.Create Specification: Select to include the specification as a File Asset in the API. Both Deselect to omit the specification file you uploaded.
Create Endpoints from Path: Select to include all default Assets for this API. Deselect to leave the API an empty container for you to provide the Assets later.
Enter information about your Version, then click Create.
General Info: Provide basic information about your API. The name is the API name plus the version number.
Description: Enter a brief description.
Version: Define the version. By default, the version is 1.0 when you create an API for the first time.
Tags: Enter any tags associated with your API.
Endpoint Configuration: The base path for the endpoint.
Server Configuration: Enter the Snaplex associated with this API.
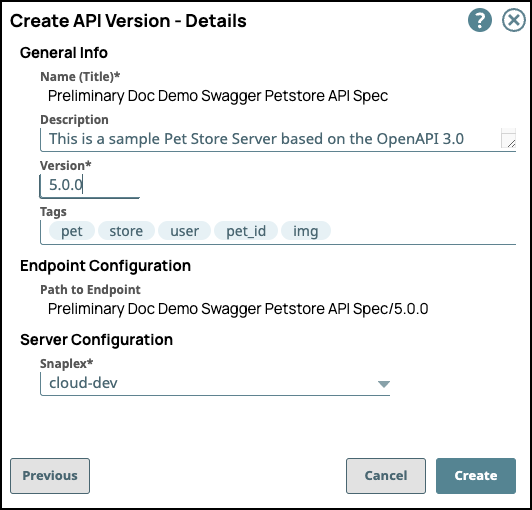
You must enter a name and Snaplex. You can also change the version from this dialog window, and therefore create another version of the API.
After you create a version of an API, the Version asset is displayed on the Versions Details page. You can view information about the assets used in the API version by clicking it.
Creating an API Version from Existing Project Assets
Navigate to API Management > API Manager, and click the target API to display the API Details page.
Click the Versions tab, then click
to display the Create Version dialog window.

In the Create API version dialog window, select Create from Existing Project, then click Continue:
In the Create API Version-Select Assets dialog window, select/deselect the assets from the Project to use in the API Version, then click Import and Continue.
An Asset selected at the root level also imports the leaf-level Assets.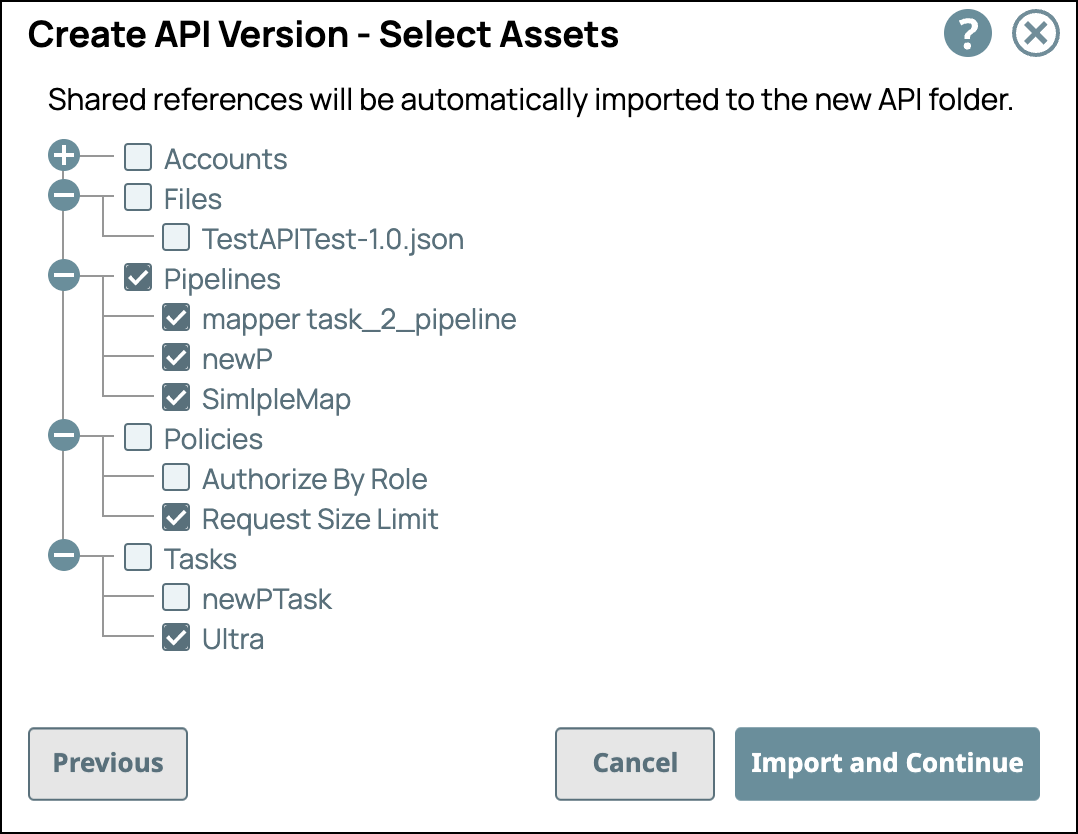
Enter information about your API Version, then click Create.
General Info: Provide basic information about your API. The name is the API name plus the version number.
Description: Enter a brief description.
Version: Define the version. By default, the version is 1.0 when you create an API for the first time.
Tags: Enter any tags associated with your API.
Endpoint Configuration: The base path for the endpoint.
Server Configuration: Enter the Snaplex associated with this API.
You must enter a name and Snaplex. You can also change the version from this dialog window, and therefore create another version of the API.
After you create a version of an API, the Version asset is displayed on the Versions Details page. You can view information about the assets used in the API version by clicking it.
Creating an Empty API Version
Navigate to API Management > API Manager, and click the target API to display the API Details page.
Click the Versions tab, then click

In the Create API version dialog window, select Create Empty API Version click Continue.
Enter information about your Version, then click Create.
General Info: Provide basic information about your API. The name is the API name plus the version number.
Description: Enter a brief description.
Version: Define the version. By default, the version is 1.0 when you create an API for the first time.
Tags: Enter any tags associated with your API.
Endpoint Configuration: The base path for the endpoint.
Server Configuration: Enter the Snaplex associated with this API.
You must enter a name and Snaplex. You can also change the version from this dialog window, and therefore create another version of the API.
After you create a version of an API, the Version asset is displayed on the Versions Details page. You can view information about the assets used in the API version by clicking it.
Deleting an API version
You must delete all of the Assets in a Version before you can delete the Version.
Navigate to API Management > API Manager, click the target API to display the API details page.
Click the Versions tab and point your cursor on the target Version.
The delete icon is displayed.Click
The API Version is deleted from the API Manager console.
Managing API Version Assets
You can manage the following SnapLogic assets in your API Version on the Assets tab:
Clicking an asset opens up a dropdown that contains the same options in the Assets table view in Manager.
In the Assets tab of an API Version, these asset components - Task name, Pipeline, Pipeline parameters, and Task run policy - can no longer be edited when referenced by a published API. You must unpublish the API to modify any of its assets.
Adding an Asset
In Manager > API Management > API Manager, navigate to the target version and click to display the Version Details page.
Click
to open the assets menu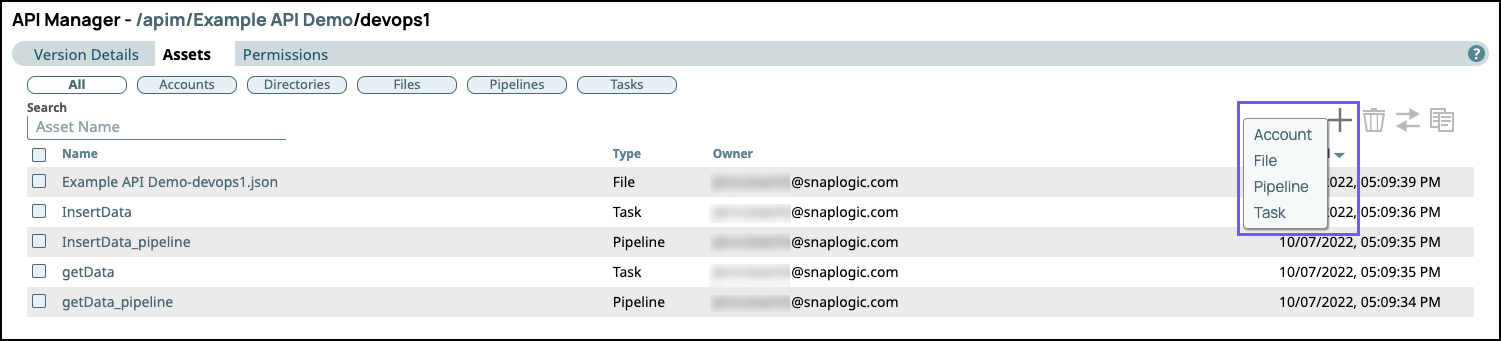
Select one of the following choices:
Accounts. Opens the Create Account dialog where you make Account selections.
File. Opens the Upload File dialog.
Pipeline. Opens the blank Designer canvas where you build your Pipeline.
Task. Opens the Create Task dialog where you create your Task.
Complete the required dialogs associated with the type of Asset.
Moving an Asset
You can move your API version Assets from one version to another version in the same API or to another version in a different API.
Snap Packs cannot be moved as Assets.
To move an Asset:
In Manager > API Management > API Manager, navigate to the target version and click to display the Version Details page.
Click the Assets tab.
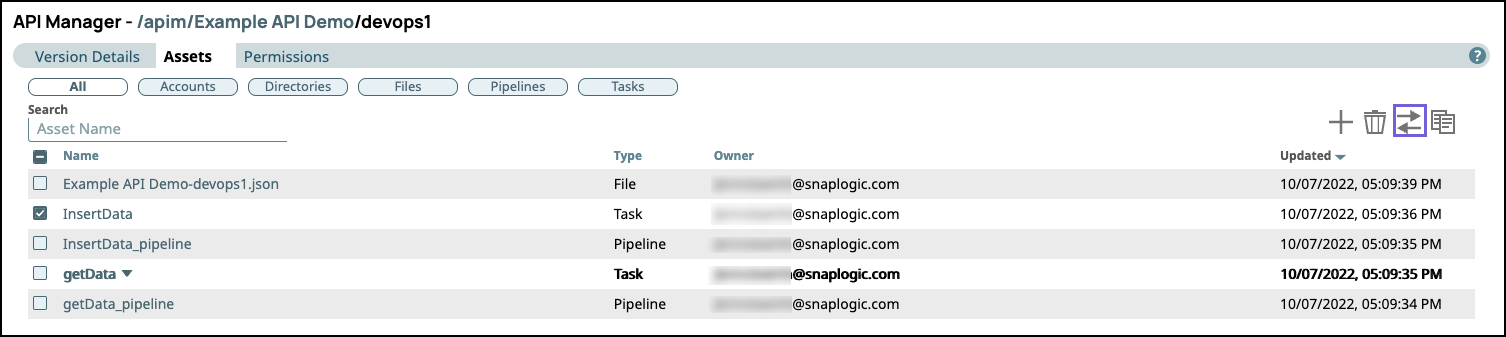
You can filter by Asset type by clicking one of the following pills.
All. Click to display all Assets.
Accounts. Click to filter by Accounts.
Directories. Click to filter by directories created with Task debug details from your Task.
Files. Click to filter by files.
Pipeline. Click to filter by Pipelines.
Task. Click to filter by Tasks.
Click
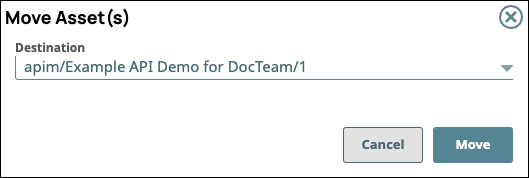
to display the APIM project tree, then select the destination API version.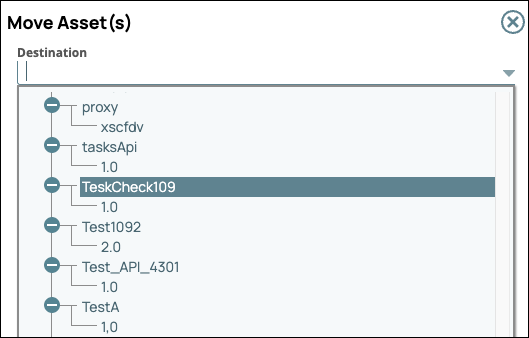
Click Move on the Move Asset(s) confirmation prompt.
If one or more Assets with the same name exist in the API version, the Error occurred while moving Asset(s) prompt appears.
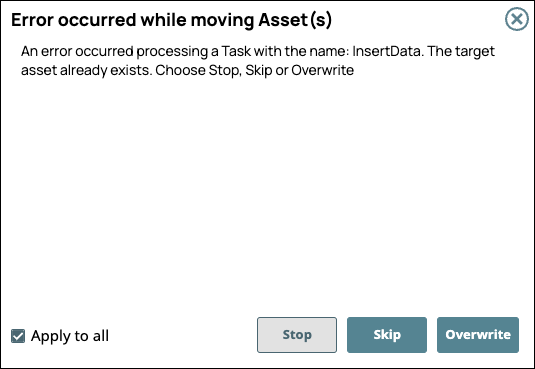
Choose one of the following options:
Stop: Cancels the entire operation, and the specified Assets are not moved to the destination version.
Skip: Does not move the selected Asset if an existing Asset in the destination version has the same name.
Overwrite: Replaces the asset with the same name in the destination version with the specified Asset.
Select Apply to all to skip moving or to overwrite the Assets in the destination version.
Copying an Asset
You cannot copy Files into the same API Version. If you copy Pipelines, Tasks, or Account to the same API Version, then the copied Assets overwrite the original Asset.
In Manager > API Management > API Manager, navigate to the target API Version and click it to display the Version Details page.
Click the Assets tab:
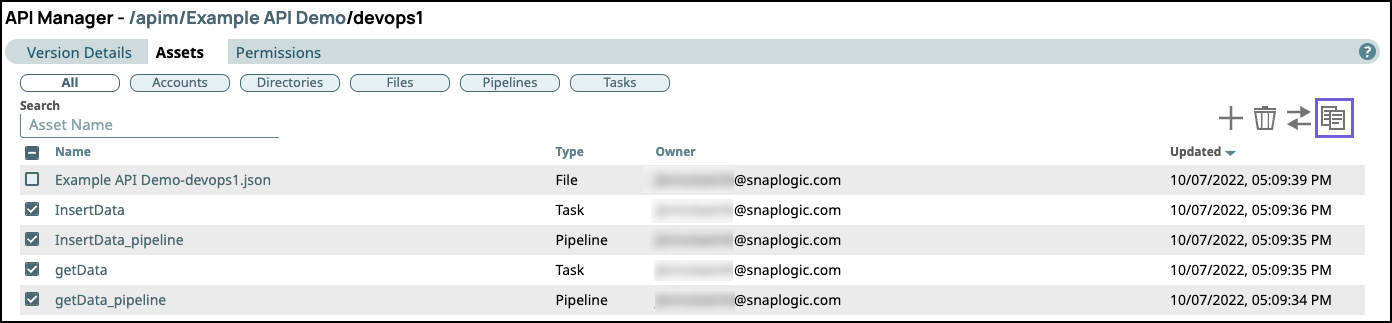
Select the target assets and click the
to copy. You cannot copy Directories or Snap Packs.When the Copy Assets dialog appears, select a destination API version. If Files are selected, the Destination picker does not display the same folder:

Click Copy.
If one or more Assets with the same name exist in the API version, the Error occurred while copying Asset(s) dialog appears.
Choose one of the following options:
Stop: Cancels the entire operation, and the specified Assets are not moved to the destination version.
Skip: Does not copy the selected Asset if an existing Asset in the destination version has the same name.
Overwrite: Replaces the Asset with the same name in the destination version with the specified Asset.
Select Apply to all to skip moving or to overwrite the Assets in the destination Version.
When Pipelines are copied to the same destination Version, the copied Pipeline is added with the following name:
Copy of pipeline_name
The original Pipeline remains in the destination Version.
Deleting an Asset
WARNING: Deleting assets of a published API can adversely affect its endpoints and any subscriptions to it. In addition, unexpected errors can occur when running pipelines that depend on those assets.
In Manager > API Management > API Manager, navigate to the target API Version and click it to display the Version Details page.
Click the Assets tab.
Select the Asset to delete and click the trash icon (
). You can select multiple Version Assets.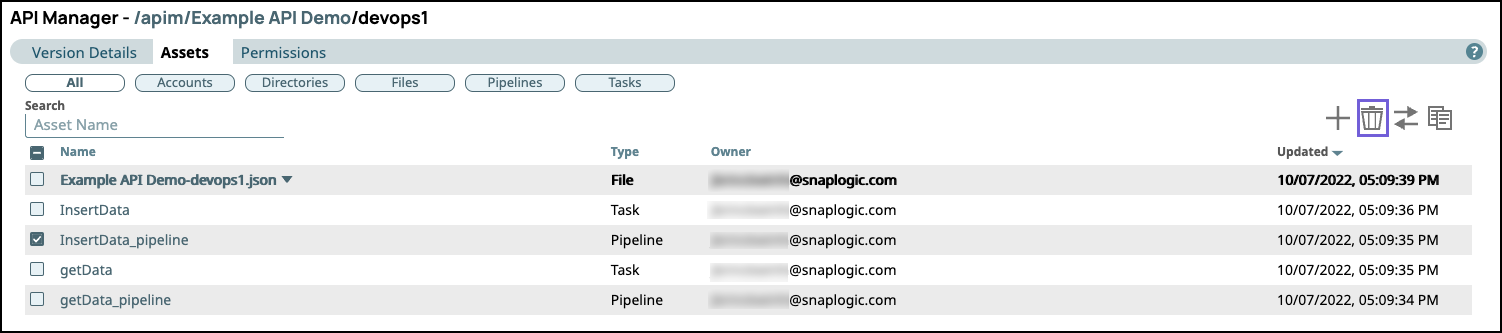
The Delete confirmation message appears:

Click Delete.
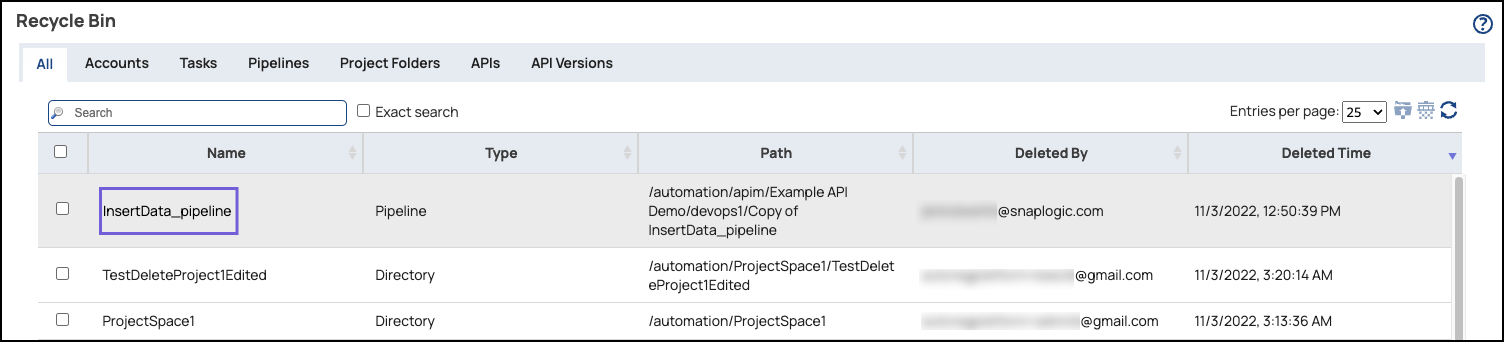
Verify the deleted Assets by navigating to the Manager Recycle Bin for your Org:
Changing the Snaplex of a Task inside an Unpublished API
You can change the Snaplex a Task runs on if the API Version is unpublished. You cannot change the Snaplex of a Task if the API is already published.
In Manager > API Management > API Manager, navigate to the target API Version and click it to display the Version Details page.
Click the Assets tab.
Click the target Task to open the Update Task dialog.
In the Snaplex field, click
to open the dropdown list of Snaplexes available in the Org’s global sharedfolder:
Select the target Snaplex and click Update.
Editing the Run Policy for a Task inside a Version
You can open the Update Task dialog from the Version > Assets tab of an API to change its configuration. You can also change the Run Policy.
API Manager does not support Scheduled Tasks. When you edit a Task in the Assets tab, the Update Dialog displays only Triggered and Ultra as Run Policy selections.
In Manager > API Management > API Manager, navigate to the target API Version and click it to display the Version Details page.
Click the Assets tab.
Click on the target Task to open the Update Task dialog.
In the Run Policy field, click
to select a different Task type.
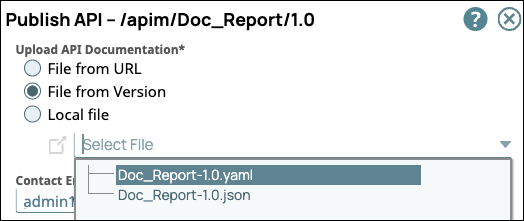
Downloading a Specification File
You can download the specification file from the Assets tab. Both JSON and YAML file formats are supported for download.
In Manager > API Management > API Manager, navigate to the target API Version and click it to display the Version Details page.
Click the Assets tab.
Point the cursor as the File, and click
to open the dropdown menu.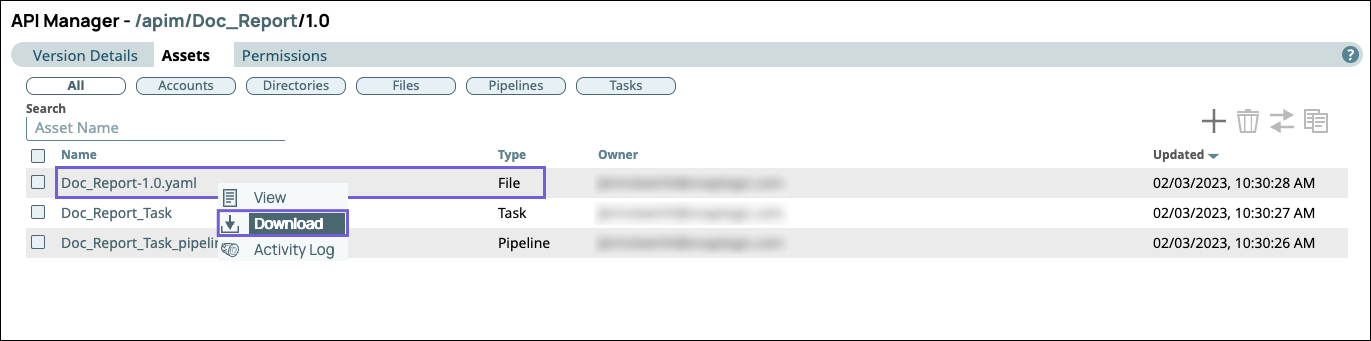
Select Download.
APIM Asset Tracking with Git
When your Org is integrated with Git, you can access the same set of functionalities for APIM version assets, and the Version is treated as the Project folder.
Supported Git Operations with Versions
In the Versions tab, you can manage your Versions similarly to Projects in Manager.

The following GIT operations are supported in Versions:
Checkout Git Repository: Allows you to check out repositories and branches/tags.
Git Add Tag: Allows you to access Git tags for your Versions.
Commit to Git: Allows you to commit your changes to an API Version in Git.
Git Pull: Allows you to pull the changes made by other users into the API Version.
Supported Git Operations with Version Assets
In the Assets tab of your API Versions, you can manage Assets similarly to Project Assets in Manager. For example, APIM Assets are tracked by the Git repository and Git status, as shown in the following image.

When you select an Asset or point and click on it, the Git options menu appears:
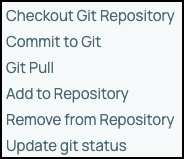
You can perform the following actions from this menu:
Checkout Git Repository: Allows you to check out this Asset from its associated Git repository.
Commit to Git: Allows you to commit your changes to a Version Asset in Git.
Git Pull: Allows you to do a pull on the latest changes made to the Version Asset.
Add to Repository: Allows you to add the Version Asset to the Git repository.
Update git status: Allows you to update the Git status.