...
Snaps in the Exchange Online Snap Pack work with different account types per the following table.
Snap | |||
|---|---|---|---|
✔ | ✔ | ✔ | |
✔ | ✔ | ✔ | |
✔ | ✔ | ✔ | |
✔ | ✔ | ✔ | |
✔ | ✔ | ✔ | |
✔ | ✔ | ✔ | |
✔ | ✔ | ✔ | |
✔ | ✔ | ✔ | |
✔ | ✔ | ✔ | |
✔ | ✔ | ✔ | |
✔ | ✔ | ✔ | |
✔ | ✔ | ✔ | |
✔ | ✔ | ✔ | |
✔ | ✔ | ✔ | |
✔ | ✔ | ✔ | |
✔ | ✔ | ✔ |
Configure the Exchange Online Snap Pack Accounts Using SnapLogic Designer
...
In the Account tab, click the to view the accounts you have access to, and select the account you want to use.
Click the Save
 icon.
icon.
Create an Account
In the Account tab, click the Add Account button under the Account Reference field.
Select the location where you want to create the account, select the Account Type, and click Continue. The Add Account dialog window associated with the account type displays.

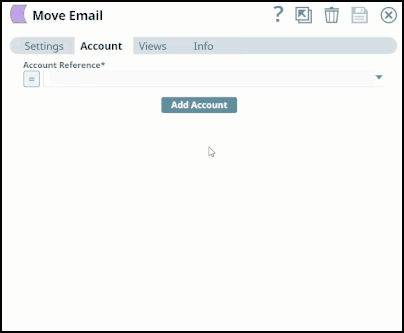
Enter the required account details. For detailed guidance on how to provide information associated with each account type, use the following links:
Click Validate to verify the account, if the account type supports validation.
Click Apply to complete configuring the Exchange Online account.
| Warning |
|---|
Avoid changing account credentials when Pipelines using them are in progress. This might lead to unexpected results, including locking the account. |
...
In the left pane, browse to the project in which you want to create the account and click Create > Account > Exchange Online, followed by the appropriate account type.
The Create Account dialog associated with the selected account type appears.

Repeat steps 3 through 5 in the Create an account section.
...