...
Create an instance in the ServiceNow portal.
Log into your instance in ServiceNow.
In the left navigation pane, type OAuth in the Filter box.
Click Application Registry,and then click New.
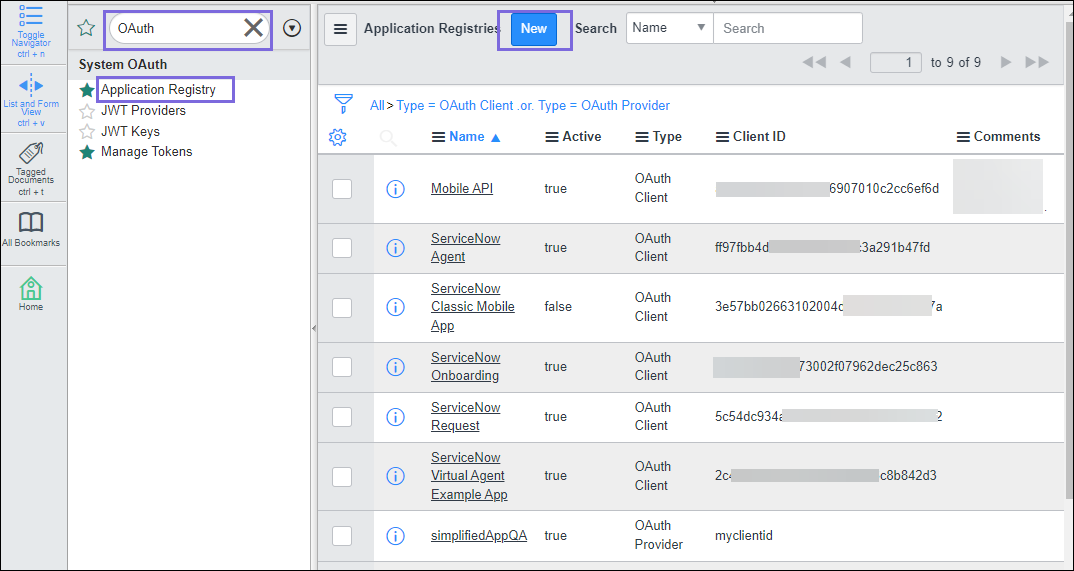
Select Create an OAuth API endpoint for external clients.
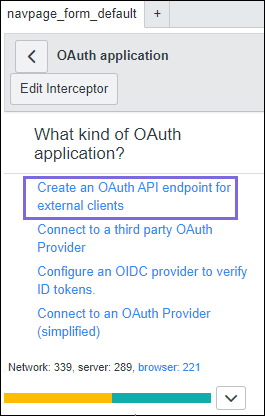
The app configuration form is displayed in the right pane.
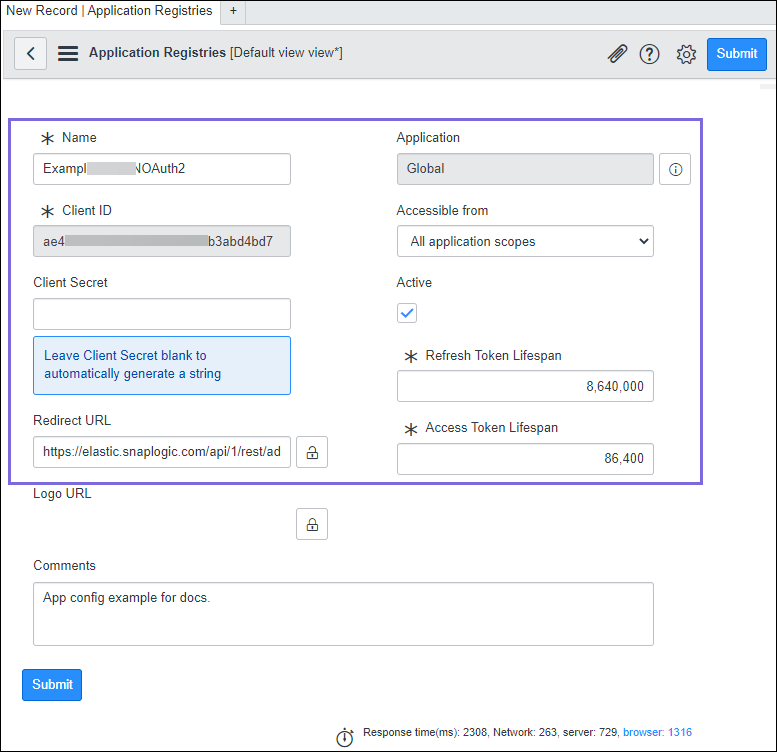
Enter the Name for your application.
To allow your app to remain active, leave the Active checkbox selected.
Enter the time (in seconds) to indicate the lifetime of the Refresh and Access tokens.
By default, the Access token is valid for 30 minutes and the Refresh token is valid for 100 days.Enter the Redirect URL .
based on the region of the server you are accessing. You can provide multiple URLs separating them with a comma. For example,https://elastic.snaplogic.com/api/1/rest/admin/oauth2callback/servicenow,https://elasticemea.snaplogic.com/api/1/rest/admin/oauth2callback/rest, https://uat.elastic.snaplogic.com/api/1/rest/admin/oauth2callback/servicenow
Note: To process the authorization of OAuth through the REST Snap pack, provide this URL:
https://elastic.snaplogic.com/api/1/rest/admin/oauth2callback/restOptional. Provide Logo Logon URL to upload an image for your app.
Optional. Provide comments as required.
Click Submit.
The Client ID and Client Secret are auto-generated. The newly created OAuth2 app appears on the list.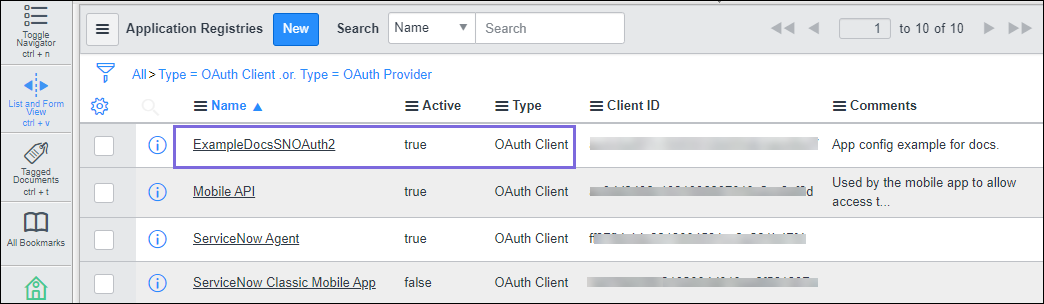
...
Navigate to the ServiceNow Snap of your choice and configure the ServiceNow OAuth2 Account with the following details:
Client ID: A Public Identifier for your app. Provide the Client ID that is auto-generated after creating the app in your ServiceNow instance.
Client Secret: Secret value known only to the app and the auth server. Provide the Client Secret that is auto-generated after creating the app in your ServiceNow instance.
OAuth2 Endpoint:
https://<servicenow instance name>.service-now.com/oauth_auth.do. For example, https://myinstance.service-now.com/oauth_auth.doOAuth2 Token:
https://<servicenow instance name>.service-now.com/oauth_token.do. For example, https://myinstance.service-now.com/oauth_token.do
Click Authorize.
You will be redirected to the login page of ServiceNow.Log into ServiceNow and accept the permissions.
The Access token and the Refresh Token will be generated.Select the Auto-refresh token checkbox and save the account.
...
Related Links