This account is used by the Snaps in the ServiceNow Snap Pack.
You can create an account from Designer or Manager. In Designer, when working on pipelines, every Snap that needs an account prompts you to create a new account or use an existing account. The accounts can be created in or used from:
- Your private project folder: This folder contains the pipelines that will use the account.
- Your Project Space’s shared folder: This folder is accessible to all the users that belong to the Project Space.
- The global shared folder: This folder is accessible to all the users within an organization in the SnapLogic instance.
Account Configuration
In Manager, you can navigate to the required folder and create an account in it (see Accounts). To create an account for ServiceNow:
- Click Create, then select ServiceNow > ServiceNow.
- Supply an account label.
- Supply the Username, Password, and Instance for your ServiceNow account.
- (Optional) Supply additional information on this account in the Notes field of the Info tab.
- Click Apply.
| Note |
|---|
| You need admin permissions to be able to suggest the tables from the Snap property using a provided ServiceNow admin account. There appears to be a workaround to grant a user permissions on the sys_directory_list table as documented at: https://community.servicenow.com/thread/152403. |
In this article
| Table of Contents | ||||||
|---|---|---|---|---|---|---|
|
Overview
Configure the ServiceNow Account to access the ServiceNow Snaps. The supported ServiceNow instances are:
- Aspen
- Berlin
- Calgary
- Dublin
- Eureka
- Fuji
- Geneva
- Helsinki
- Istanbul
- Jakarta
- Kingston
- London
Articles in this section
| Child pages (Children Display) |
|---|
Snap-Account Compatibility
| Snap | ServiceNow | ServiceNow OAuth2 Account |
|---|---|---|
| ServiceNow Delete | ✔ | ✔ |
| ServiceNow Insert | ✔ | ✔ |
| ServiceNow Query | ✔ | ✔ |
| ServiceNow Update | ✔ | ✔ |
Configuring ServiceNow Accounts
You can configure your ServiceNow account in the SnapLogic UI by using either Designer or Manager.
Using SnapLogic Designer
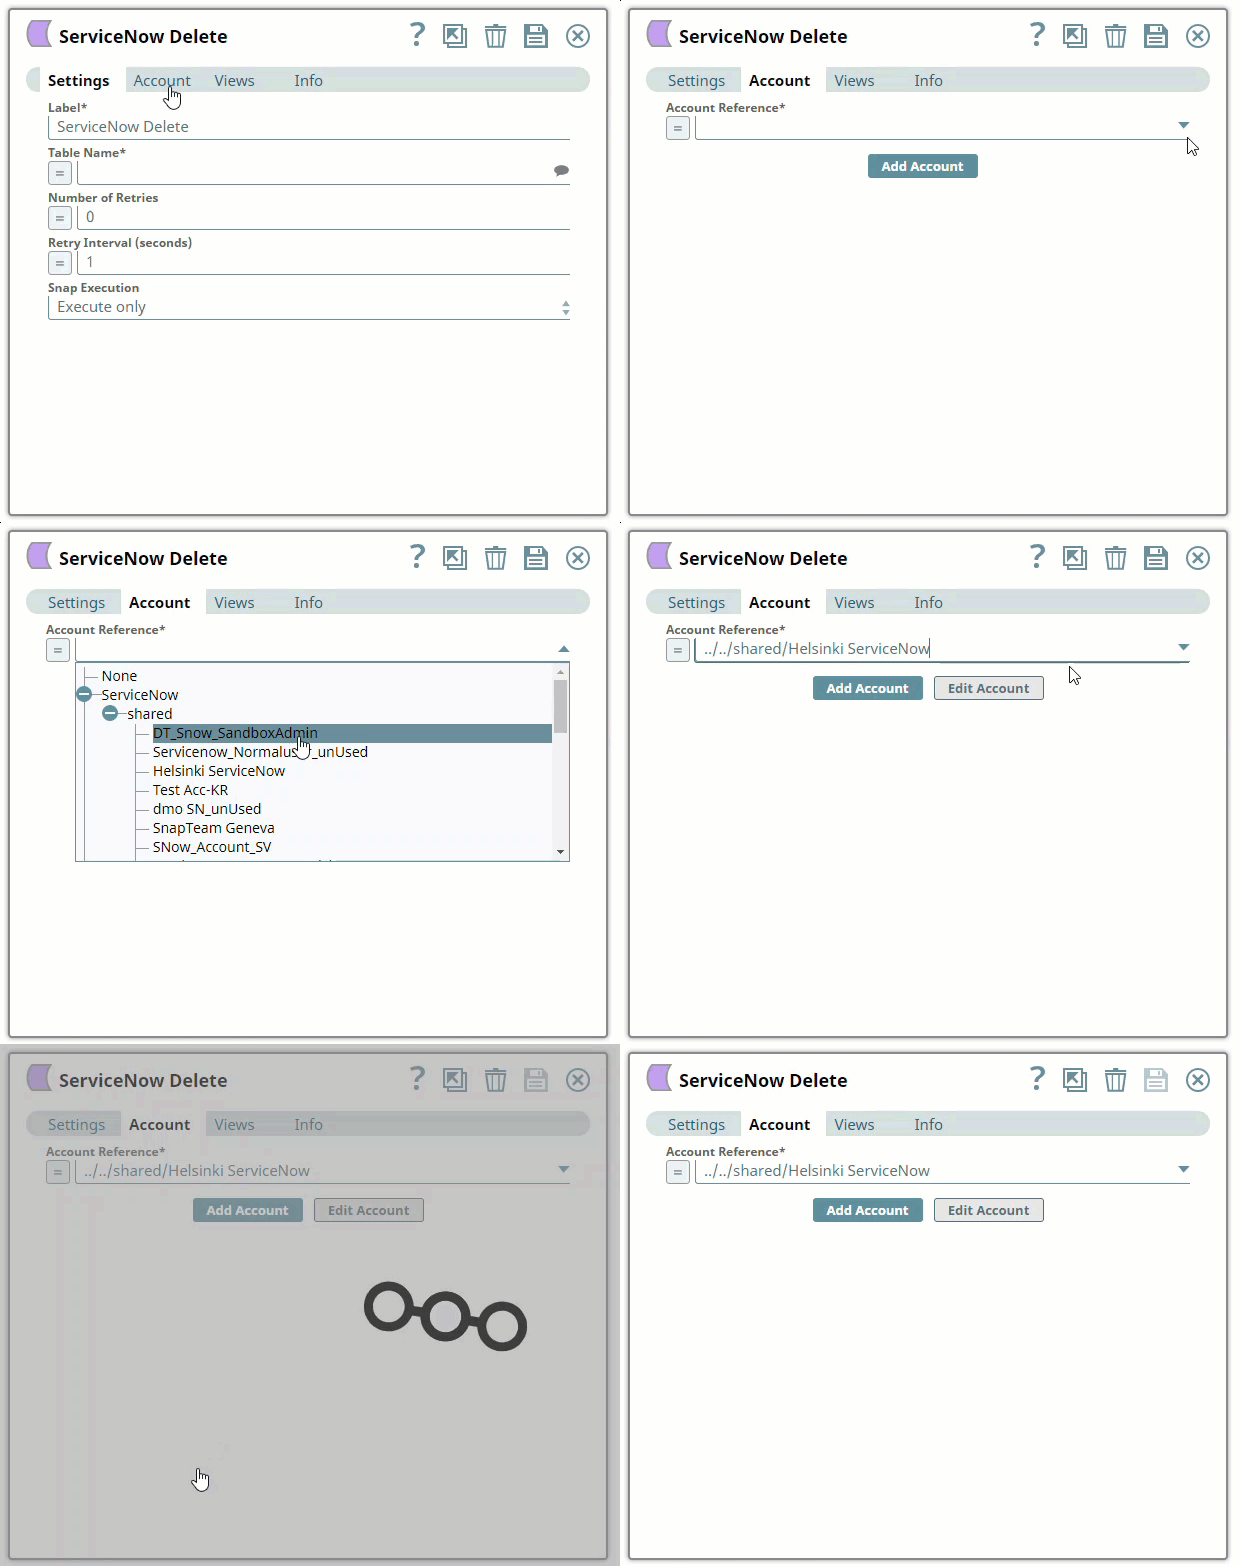
Drag a ServiceNow Snap to the Canvas and click the Snap to open its settings. Click the Account tab. You can now either use an existing account or create a new one.
Selecting an existing account
SnapLogic organizes and displays all accounts to which you have access, sorting them by account type and location. To select an existing account:
- Click the icon to view the accounts to which you have access and select the account that you want to use.
- Click to save the Snap settings.
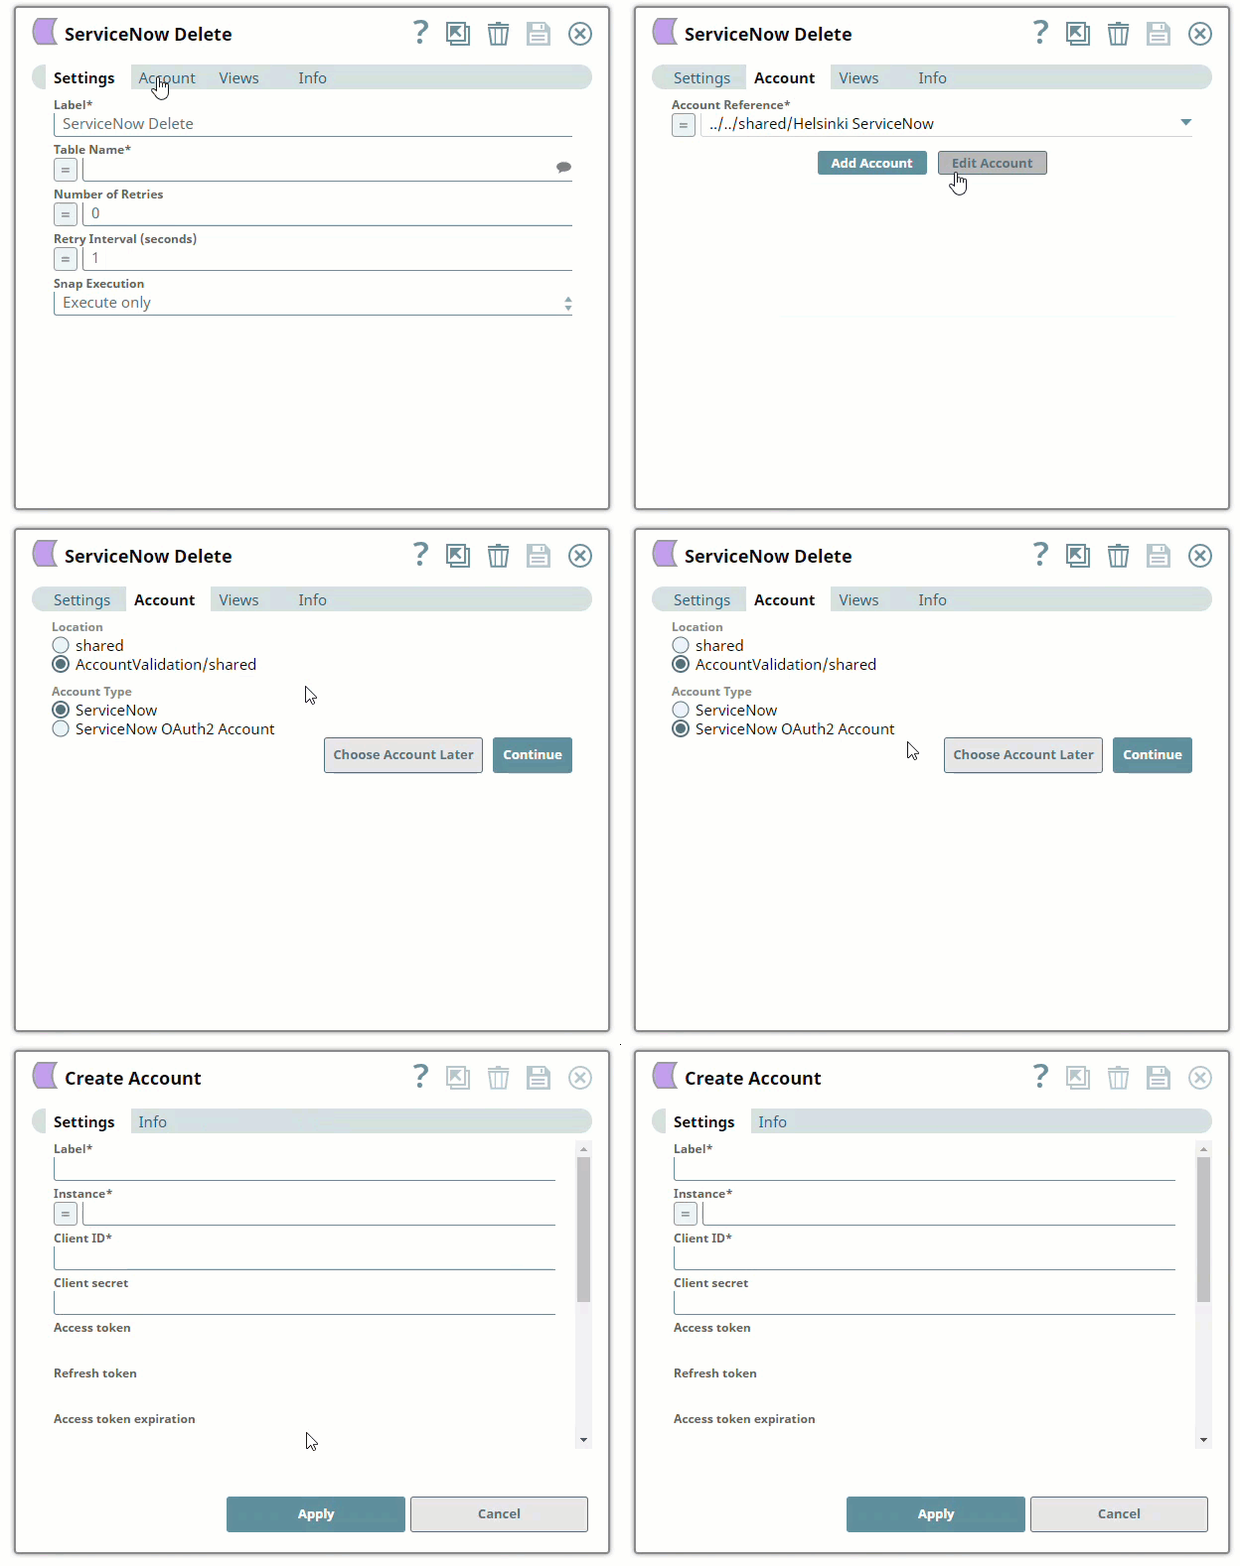
Creating an account
- Click Add Account in the Account Reference dialog.
- Select the Location in which you want to create the account, select the account type, and click Continue. The Add Account dialog associated with the account type appears.
Enter the required account details. For detailed guidance on how to provide information associated with each account type, use the following links:
Info Enter additional information on this account in the Notes field of the Info tab. This will help you–and other users–understand the purpose of the account, especially if there are multiple accounts of the same type
- Click Validate to verify the account, if the account type supports validation.
Click Apply to complete configuring the ServiceNow account.
Using SnapLogic Manager
Use Manager to create accounts without associating them immediately with Pipelines.
| Info |
|---|
Accounts in SnapLogic are associated with projects. You can use accounts created in other projects only if you have at least Read access to them. |
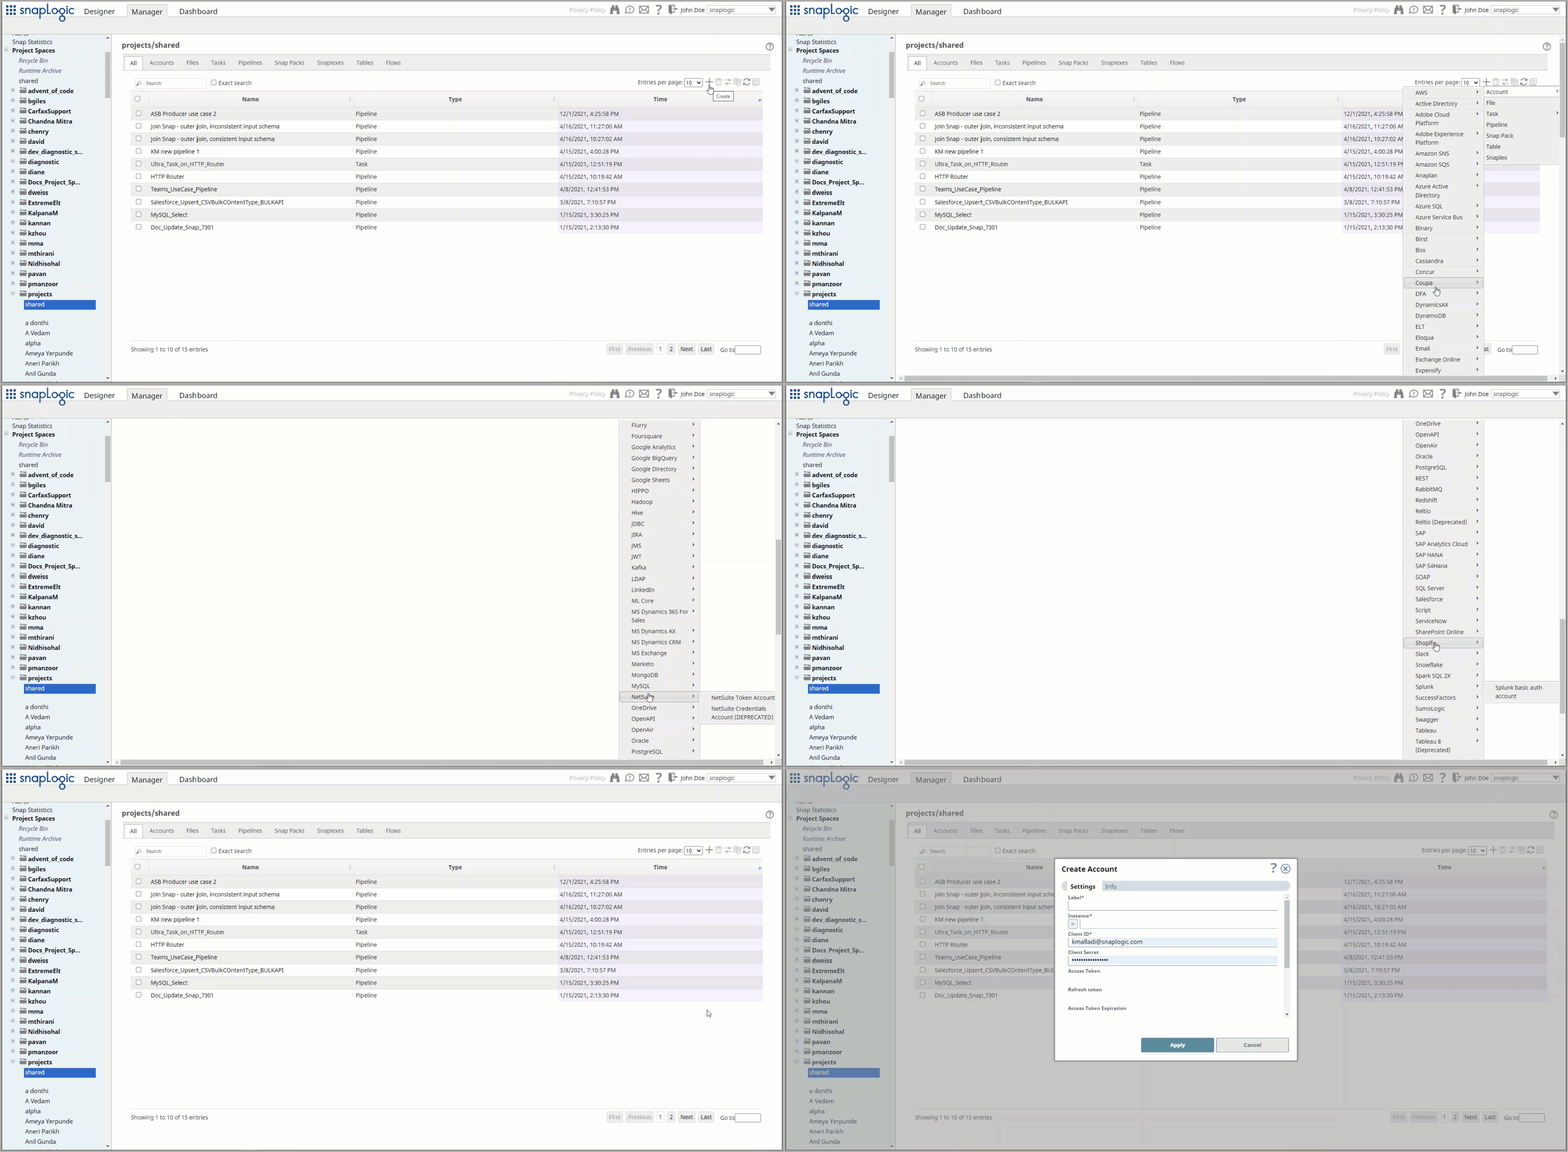
- In the left pane, browse to the project in which you want to create the account and click Create > Account > ServiceNow, followed by the appropriate account type.
Repeat the steps numbered 3 through 5 in the Creating an account section.
Warning Avoid updating account credentials when Pipelines using that account are being executed. This may lead to unexpected results, including locking your account
| Excerpt | ||
|---|---|---|
|
| Note |
|---|
We recommend you to create a role specific to your integration and provide to that role all of the rights that you need in order to perform the integration. |
Supported ServiceNow instances are: Berlin, Dublin, Calgary, Eureka, Fuji, & Helsinki.
Account Types
ServiceNow
Account Settings
Label
Username
Required. The name for this account.
Default value: [None]
Password
Required. The password for the account.
Default value: [None]Instance
Required. The name of the ServiceNow instance (subdomain)
Example: if https://abc.service-now.com/ is the URL of your ServiceNow instance then "abc" is the instance name.
Account Encryption
Standard Encryption | If you are using Standard Encryption, the High sensitivity settings under Enhanced Encryption are followed. | |
|---|---|---|
Enhanced Encryption | If you have the Enhanced Account Encryption feature, the following describes which fields are encrypted for each sensitivity level selected for this account. Account:
| |
| borderColor | black |
|---|---|
| borderWidth | 1 |
| borderStyle | solid |
| title | Account History |
4.14 (snapsmrc490)
No updates made. Automatic rebuild with a platform release.
4.5.1
Extended support for the latest ServiceNow releases through Helsinki| Insert excerpt | ||||||
|---|---|---|---|---|---|---|
|


