Overview
Snaps that write data to a database or a file on a server or move data between resources require you to have authenticated access to that resource. For example, to write to S3 files on an AWS S3 database, you need an active S3 account. You can establish this access by creating an account on that resource with your credentials.
Account expiration is controlled by the endpoint.
You can also choose to include the accounts while exporting or importing a project. See Importing and Exporting Projects for details.
Prerequisites
- Write permissions for the project for which you are creating the account.
- Values for account settings, such as hostname or server path, as applicable. These are received from the endpoint that you will access using the account.
Known Issue
com.atlassian.confluence.api.service.exceptions.PermissionException: Parent page view is restricted
If you're experiencing issues please see our Troubleshooting Guide.
Creating an Account
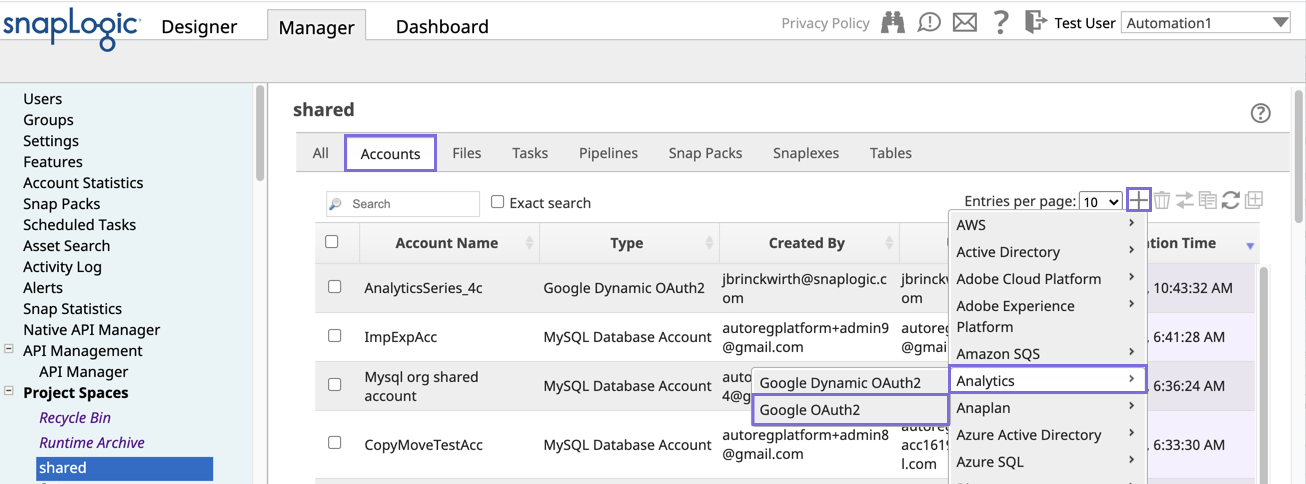
You can create an account in SnapLogic from the Accounts tab that is accessible through both Manager and Designer. To do this:
- Access the Create Account dialog in one of the following ways:
- Using the SnapLogic Manager:
- Click Project Spaces in the left navigation bar.
- Navigate to your project space and click on the project for which you want to create an account.
- In the project page, do one of the following:
- With the All tab selected, click the + icon in the project toolbar and select Account.
- Click the Accounts tab, and in the project toolbar on the right, click + .
- Select the account you need to set up. For example, to create an AWS S3 account, select Binary > AWS S3. The supported account types are displayed when you click on the account name.
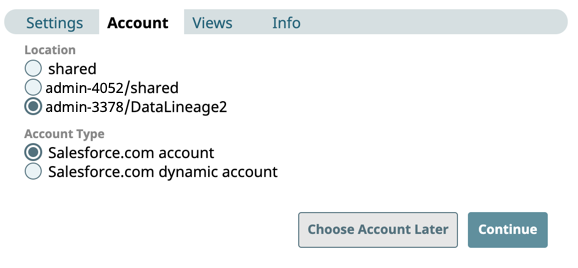
- Using the SnapLogic Designer:
Drag a Snap that requires the account that you want to create, to the Canvas.
- Click the Accounts tab in the Snap if the Create Account Options dialog does not display automatically, and then, Add Account.
- Select the account location(project location) and type, and click Continue.
- Using the SnapLogic Manager:
- In the Create Account dialog, specify the account settings. See the specific Snap Pack documentation for more information on configuring accounts.
- Click Apply to create the account.
You can see the new account in your project's Accounts tab in Manager along with useful details such as the account type, creation date, and the user who created and last updated it. Hover over the account name to access the context menu. From there, you can access the account's activity log for its creation and modification. For more information, see Activity Log. When you select a Snap that requires an account, the Account > Account Reference field lists accounts that work with that specific Snap, and to which you have access.
If you have access to multiple Orgs, you can migrate accounts from one Org to another. See Migrating Accounts for more information.
Avoid changing account credentials while Pipelines using them are in progress. Doing so may lead to unexpected results, including locking the account.