Configuring Zuora Accounts
- Kalpana Malladi
- Diane Miller (Deactivated)
- Gouri Bhagchandani (Deactivated)
In this article
Overview
You must create Zuora accounts to connect to data sources that you want to use in your Pipelines.
Snap-Account Compatibility
Configuring Zuora Accounts
You can configure your Zuora accounts in SnapLogic using either the Designer or Manager.
Using SnapLogic Designer
Drag a Zuora Snap to the Canvas and click the Snap to open its settings. Click the Account tab. You can now either use an existing account or create a new one.
Selecting an existing account
SnapLogic organizes and displays all accounts to which you have access, sorting them by account type and location. To select an existing account:
- Click the
 icon to view the accounts to which you have access and select the account that you want to use.
 - Click
 to save the Snap settings.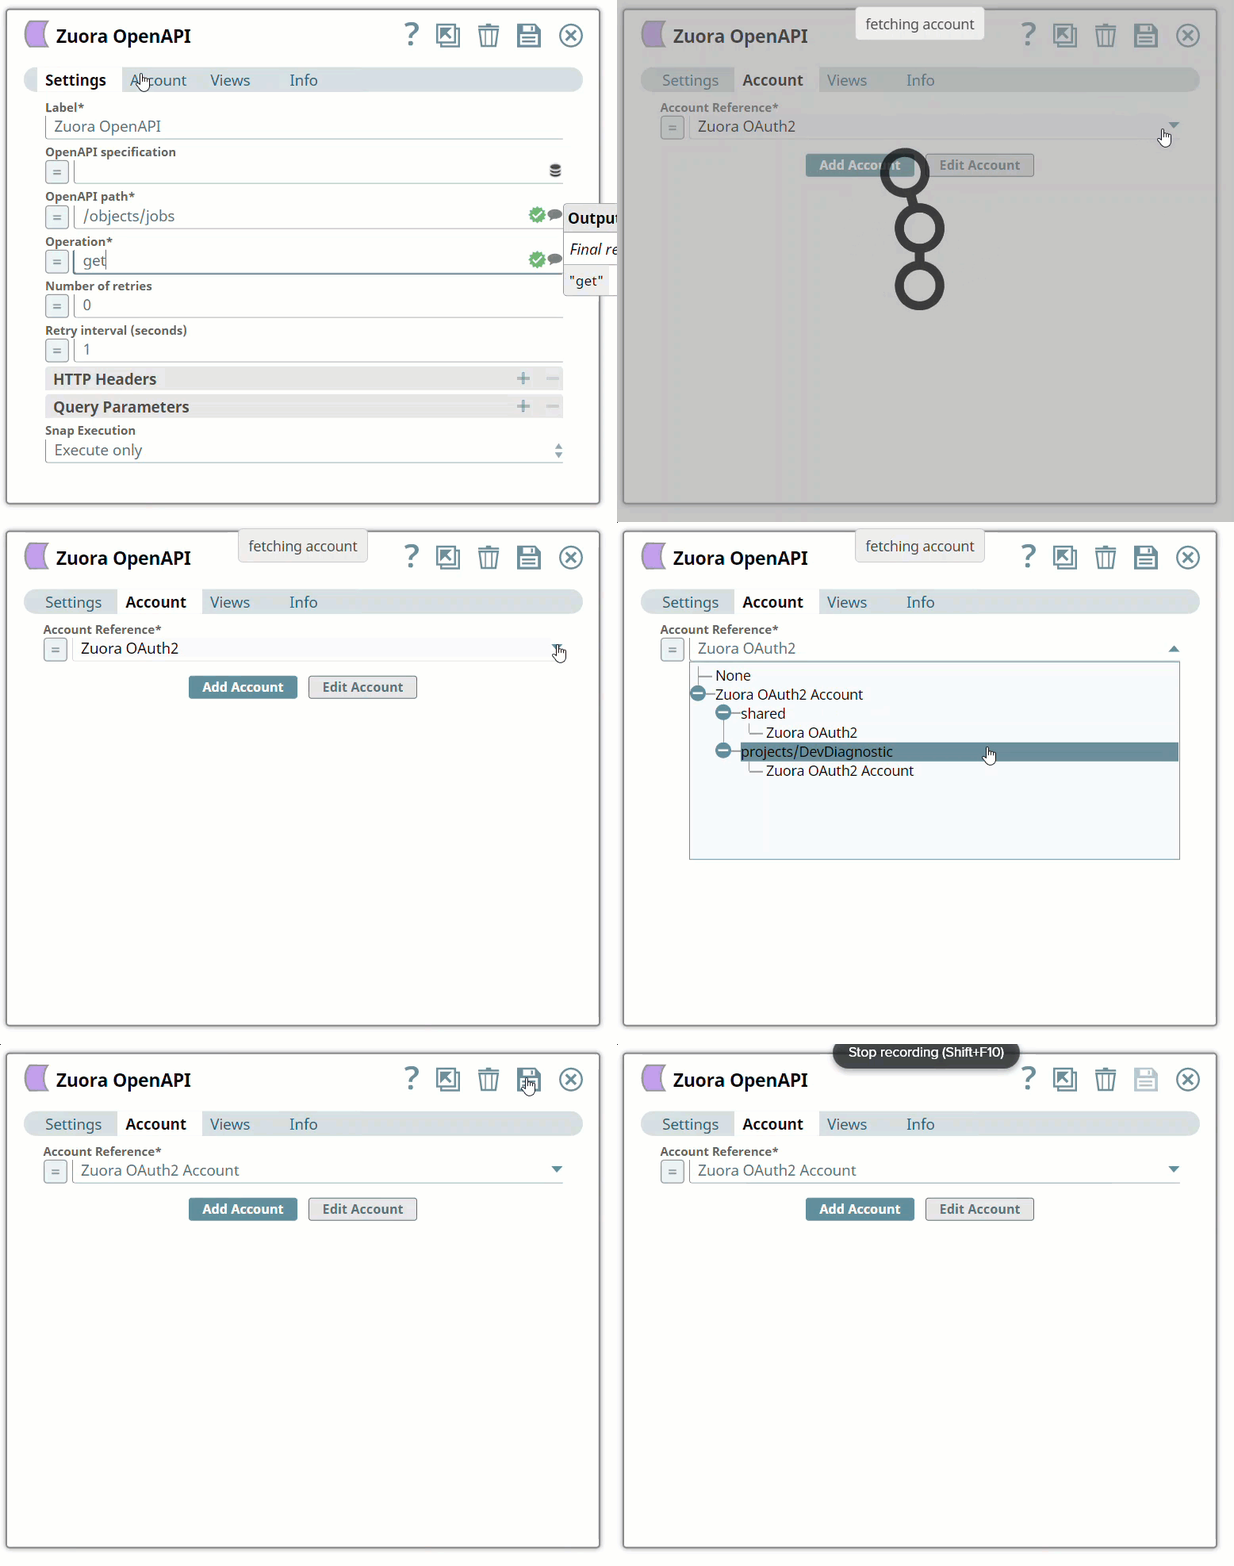
Creating an account
- Click Add Account in the Account Reference dialog.
- Select the Location in which you want to create the account, select the account type, and click Continue. The Add Account dialog associated with the account type appears.
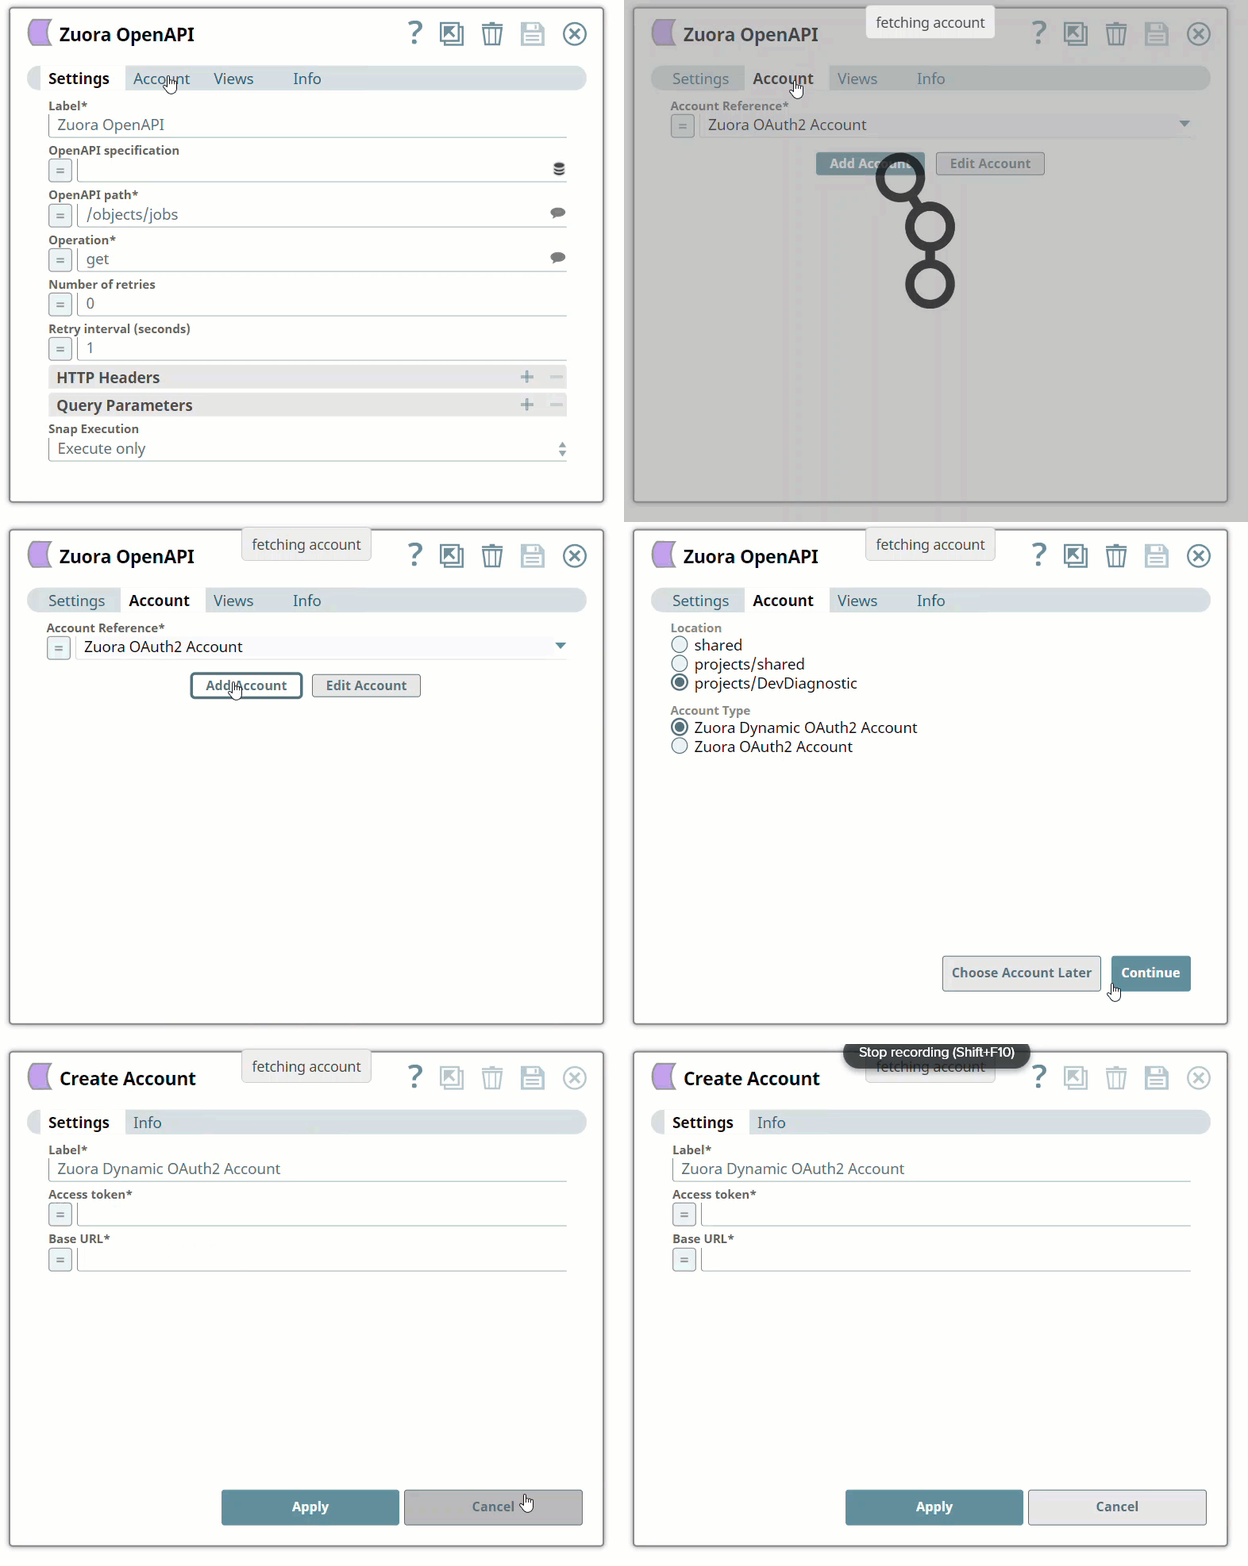
Enter the required account details. For detailed guidance on how to provide information associated with each account type, use the following links:
- Zuora Soap Account
- Zuora Dynamic OAuth2 Account
- Zuora OAuth2 Account
- Application Configuration in Zuora Portal for OAuth2 Account to use in Zuora
Enter additional information on this account in the Notes field of the Info tab. This will help you–and other users–understand the purpose of the account, especially if there are multiple accounts of the same type.
- Click Validate to verify the account, if the account type supports validation.
Click Apply to complete configuring the Zuora account.
Using SnapLogic Manager
Use Manager to create accounts without associating them immediately with Pipelines.
Accounts in SnapLogic are associated with projects. You can use accounts created in other projects only if you have at least Read access to them.
- In the left pane, browse to the project in which you want to create the account and click Create > Account > Zuora, followed by the appropriate account type.
Repeat the steps numbered 3 through 5 in the Creating an account section.
Avoid updating account credentials while Pipelines using that account are executing. This may lead to unexpected results, including locking your account.
Snap Pack History
Have feedback? Email documentation@snaplogic.com | Ask a question in the SnapLogic Community
© 2017-2025 SnapLogic, Inc.