SnapLogic Product Trial Quick Start Guide
- Ankur Parekh
- Ruth Stento
- Aparna Tayi (Unlicensed)
- Chandna Mitra
Prerequisites
Before you begin building a pipeline, ensure that you have the following:
- User credentials to log into the SnapLogic IIP. Don’t have a free trial account yet? Sign up here.
- Account credentials of the applications you need to access. For instance, your Salesforce account.
- Document files, if any, to process as inputs in the pipeline.
- Viewed “How To” videos to learn how to build your first pipeline:
The SnapLogic Trial is hosted in a shared environment. Please be mindful of the data you use during the trial.
If you already have an account for SnapLogic, you will not receive the email from the platform with temporary credentials. The Trial Program Manager is notified of your sign-up request and will add you to the trial org. If you do not see snaplogictrial as your org within 24 business hours, email trial-support@snaplogic.com.
SnapLogic Intelligent Integration Platform: Introduction
During your trial, you will connect Snaps (pre-built connectors) and build integration pipelines through the Designer tab.
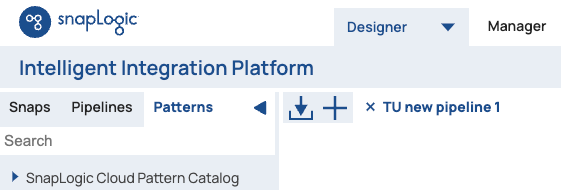
Accessing Snaps
Access our Free Trial Snaps through the Snap Catalog on the left panel in the Designer as shown below. You can build pipelines with the Snaps provided for the trial.
Custom Snaps, which enable integration between applications and databases that are not currently available in the Snap catalog, cannot be created during the trial.

Once you identify the Snap to use, drag and drop it onto the canvas. To link Snaps, the input view type of the next Snap must match the output view type of the previous, that is, Snaps with binary input view (diamond connector) can only be connected to Snaps with a binary output view (diamond receptor), and Snaps with a document input view (circle connector) can only be connected to Snaps with document output view (circle receptor).
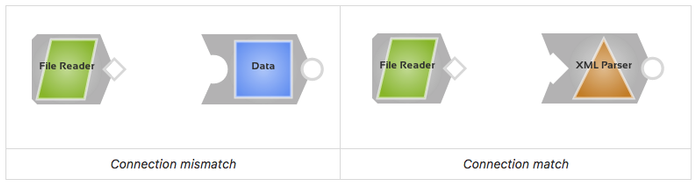
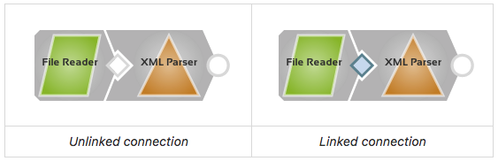
It is possible for two Snaps to be next to each other but not actually be linked. Make sure the views (the circle or diamond between the two Snaps) turn blue, indicating that the Snaps are linked.
Configuring Snaps that have no Input/Output View
- Click the Snap to open a window with multiple tabs (Settings, Account, Views, Info).
- Under the Views tab, click "+" to add the required input and output view type and click the save
 icon.
icon. 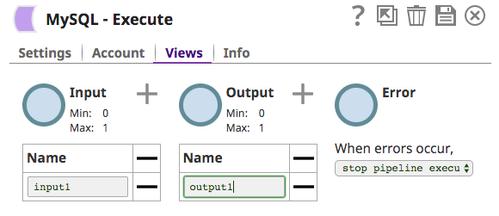
The Snap is now configured and ready to connect with other Snaps in a pipeline.
Using Patterns
In this section, we will use SnapLogic Patterns to build pipelines. Patterns are ready-to-use pipelines you can configure and customize using a step-by-step wizard.
To build a SnapLogic pipeline using a Pattern:
- Log into the SnapLogic platform using either a Chrome or Firefox browser.
- On the left panel, in the Designer tab, click Patterns > Projects to view the pipeline patterns.
- Click a pipeline pattern you want to use. In this example, we are using the Salesforce to ServiceNow pattern. This displays the pre-built pipeline with the Pipeline Configuration Wizard to the right.
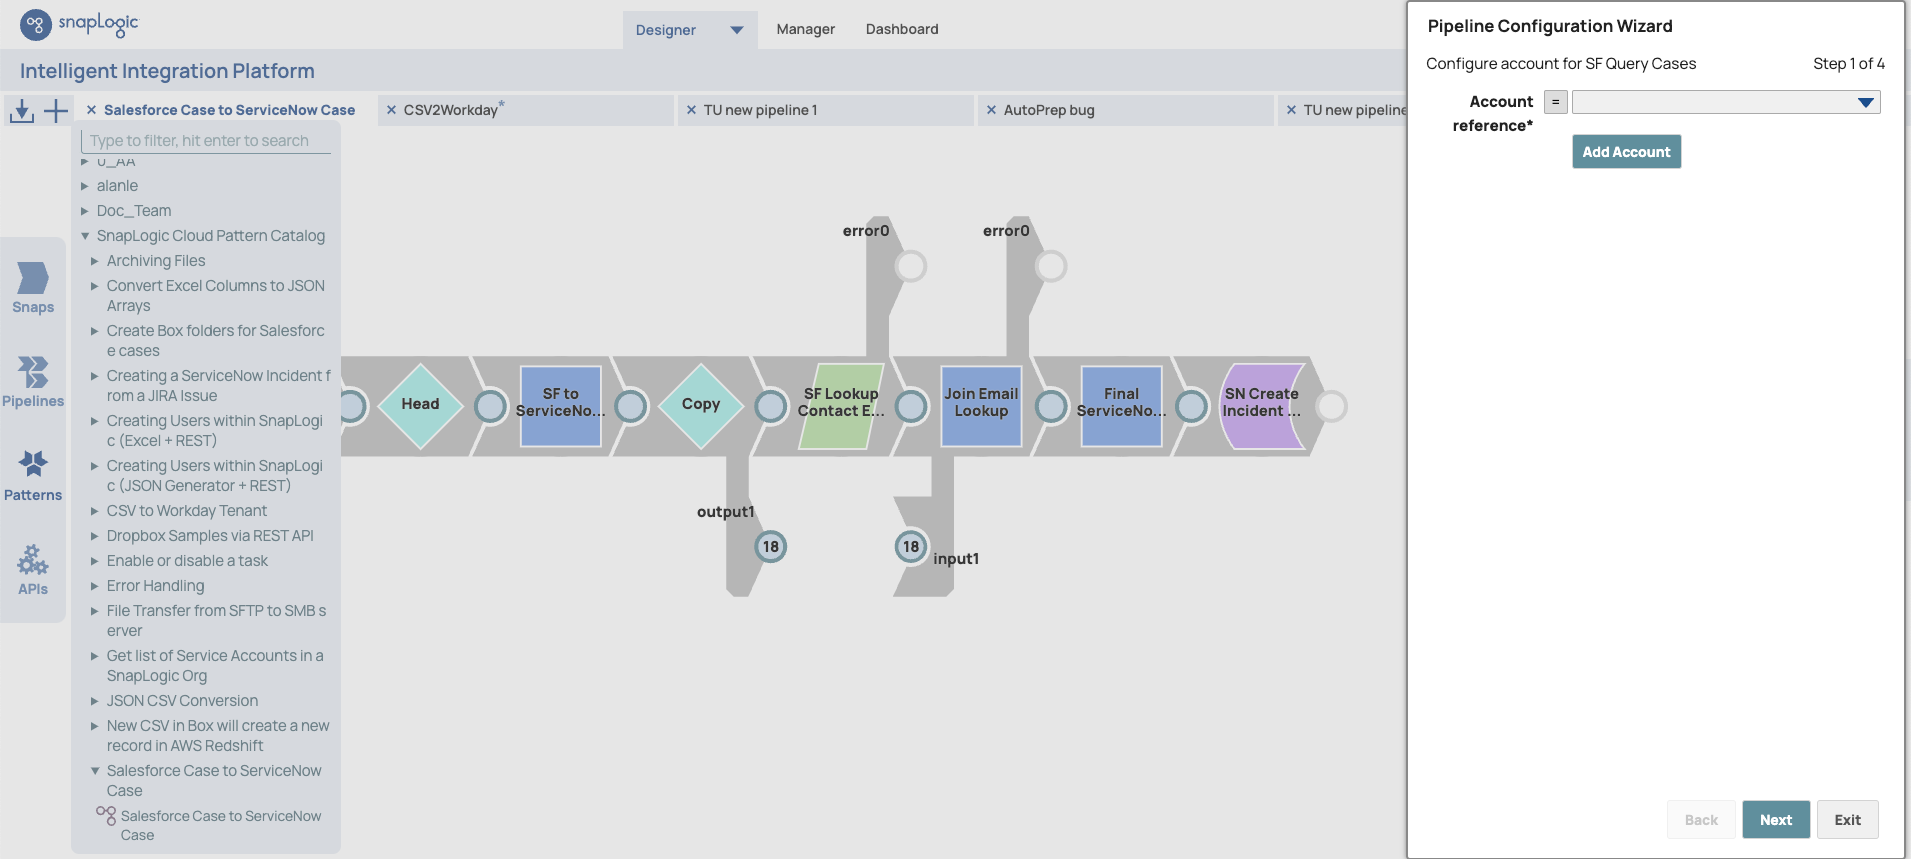
- In the Wizard, configure the applicable accounts:
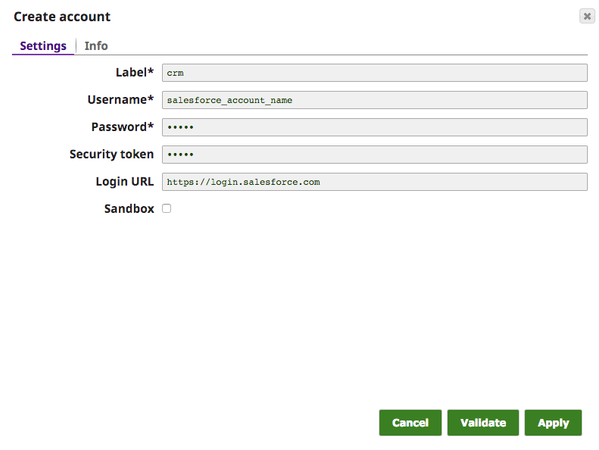
a. Click Add Account to open the Create Account Options dialog. Click OK.
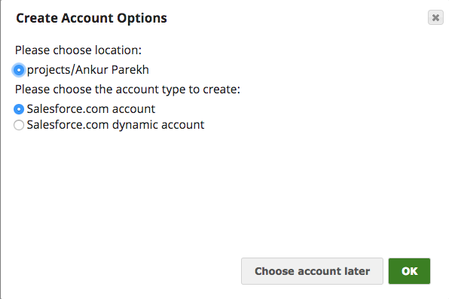
b. In Create account, you need to have an existing account for the application you’re using for this trial (for example, Salesforce) that you are integrating in the SnapLogic platform. For example, as shown above, you will need an existing SFDC (Salesforce.com) account user credentials to enter in the Create account dialog.
c. Once you have entered the information of the application you are accessing, click Validate or Apply. This configures your account in the Wizard. Click Next.
d. Likewise, and as needed, provide account details for any additional accounts related to the Snaps and pipelines you’d like to create.
e. After configuring the accounts, click Execute Pipeline. The color of the Snaps in the pipeline turn yellow in a running state and then green upon successful execution.
Once you complete the steps outlined in this Quick Start Guide you should now be able to create your first integration pipeline. Congratulations!
For more information:
- Email trial-support@snaplogic.com with any support questions. Free trial support hours are Monday through Friday 9AM-5PM PT. You can expect responses within 24-hours.
- Search this documentation portal for additional information.
- Visit community.snaplogic.com to consult SnapLogic experts and watch the how-to videos available in the Community’s Free Trial category.
See Also
Have feedback? Email documentation@snaplogic.com | Ask a question in the SnapLogic Community
© 2017-2025 SnapLogic, Inc.