Deploying and Managing SnapLogic Containers on Mesosphere
- Leena Gopal
- Rakesh Chaudhary
- Mohammed Iqbal
In this Page
Overview
Deploying SnapLogic Snaplexes as containers in Mesosphere significantly reduces your total cost of ownership in terms of infrastructure, team, and maintenance costs, while enhancing technology standardization, availability, and efficiency.
This document explains how you can deploy and configure SnapLogic Snaplexes on Mesosphere.
The Mesosphere Universe is a DC/OS package repository that contains services like Spark, Cassandra, Jenkins, and many others. To deploy SnapLogic Snaplexes on Mesosphere, you need to create a Mesosphere Universe server and then install the SnapLogic package in it.
Prerequisites
You must have access to a Mesosphere cluster, or must have deployed Mesosphere server running on your premises. For information on starting the Mesosphere universe server, see the Universe Server section in the Mesosphere Universe page on GitHub.
Deploying SnapLogic-Snaplex in Mesosphere
Contact us at support@snaplogic.com to get this package.
To deploy the SnapLogic-Snaplex container:
- Start the Mesosphere Server.
- Start the universe server with the SnapLogic-Snaplex package. For more information on doing so, see the Mesosphere Universe page on GitHub.
- Once the SnapLogic-Snaplex package is hosted in your Mesosphere Universe server, search for the 'Snaplogic-Snaplex' package in the Catalog.
- Click the snaplogic-snaplex label. This displays the Edit Configuration page.
- Click the Review & Run button on the top-right side to deploy the package.
This deploys the package and displays the Edit Configuration page.
The Edit Configuration page is split into two sections: Service Properties and Service Configuration.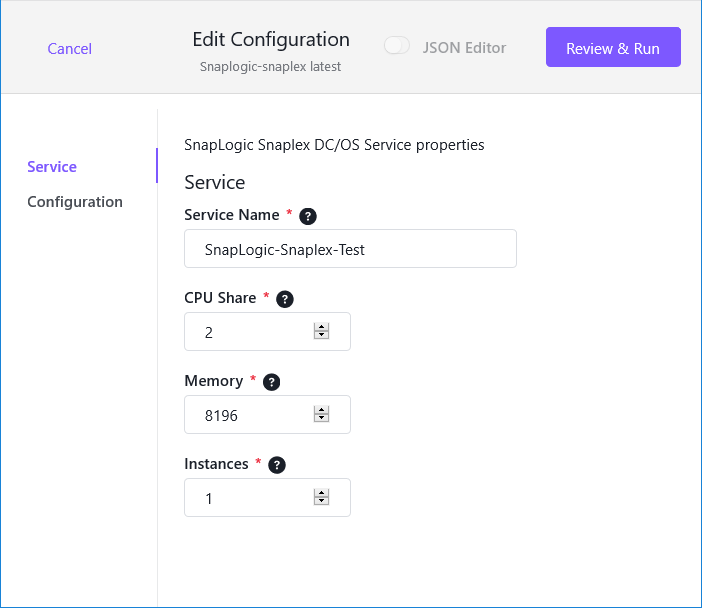
- Specify the Service Properties associated with SnapLogic-Snaplex package:
Service Name: Enter the service name, by which the package will be accessed within the Mesosphere universe.
You can use any unique name for the SnapLogic-Snaplex service as long as it doesn't conflict with other services.
CPU Share: Specify the number of CPU cores you want to use for each SnapLogic-Snaplex node. You can also use float numbers here. This enables you to dedicate even specific percentages of a CPU to each Snaplex node. The minimum acceptable value for this field is 1; the recommended value is 2.
Memory: Required. Specify the amount of memory ( in Mb) that you want to use for each SnapLogic-Snaplex Node. The minimum recommended memory allocation is 4096 Mb; the recommended allocation is 8192 Mb.
Instances: Required. Specify the number of nodes you want to use for this service. The minimum number is 1.
- Click Configuration to save your changes and display the Configuration page:
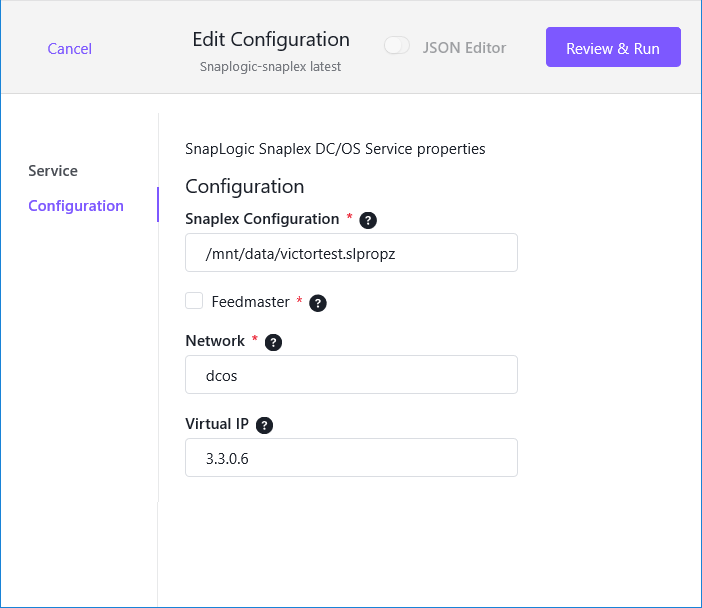
- Use the Configuration page to provide the following details:
Snaplex Configuration: Required. This is the Snaplex Configuration path. The user should download the Snaplex properties from Manager page and place this file in the Network file system. This field must point to that file. For example, if the Snaplex properties file is located in the "/mnt/data" folder, the path must read "/mnt/data/victortest.slpropz".
Feedmaster: Select this check box if you want to deploy SnapLogic Snaplex service as a Feedmaster.
Network: Required. This is the name of the Mesosphere network. The default name configured by Mesosphere is 'dcos'.
Virtual IP: Enter here the Virtual IP you want to use for this service. This address is used to generate the load balancer address.
For example, if you specify the Virtual IP as '3.3.0.6' and select the Feedmaster check box, the Snaplex load balancer address is automatically configured as '3.3.0.6:8084'.
However, if you do not select the Feedmaster check box, the Snaplex load balancer address is '3.3.0.6:8081'.
- Click Review and Run. This deploys the package.
SnapLogic Snaplex is now ready for use within Mesosphere.
See Also
- How to Start the Mesosphere Server.
- The Mesosphere Universe
- The Universe Server section in the Mesosphere Universe page on GitHub
Have feedback? Email documentation@snaplogic.com | Ask a question in the SnapLogic Community
© 2017-2025 SnapLogic, Inc.