Access Control for Triggered and Ultra Tasks
On this Page
You can invoke Pipelines as Triggered or Ultra Tasks using a SnapLogic Cloud URL or Groundplex URL. You can invoke a Cloudplex URL usually from any machine that has network access to the SnapLogic Cloud. However, if you enable an IP address Allowlist for the Org, you can invoke the Cloud URL only from those machines whose IP addresses fall within the IP Allowlist range that you specify. This functionality enhances security for your Tasks by limiting access to trusted IPs.
Allow Access to Tasks through IP Address Allowlist
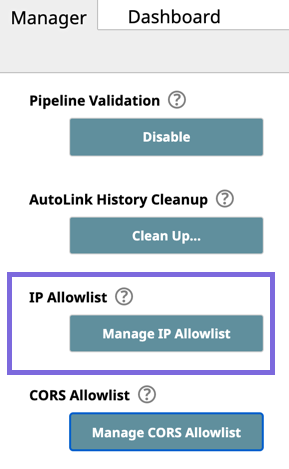
- Click Manager > Settings, scroll down the page to IP Allowlist, and click Manage IP Allowlist.
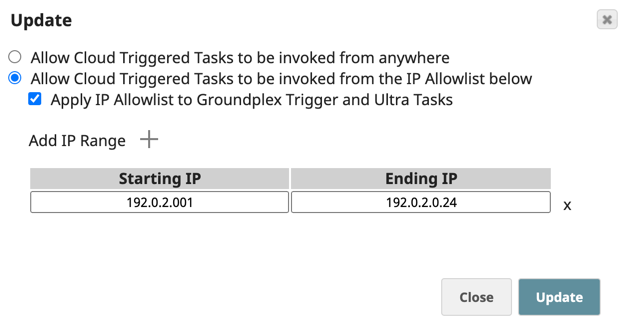
Click Allow Cloud Triggered Tasks to be invoked from the IP Allowlist below to allow access to Tasks from only allowed IP addresses.
The Allow Cloud Triggered Tasks to be invoked from anywhere option allows access to Tasks from all IP addresses, including those not on the Allowlist.
- Add or remove IP ranges from the Allowlist of IP Addresses, as required.
- To add a target range, click and enter the appropriate Starting IP and Ending IP addresses in the newly added row.
- To remove a range, click next to the IP range that you want to remove.
- (Optional) Select Apply IP allowlist to Groundplex Trigger and Ultra Tasks to include Tasks set up on the Groundplex.
- Click Update to save your changes.
You can invoke a Groundplex URL only from those nodes that have direct access to the Groundplex nodes. For security purposes, do not make Groundplex nodes accessible over the Internet.
Load balancers
You can apply an IP Address Allowlist even when Groundplex and FeedMaster is behind load balancers in your network configuration. You must configure the load balancer by adding an X-Forwarded Header to send the original client IP Address (client_ip) across the network.
Cross-Origin Resource Sharing (CORS)
If you initiate a trigger from a web page hosted outside the SnapLogic domain, the browser enforces Cross-Origin Request Sharing (CORS) access control to secure cross-domain data access. See Cross-Origin Resource Sharing for more information. Since the web page making the request is not hosted on the SnapLogic domain, the cross-origin request will fail. However, if you configure the list of domains that can make cross-origin requests to the trigger, then those domains will have access to it. Contact SnapLogic Support to configure this setting.
The CORS header is currently not configurable for Groundplex requests.
The default behavior is that the Access-Control-Allow-Origin HTTP header is not set in the OPTIONS response. If, for example, you want https://mydashboard.myorg.com to be allowed to make a CORS request to the trigger, you must add https://mydashboard.myorg.com to the list of domains for which the Access-Control-Allow-Origin header is allowed. You can either use URLs or regexes to enable CORS requests from any host in a domain or domain range.
CORS settings do not apply to requests initiated from outside a browser. If an IP Address Allowlist is enabled, the IP address of the machine where the browser session is running must be part of the IP Address Allowlist. If this is not feasible, the workaround is to modify the settings such that the Triggered Task is invoked from a back-end server rather than from the client side. In that case, only the back-end server needs to be allowed, and CORS does not apply, since the Triggered Task request would not be invoked from the browser.
Managing the CORS Allowlist
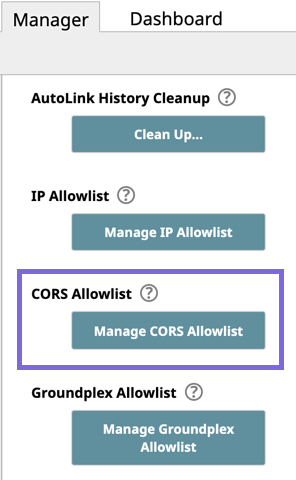
- Click Manager > Settings, scroll down the page to CORS Allowlist, and click Manage CORS Allowlist.
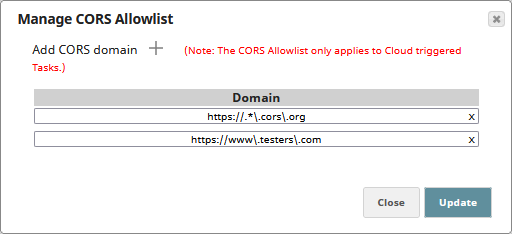
Add or remove a CORS domain as required. The CORS domain is compared with the Origin in the header of the request and must be a valid regular expression.
To add a CORS domain, click and enter the domain URL, preceded by either http:// or https://, to allow in the new field added to the dialog.
- To remove a CORS domain, click next to the domain that you want to remove from the Allowlist.
- Click Update to save your changes.
Have feedback? Email documentation@snaplogic.com | Ask a question in the SnapLogic Community
© 2017-2025 SnapLogic, Inc.


