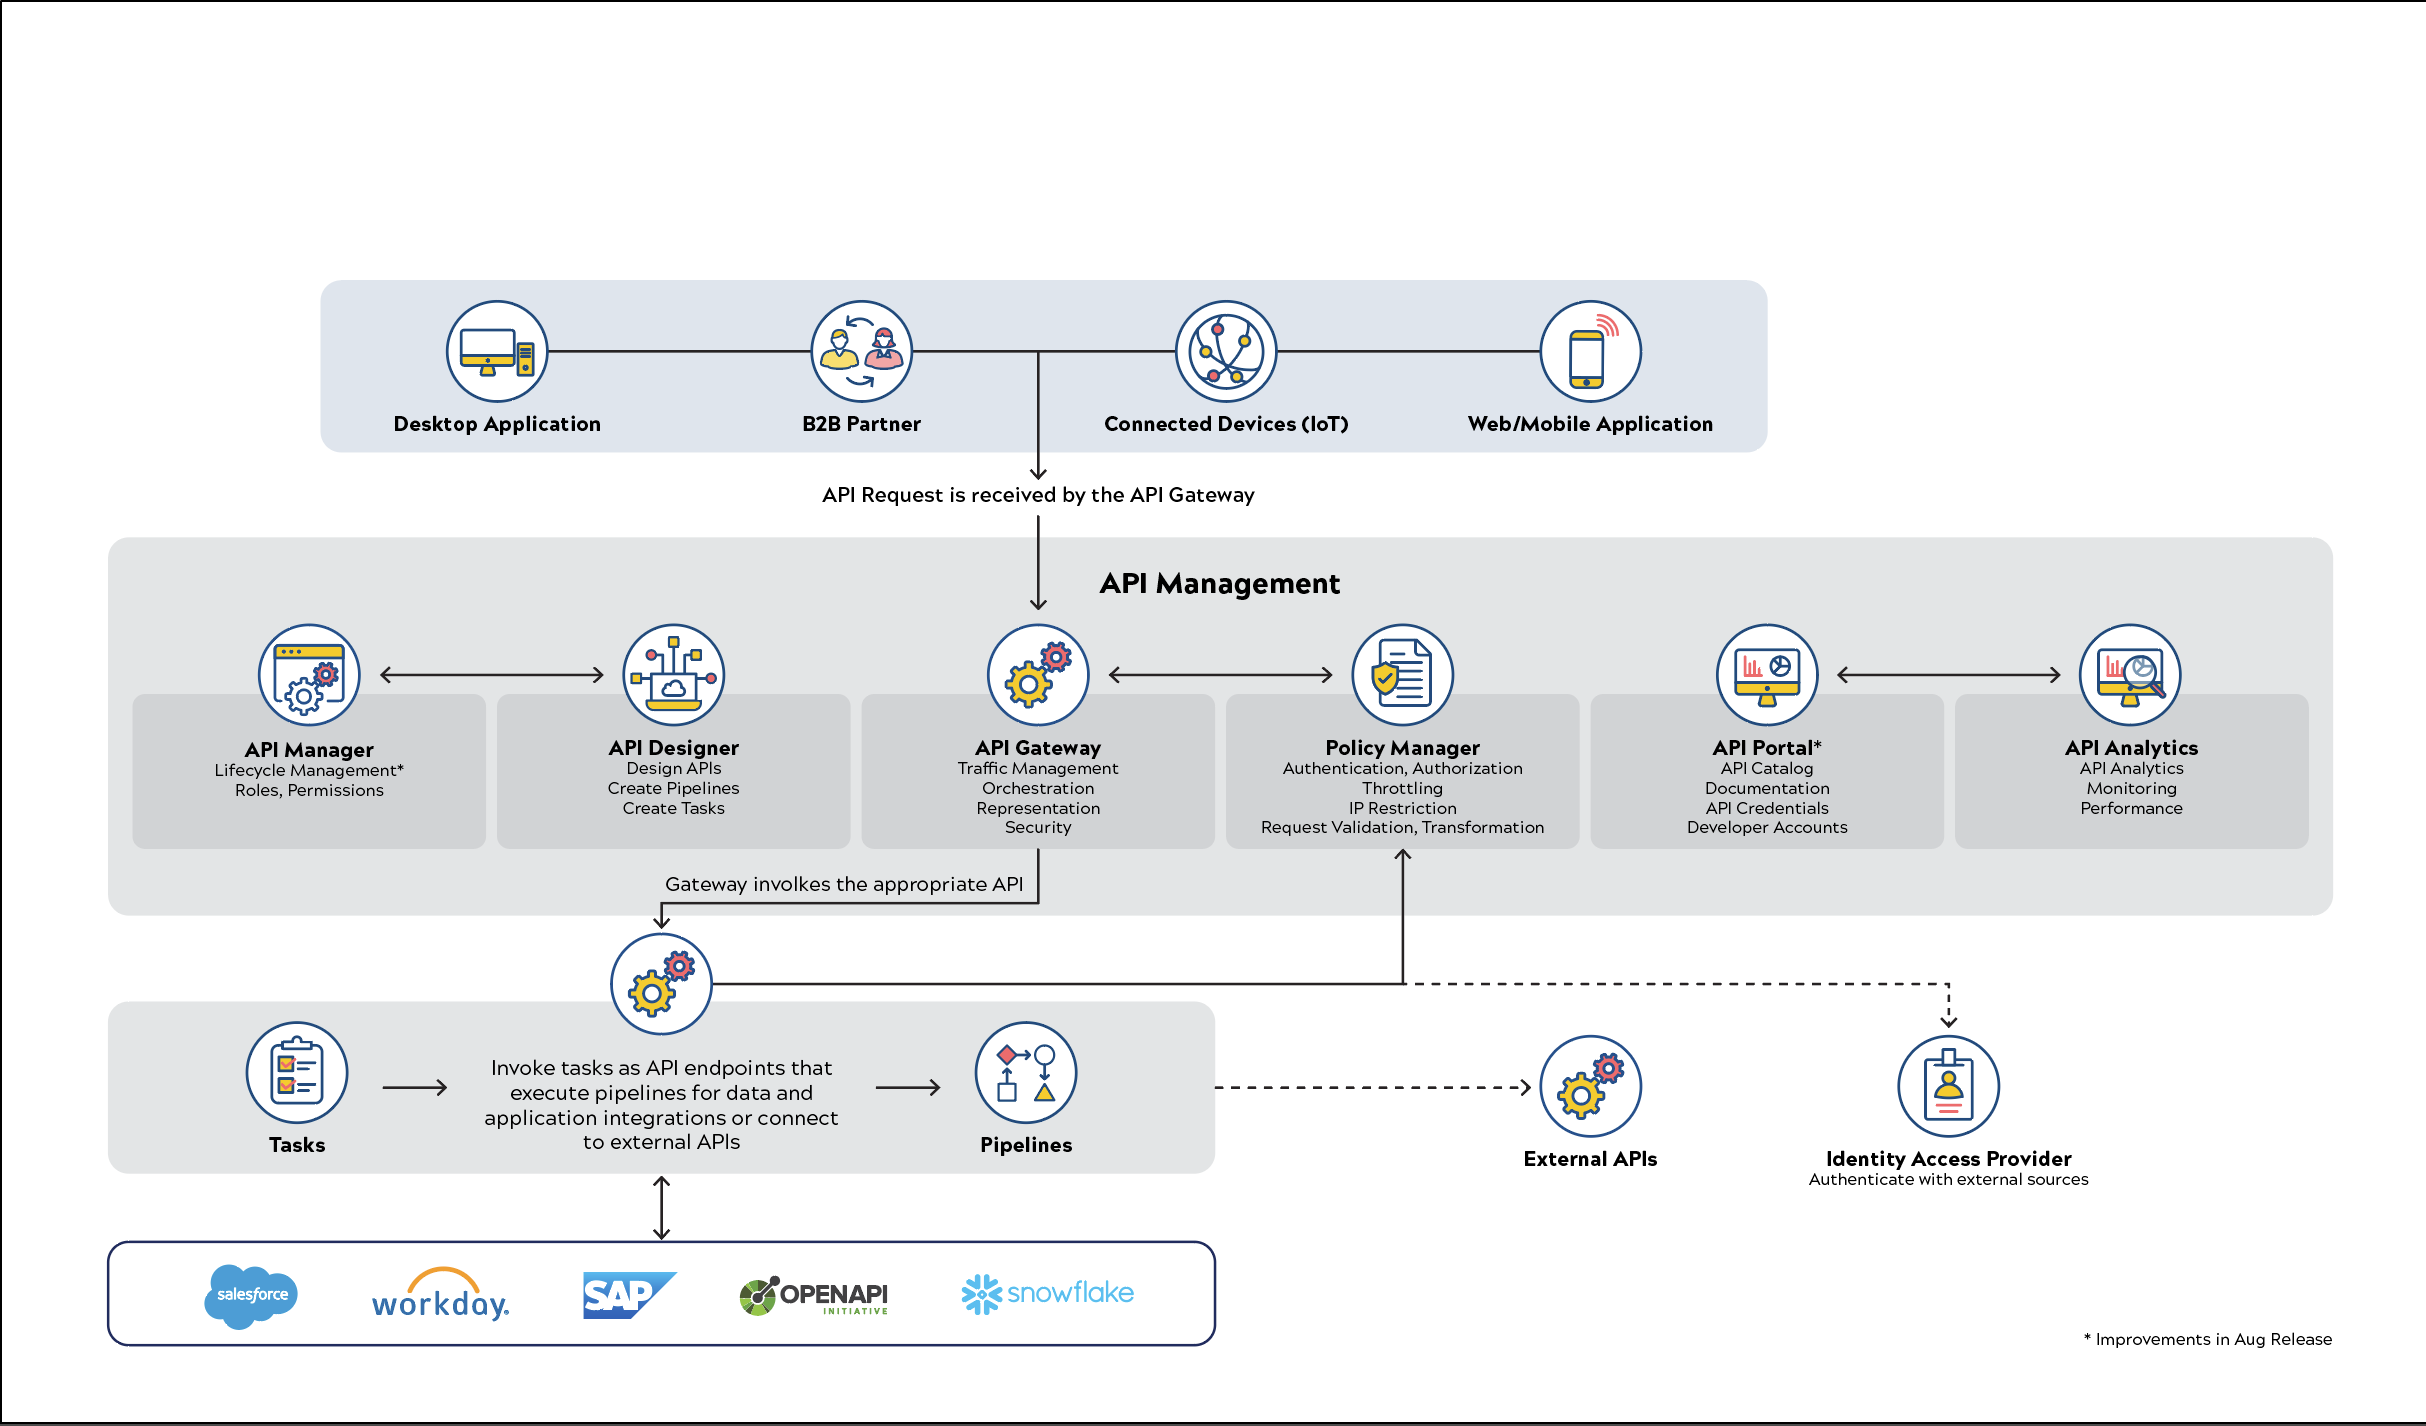
API Management Architecture
Prerequisites
The API Management feature must be enabled for your Org. Contact SnapLogic Support to subscribe to this feature.
Your API specifications must be based on Open API Specification (OAS) 2.0.
You must have a good understanding of the SnapLogic Manager and the SnapLogic expression language.
API Manager - Design First Workflow
When you import or reference an API specification to the new /apim space, a new API asset is created. The new API comprises a Pipeline that is the scaffolding for the API and the Task used to call it. You can then create versions, add API policies, set permissions, and modify the underlying SnapLogic assets to build the business logic for your API. You can find instructions for this workflow here: Creating the API using Design First
Create New API from existing Pipelines and Tasks
You can also create an API in the API Manager Console by referencing existing Projects in Manager. This functionality enables you, as a Pipeline designer, to complete your Pipeline building activity first. The advantage of this approach is taking advantage of your existing SnapLogic infrastructure. You can segment the design and testing activities as you build Pipelines and creates Triggered Tasks from them individually testing and vetting them for production. Once your Pipeline assets are production ready, you can create APIs in the API creation dialog windows. You can find instructions for this workflow here: Creating the API from Existing Project Assets
Limitations
For Cloudplex users, you must set up a load balancer for the API Policy Manager to work. You must use the load balancer URL in your Triggered and Ultra Task endpoints.
Only one API policy of a type is applicable at a level in the hierarchy.
When you open a Task in an API version, you cannot change it to Scheduled (not visible). Also, the Task dialog window displays the Snaplex, but it cannot be modified.
In Designer, when you open a Pipeline in an API version, the Snaplex selector in the Edit Pipeline dialog window only shows the Snaplex instances from the global shared folder.
In Designer, the asset or account selectors in the Snap dialog window opened from a Pipeline in the API Management - /apim space, only shows assets from the global shared folder, in addition to those in the current version.
You can change a Snaplex for an API Version if it is unpublished. However, clicking Edit Details from the API > Versions page displays the Server field for selecting another Snaplex, but the field is disabled if the Snaplex is down.
Server Configuration
If you need a new Cloudplex server for your environment, contact support at snaplogic.com with the request to set up a Cloudplex FeedMaster node. SnapLogic Support will add a Load Balancer to the provisioned new (or existing) Snaplex. Once the Load Balancer is set up, your Org admin must update the Load Balancer information URL in Update Snaplex > Settings.
Refer to this page for more information: Updating a Snaplex


