Creating a User
- John Brinckwirth
- Diane Miller (Deactivated)
- Ruth Stento
In this article
Overview
Org admins can use Manager, Admin Manager, or User and Group APIs to add users to an Org. A new user receives a sign-up email from SnapLogic. The email contains a login link. If the Org admin later changes a user's app access, the user also receives an email notification.
Refer to the AutoSync documentation for more information on AutoSync users.
User Types
You can use the Create User dialog to create the following types of users in Manager:
- Basic user—Logs in to SnapLogic applications using a username and password.
- Basic user (SSO Login)—Logs in to SnapLogic applications through an SSO (Single Sign-On) configured for the Org and has access the UI, not directly through the SnapLogic UI login. Use the Disable Password-based Login in the Create User dialog for this option.
- Basic user (No UI Access)—Does not log in to the SnapLogic IIP UI but has access to SnapLogic assets. Select API Access in the Create User dialog for this option. A regular user without UI access can act as a service account, but the user receives password reset emails.
- Org admin—Administers Org Settings, manages feature subscriptions, and has access to all assets in the Org.
- Service Account—Does not log in to the SnapLogic IIP UI and can only run Triggered Tasks with basic authentication. Service accounts require permissions on a project or group basis, like regular user accounts. These accounts, however, cannot access Designer or Manager, and can only run Triggered Tasks with basic authentication. The user that creates a service account will receive the welcome email for that service account.
Additional Options
- Create a project for this user in the default project space: The new project provides a workspace to build and test Pipelines without affecting other shared projects in the Org. If your company has already defined multiple Orgs in SnapLogic, and this user exists in another organization or was previously removed, then the existing user is added to the current Org.
- Provision this user as an Org admin: The new user will have administrative privileges.
- Send notification emails: Disable for account types that do not require access to the UI and for users who log in using SSO.
- Disable password-based login: The user can log in using SSO. SSO must be enabled for the Org and the user cannot belong to another Org that does not have SSO.
- Multi-factor authentication-one time passcode: The user will need to have an authenticator app and log in using one-time passcodes. Password-based login must be enabled. Currently, the user cannot belong to more than one Org.
Security
To protect user accounts, SnapLogic offers additional security with Multi-factor authentication (MFA) and Single Sign On (SSO). Both reduce risks of unauthorized access, phishing, and other forms of cyber-attacks. SnapLogic supports SSO for Identity Providers (IdPs) that use the Security Assertion Markup Language 2.0 (SAML 2.0) standard. SnapLogic uses Auth0 to support MFA for authenticators that comply with the OAuth 2.0 standard. We support MFA with a one-time passcode.
MFA is an optional add-on. An Org admin enables MFA per user, and the user completes the setup:
An Org admin creates or edits a user account in Classic Manager and selects Multi-factor authentication-one time passcode.
The user must create a password and register SnapLogic with their authenticator. This is a multi-step process.
Prerequisites
- You must be an Org admin to create users.
Username must be a valid email address and must meet the following requirements:
It must start with a letter, number, or one of the following special characters: !#$%&'*+/=?^_`{|}~-
The name part of the email address (before @) can contain one or more periods. The period must be followed by a letter, number, or one of the following special characters: !#$%&'*+/=?^_`{|}~-
- The domain name (after @):
- Must begin with a letter or number.
- Can contain a hyphen. The hyphen must be followed by a letter or a number.
- Must contain at least one period.
- Must end in an extension that contains at least two characters.
Steps
In the SnapLogic Manager, click Users in the navigation pane to display the Users screen.
- In the toolbar of the Users screen, Click create
 icon.
icon.The Create User dialog box is displayed.
In the User Email field, enter the email ID.
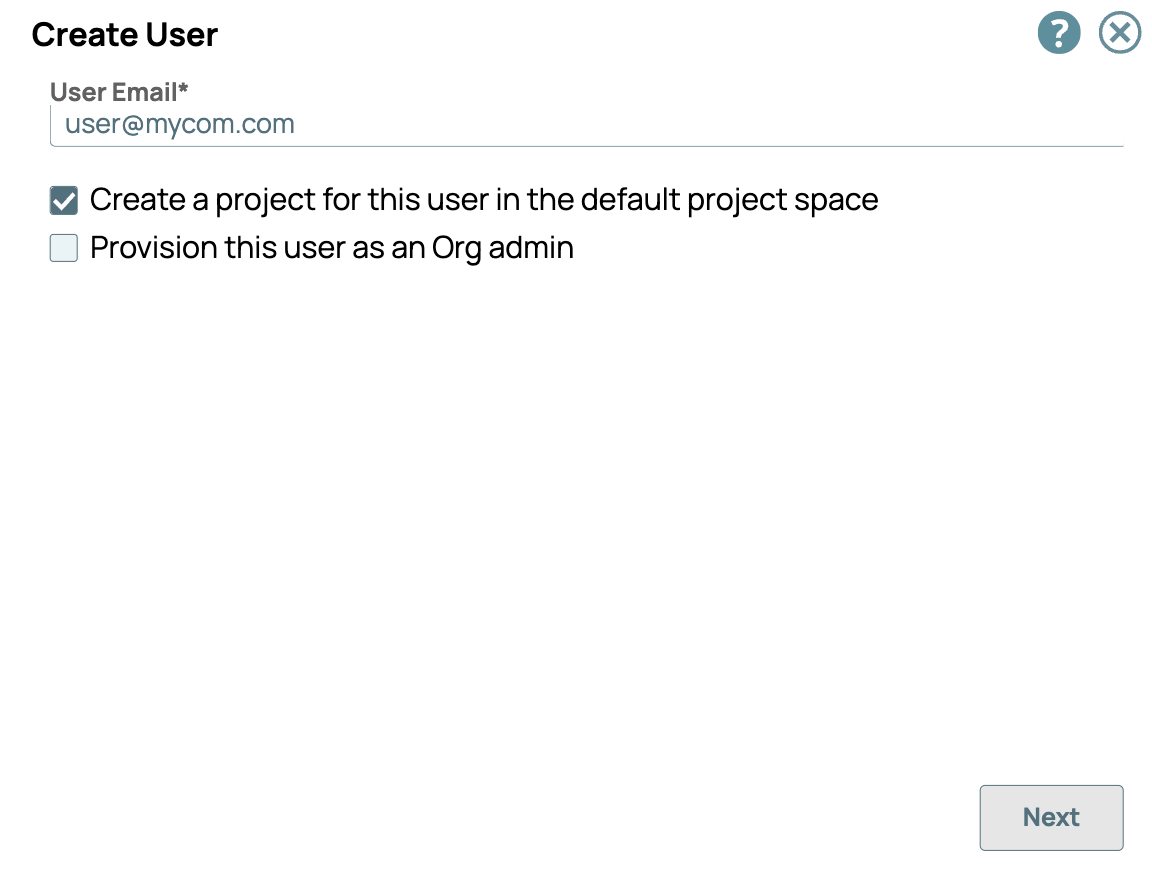
To create a project for this user in the default projects space, select Create a project for this user in the default project space.
To provide Org admin permissions to this user, select Provision this user as an Org admin.
Click Next. The dialog box displays the details required to create the user.
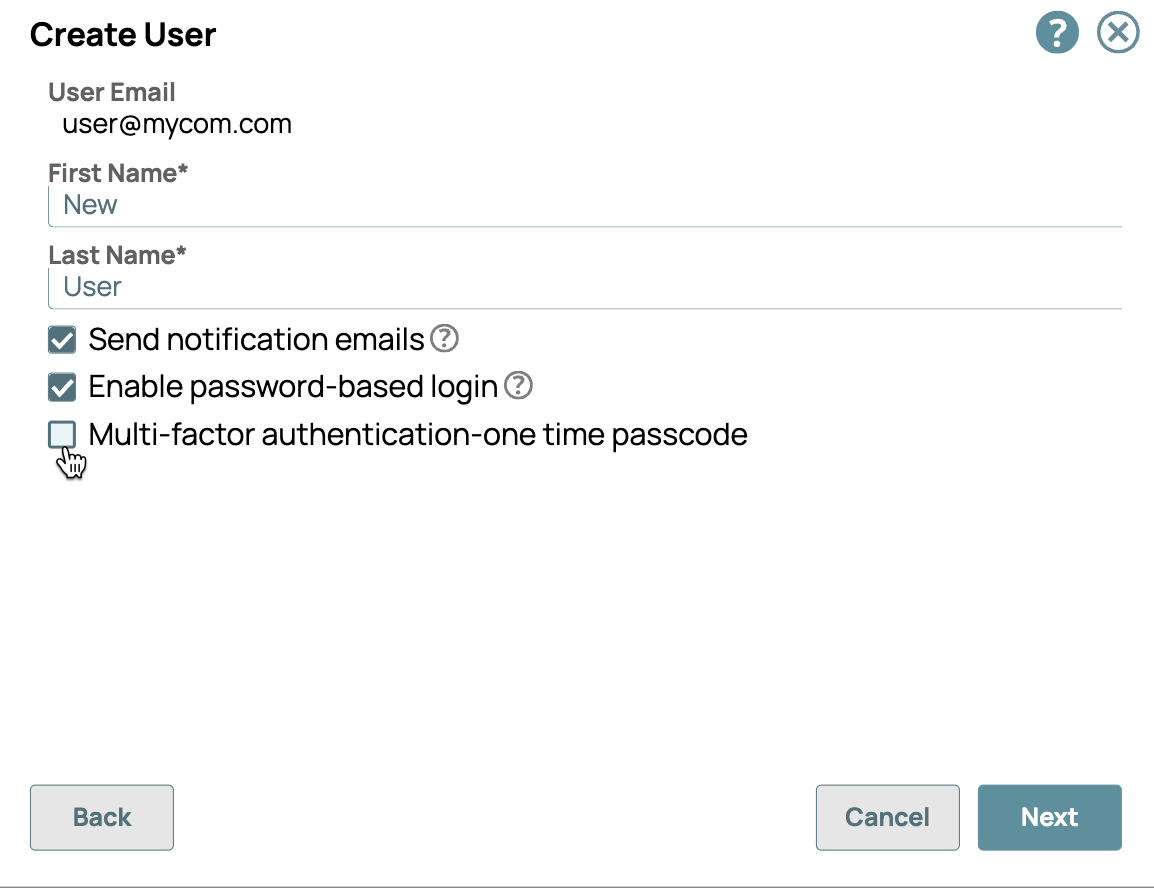
Enter the First name and Last name of the new user.
Select the Send notification emails option to send a welcome email when the user is created.
SSO Login
- If you use Single Sign On (SSO) for login, you can disable notification emails. If this option is disabled, you must provide the login link directly to a new user, since they will not receive the welcome email. They will need to click the link to log in with SSO.
Click the to help icon
 to view the context sensitive helop.
Click the help icon
 to view the help documentation.
If you plan to use SSO and do not want the users to have a separate SnapLogic login, unselect Enable password-based login. This option must be enabled for MFA.
For information on managing password-based logins for existing users, see Manage Password Logins.- Select Multi-factor authentication-one time passcode to enable MFA for this user. The user receives an email to change the password and then one to set up MFA.
Click Next. The dialog box displays the options for the account access.
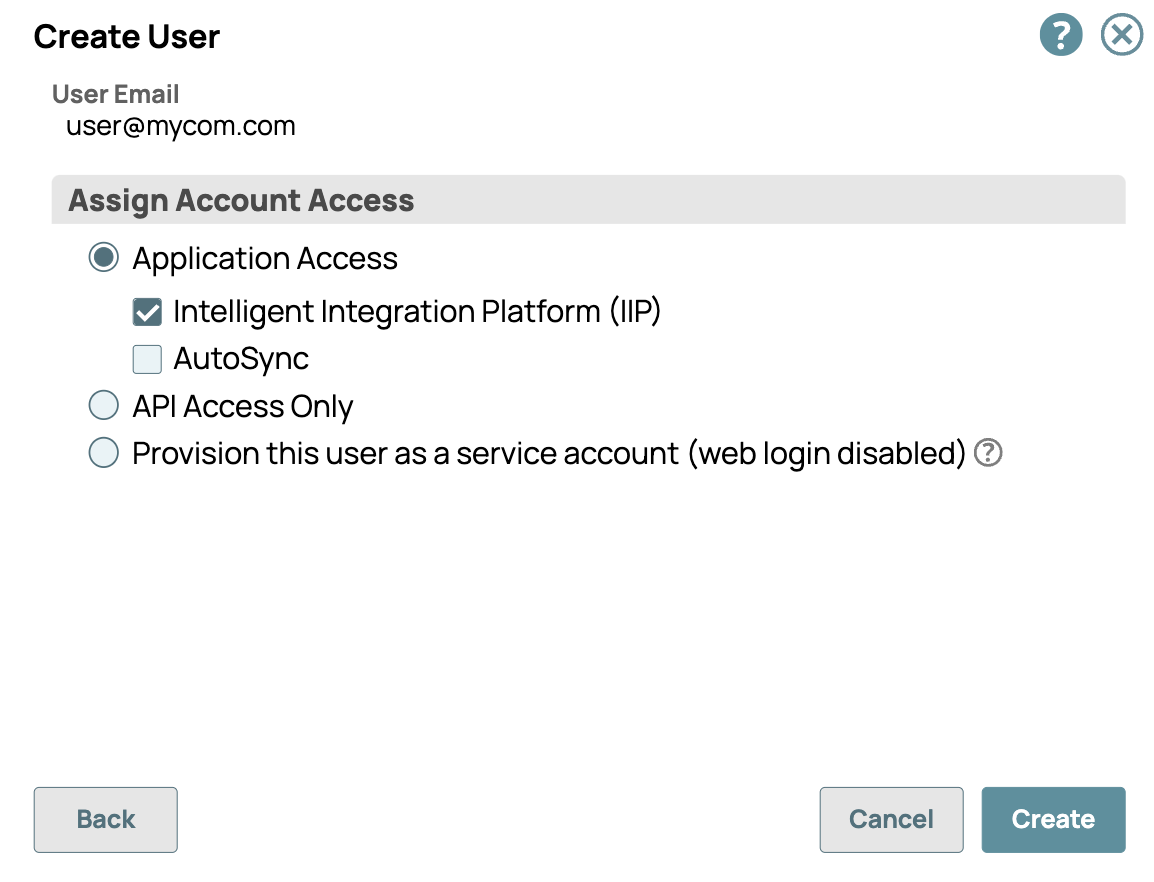
Specify the access in the Assign Account Access dialog:
- Application Access
- Intelligent Integration Platform (IIP) is selected by default and cannot be unselected when Application Access is enabled.
- AutoSync, if provisioned for the Org
Select API Access Only to use the account for basic authentication to run Tasks and call public APIs. This account can't be used to log into the UI.
Select Provision this user as a service account (web login disabled) to create an account to call Triggered Tasks. Credentials for this user are sent to the account creator, as are all reset password emails. You can change a service account into a regular user account by updating the user and deselecting this check box.
- Application Access
To encrypt the new user's emails, upload a public key. Currently, only
.derand.pemfile types are accepted.
Encrypted emails are locked and can only be unlocked with a private key.This option is only visible if Email Encryption is enabled in the Org Settings.
To add the user to the Org, click Create.
Associate a Service Account with another Org admin
You can use the Public API to associate a service account to another Org admin by setting the created_by attribute to the new user. The following example shows an HTTP request that can update the service account.
Guidelines:
- You can make the request using Postman.
- You can authenticate the request using Org admin credentials
- Make sure that you specify in the HTTP header the Content-Type:
application/json
API Call:
PUT https://elastic.snaplogic.com/api/1/rest/public/users/jasper_doe@example.com
{
"first_name" : "Jasper",
"last_name" : Doe",
"allow_password_login" : true,
"revoke_old_password" : true,
"utility" : true,
"ui_access" : false,
"created_by" : "admin92@example.com"
}
Learn more about how to use Public APIs to Update a User.
Related Content:
Have feedback? Email documentation@snaplogic.com | Ask a question in the SnapLogic Community
© 2017-2025 SnapLogic, Inc.