Speech Recognition with DeepSpeech
- Kalpana Malladi
- Vidya Patil
- Subhajit Sengupta
On this Page
Problem Scenario
Natural Language Processing (NLP) is one of the hottest topics in Machine Learning. For decades, humans have been communicating with machines by writing code with specific rules so that machines can respond to commands and perform tasks. After decades of keyboard, mouse and years of the touchscreen, we have made a big leap in NLP in recent years which enables us to communicate with machines using natural languages.
NLP is very useful and is now available in our daily life. Chatbots accurately provide solutions to people 24/7. Virtual Assistants (Alexa, Google Assistant, Siri, Cortana, etc.) understand our voices and help us in a lot of things. Machine translator can translate most of the major languages on the fly. Text summarization, content categorization, sentiment analysis, text-to-speech conversion, speech-to-text conversion, and others are bringing communication between humans and machines to the next level.
Transcribing audio into text has been a very challenging task for years. In the recent development of deep neural networks, speech recognition has been significantly improved. Now, machines can better understand our voices.
Description
DeepSpeech is an open source Speech to Text engine based on "Deep Speech: Scaling up end-to-end speech recognition" research paper. The latest pre-built American English model results in 5.6% word error rate. Mozilla also has a Common Voice project where everyone can contribute to one of the open largest voice datasets. You can either read the sentences or validate voices of other people.
Objectives
- Model Testing: Use Remote Python Script Snap from ML Core Snap Pack to deploy python script to use pre-built speech to text model using DeepSpeech library. Then, test the operations using samples.
- Model Hosting: Use Remote Python Script Snap from ML Core Snap Pack to deploy python script to host the model and schedule an Ultra Task to provide API.
- API Testing: Use REST Post Snap to send a sample request to the Ultra Task to make sure the API is working as expected.
We are going to build 3 pipelines: Model Testing, Model Hosting, and API Testing; and an Ultra Task to accomplish the above objectives. Each of these pipelines is described in the Pipelines section below.
Pipelines
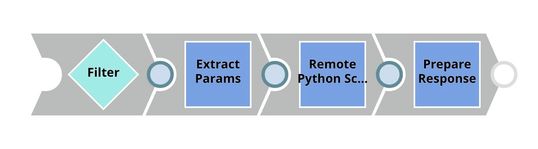
Model Testing
The File Reader reads a sample voice saved in mp3 format. The binary stream is then encoded into a base64 format using Binary to Document Snap. The encoded voice is fed into the Remote Python Script Snap which applied pre-built speech to text model.

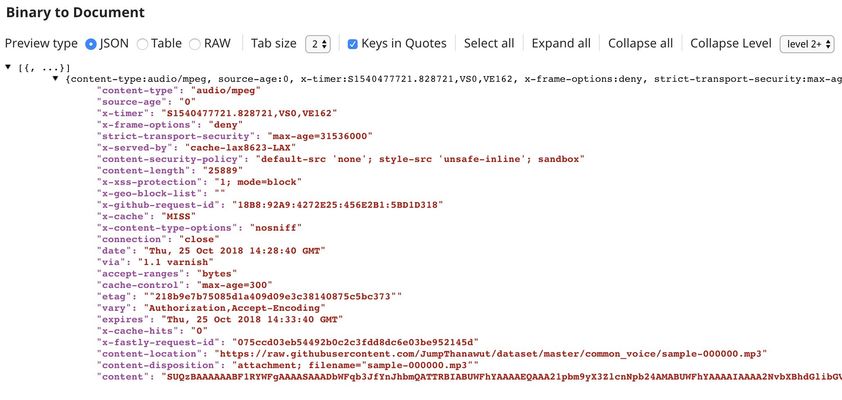
The picture below shows the output of Document to Binary Snap containing $content which is the serialized voice in base64 format.
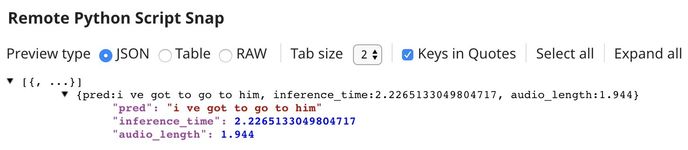
The output of Remote Python Script Snap is displayed below.
Python Script
Below is the script from the Remote Python Script Snap used in this pipeline. The script has the following 3 main functions:
- snaplogic_init
- snaplogic_process
- snaplogic_final
The first function (snaplogic_init) is executed before consuming input data. The second function (snaplogic_process) is called on each of the incoming documents. The last function (snaplogic_final) is processed after all incoming documents are consumed by snaplogic_process.
We use SLTool.ensure to automatically install required libraries. SLTool class contains useful methods: ensure, execute, encode, decode, etc. In this case, we need deepspeech.
In snaplogic_init, we load the pre-built model. If the model does not exist, it will be downloaded to /tmp/snaplogic_ds_tmp/models/ using SLTool.download_file. Since the model size is almost 2GB, it could up to 5-10 minutes to be completed. In snaplogic_process, the $content is extracted from the input document, decoded, then converted unto wav format with the sampling rate of 16 kHz. Finally, the model is used to transcribe the audio into text.
Model Hosting
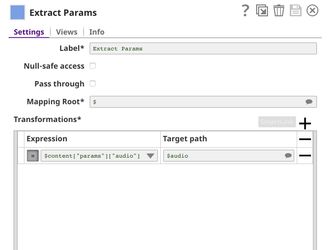
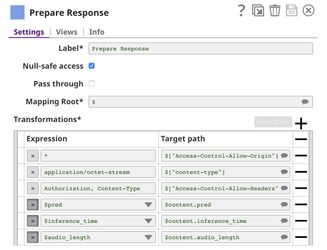
This pipeline is scheduled as an Ultra Task to provide a REST API that is accessible by external applications. The core component of this pipeline is the Remote Python Script Snap which is the same as in the previous pipeline, however, it extracts $audio field instead of $content field. The Filter Snap is used to authenticate the request by checking the token that can be changed in pipeline parameters. The Extract Params Snap (Mapper) extracts the required fields from the request. The Prepare Response Snap (Mapper) maps from prediction, inference time and audio length to $content.pred, $content.inference_time, and $content.audio_length which will be the response body. This Snap also adds headers to allow Cross-Origin Resource Sharing (CORS).
Building API
To deploy this pipeline as a REST API, click the calendar icon in the toolbar. Either Triggered Task or Ultra Task can be used.
Triggered Task is good for batch processing since it starts a new pipeline instance for each request. Ultra Task is good to provide REST API to external applications that require low latency. In this case, the Ultra Task is preferable. Bearer token is not needed here since the Filter Snap will perform authentication inside the pipeline.
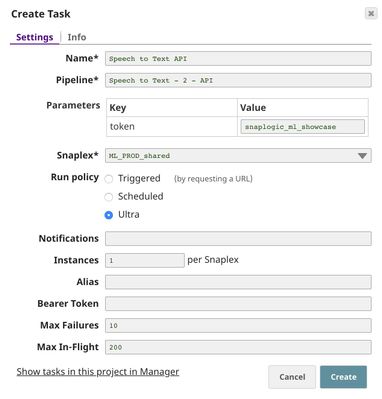
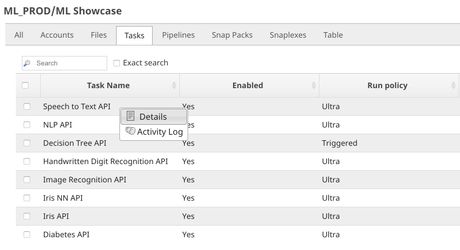
In order to get the URL, click Show tasks in this project in Manager in the Create Task window. Click the small triangle next to the task then Details. The task detail will show up with the URL.
API Testing
In this pipeline, a sample request is generated by the JSON Generator. The request is sent to the Ultra Task by REST Post Snap. The Mapper Snap is used to extract response which is in $response.entity.

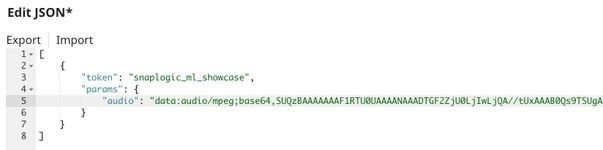
Below is the content of the JSON Generator Snap. It contains $token and $params which will be included in the request body sent by REST Post Snap.
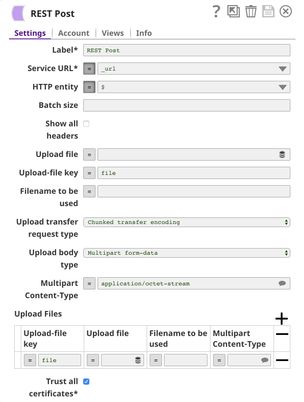
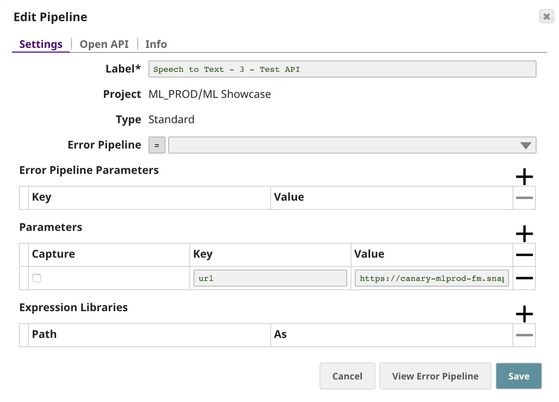
The REST Post Snap gets the URL from the pipeline parameters. Your URL can be found in the Manager page. In some cases, it is required to check Trust all certificates in the REST Post Snap.
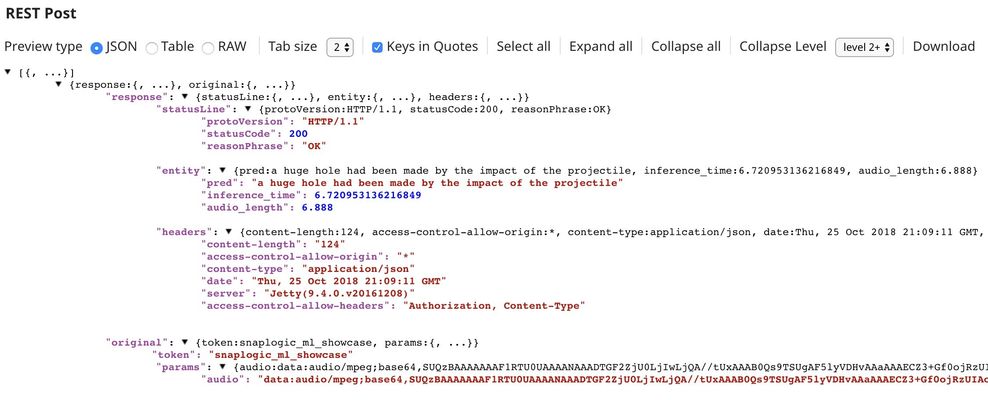
The output of the REST Post Snap is shown below. The last Mapper Snap is used to extract $response.entity from the request. In this case, the model transcribed the sample voice into "a huge hole had been made by the impact of the projectile". As you can see, it took 6.72 seconds to transcribe an audio of length 6.89 seconds. This can be accelerated by using GPU instance.
Downloads
Important steps to successfully reuse Pipelines
- Download and import the pipeline into the SnapLogic application.
- Configure Snap accounts as applicable.
- Provide pipeline parameters as applicable.
Have feedback? Email documentation@snaplogic.com | Ask a question in the SnapLogic Community
© 2017-2025 SnapLogic, Inc.