Sentiment Analysis Using SnapLogic Data Science
On this Page
Overview
What does this use case do?
This use case demonstrates how you can use SnapLogic Machine Learning (ML) Snaps to perform sentiment analysis. Sentiment analysis enables you to computationally identify and classify opinions expressed in a piece of text.
In this use case, we build a simple sentiment analysis model that classifies input text as either positive, negative, or neutral in sentiment.How this use case is structured
In the initial sections of this use case, we offer a high-level description of the project and its key tasks. We then describe the pipelines and Snaps that make up the use case. In each of these sections too, we first offer a functional description of what we are doing before getting into the technical details.
The Dataset Used for this Use Case
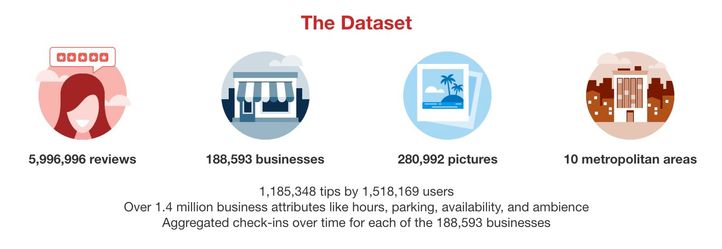
For this use case, we use the Yelp dataset. Yelp provides a subset of their data as an open dataset. This dataset contains data about businesses, reviews, users, check-ins, tips and photos. The full dataset is available here.
In this use case, we focus only on user-review data. To simplify our use case, we use only 5-star and 1-star reviews as positive and negative examples, respectively.
Building a Sentiment Analysis Model
Process Summary
In this use case, we perform the following high-level tasks to create a sentiment analysis model:
High-Level Task Description
To build a sentiment analysis model, we perform the following tasks:
- Data Preparation: Prepare the data required to train the model.
- Cross Validation: Use multiple algorithms to cross-validate the data and identify the algorithm that offers the most reliable results.
- Model Building: Build the sentiment analysis model using the algorithm identified in the previous step.
- Model Hosting: Make the model available as an ultra-task.
API Testing: Run a sample sentiment analysis request to check whether it works as expected.
Pipelines Used
We use the following pipelines to perform each of the tasks listed above:
| Pipeline | Description |
|---|---|
Data Preparation:
| |
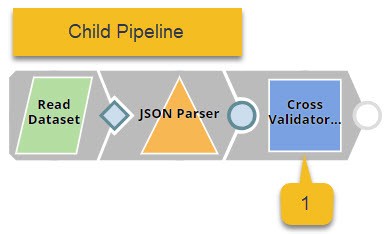
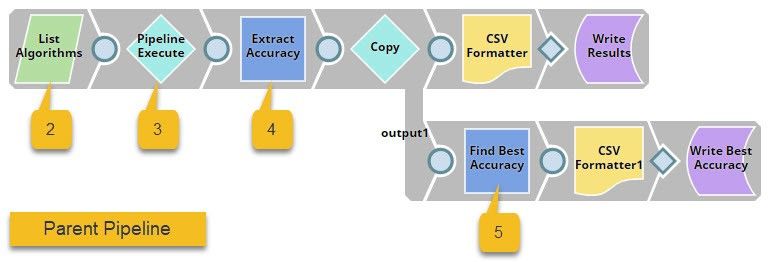
Cross Validation. We have 2 pipelines in this step. The top pipeline (child pipeline) performs k-fold cross validation using a specific ML algorithm. The pipeline at the bottom (the parent pipeline) uses the Pipeline Execute Snap to automate the process of performing k-fold cross validation on multiple algorithms.
| |
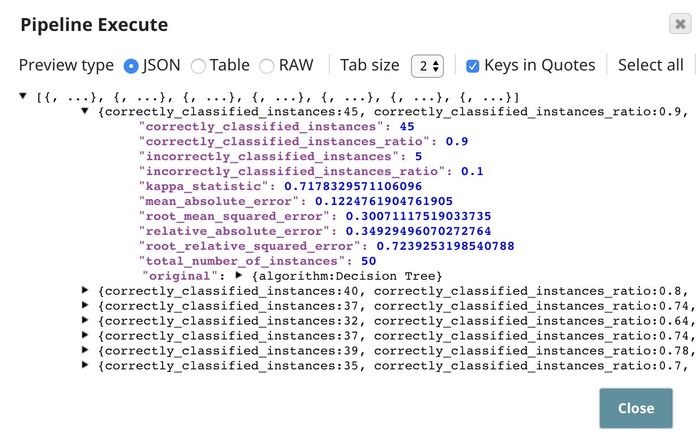
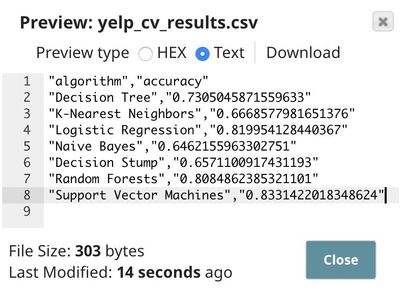
Model Building. Based on the cross validation result, we can see that the logistic regression and support vector machines algorithms perform the best.
| |
Model Hosting. This pipeline is scheduled as an Ultra Task to offer sentiment analysis as a REST-API-driven service to external applications.
For more information on how to offer an ML ultra task as a REST API, see SnapLogic Pipeline Configuration as a REST API. | |
API Testing. This pipeline takes a sample request, sends it as a REST API request, and displays the results received.
|
The Data Preparation Pipeline
We design the Data Preparation pipeline as shown below:
This is where it gets technical. We have highlighted the key Snaps in the image below to simplify understanding.
This pipeline contains the following key Snaps:
| Snap Label | Snap Name | Description | |
|---|---|---|---|
| 1 | Read Review Dataset | File Reader | Reads an extract of the Yelp dataset containing 10,000 reviews from the SnapLogic File System (SLFS). |
| 2 | Filter 1 and 5 Stars | Filter | Retains only 1-star and 5-star reviews. |
| 3 | Stratified Sampling | Sample | Applies stratified sampling to balance the ratio of 1-star and 5-star reviews. |
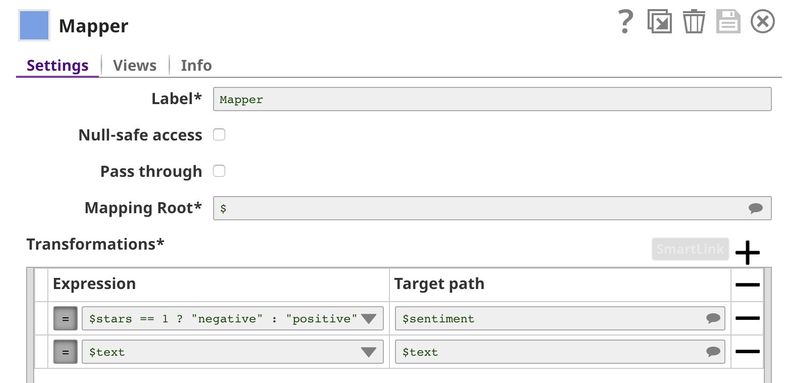
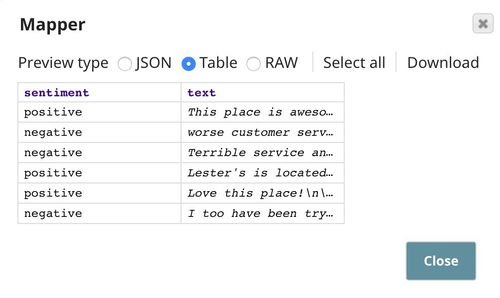
| 4 | Extract Text and Sentiment | Mapper | Maps $stars to $sentiment and replaces 1 (star) with negative, and 5 (star) with positive. It also allows the input data ($text) to pass through unchanged to the downstream Snap. |
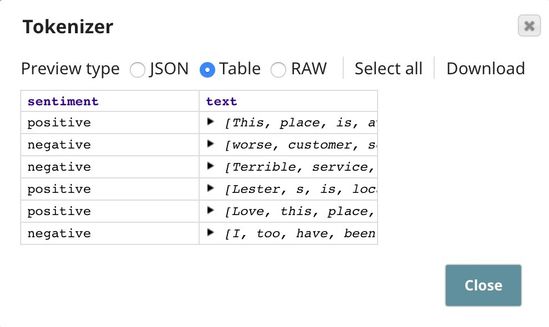
| 5 | Tokenizer | Tokenizer | Breaks each review into an array of words, of which two copies are made. |
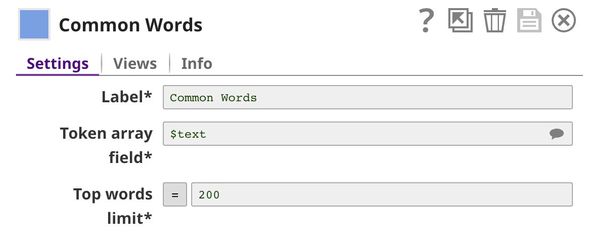
| 6 | Common Words | Common Words | Computes the frequency of the top 200 most common words in one copy of the array of words. |
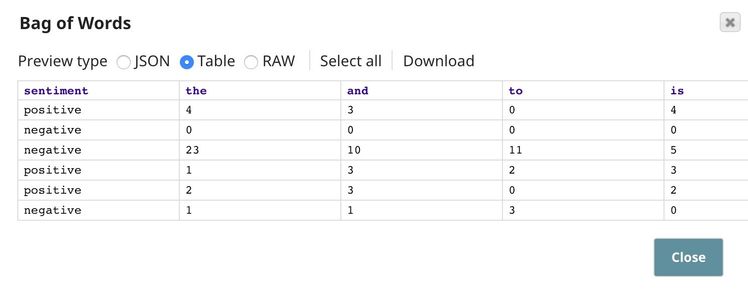
| 7 | Bag of Words | Bag of Words | Converts the second copy of the array of words into a vector of word frequencies. |
| 8 | Profile | Profile | Computes data statistics using the output from the Common Words Snap. |
Key Data Preparation Snaps
Filter
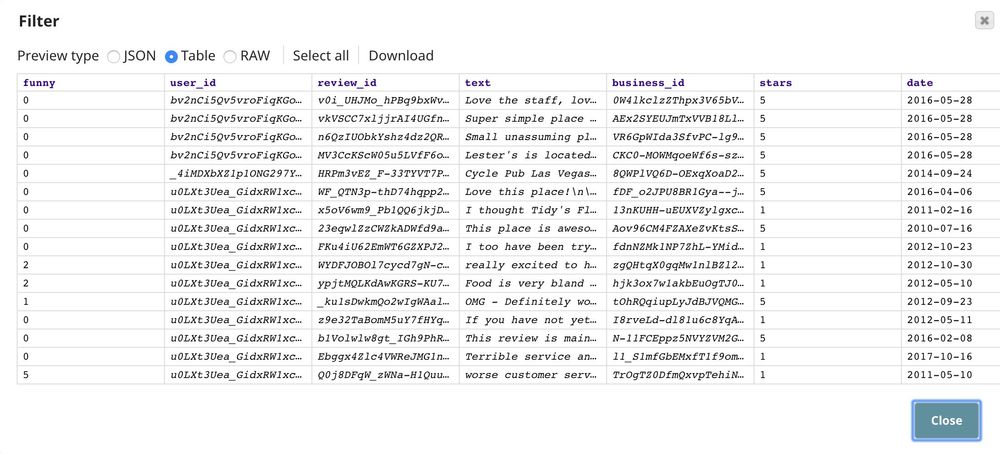
This Snap keeps 1-star and 5-star reviews while dropping all others (2-star, 3-star, and 4-star reviews). This brings the number of useful reviews down from 10000 to 4428.
Sample
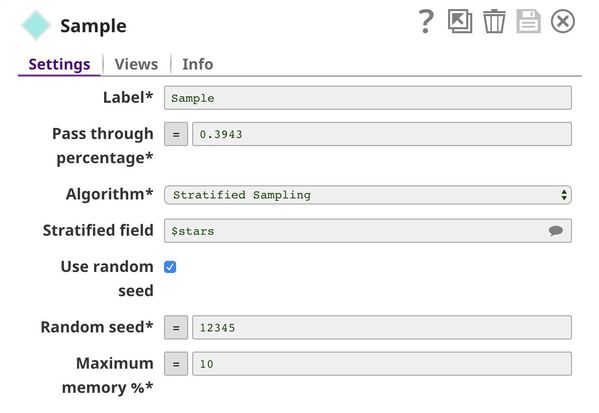
In the filtered list of 4428 reviews, there are 3555 5-star reviews and 873 1-star reviews. If we train the ML model on this dataset, the model will be biased towards positive (5-star) reviews, because it will get to sample more positive reviews than negative ones. This is what we call an unbalanced problem. There are many methods of dealing with unbalanced datasets, including downsampling (reducing the number of samples that form the majority until a balance is reached) and upsampling (duplicating samples that form the minority). In this case, we use the downsampling method.
We keep all the 873 1-star reviews and the same number of 5-star reviews. The Pass through percentage is (873 + 873) / 4428 = 0.3943. We specify $stars in the Stratified field property and select Stratified Sampling as the Algorithm. Stratified sampling is a technique that maintains the same number of documents of each class; in this case, the class is $stars.
Mapper
This Snap maps $stars to $sentiment and allows the input data ($text) to pass through. Moreover, in the $sentiment field, 1 (star) is replaced by negative, and 5 (star) is replaced by positive.
Tokenizer
Training ML models on text data can be complicated and ineffective, since most of the generic ML algorithms prefer numeric data. We use the Tokenizer, Common Words, and Bag of Words Snaps to convert text into numbers. First, the Tokenizer Snap breaks the input sentences into a single array of words (tokens). For the purposes of this use case, we are assuming that special characters do not impact the sentiment expressed; so, we select the Word only check box to remove all special characters from the input text.
Common Words
In order to perform a bag of words operation, we need to specify the words (bags) that we want to include. In most cases, we use the most common words in the dataset. This we do in this pipeline using the Common Words Snap, and retain the 200 most-common words in the dataset. We also output the frequency of each word.
Bag of Words
This Snap receives a list of common words from the Common Words Snap and computes the frequency of each word in the input document.
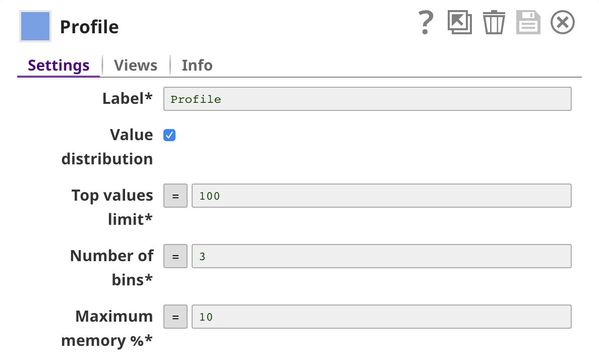
Profile
This Snap computes data statistics of the dataset. You can see the output of this Snap here.
The Cross Validation Pipelines
We need two pipelines for cross-validation, and design them as shown below:
The pipeline displayed at the top (the child pipeline) performs k-fold cross validation using a specific ML algorithm. The pipeline at the bottom (the parent pipeline) uses the Pipeline Execute Snap to automate the process of performing k-fold cross validation on multiple algorithms.
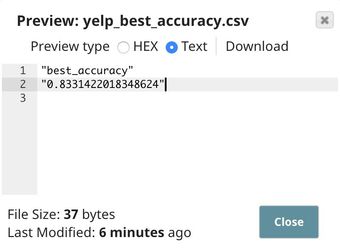
The Pipeline Execute Snap in the parent pipeline spawns and executes the child pipeline multiple times with different algorithms. Instances of the child pipeline can be executed sequentially or in parallel to speed up the process. The Aggregate Snap applies a max function to find the algorithm that offers the best result.
This pipeline contains the following key Snaps:
- Cross Validator: Performs 10-fold cross validation using various algorithms.
- CSV Generator: Lists out the algorithms that must be used for cross validation.
- Pipeline Execute: Spawns and executes the child pipeline 7 times, each time with a different algorithm.
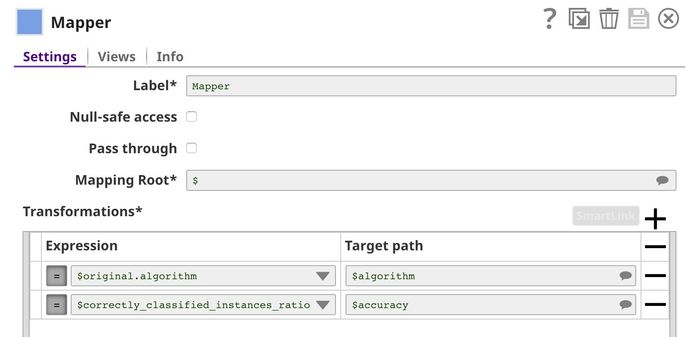
- Mapper: Lists out each algorithm with its accuracy numbers.
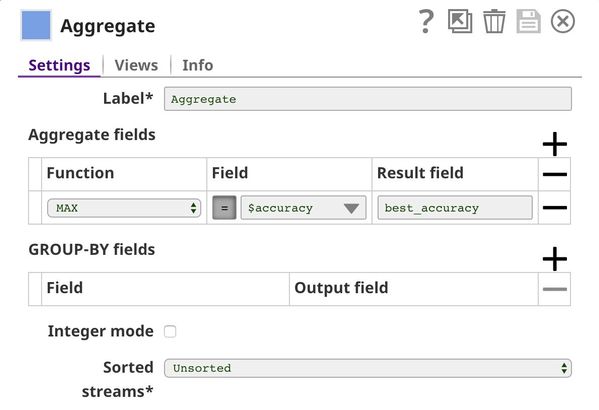
- Aggregate: Applies the max function to find the algorithm with the greatest accuracy.
Key Cross Validation Snaps
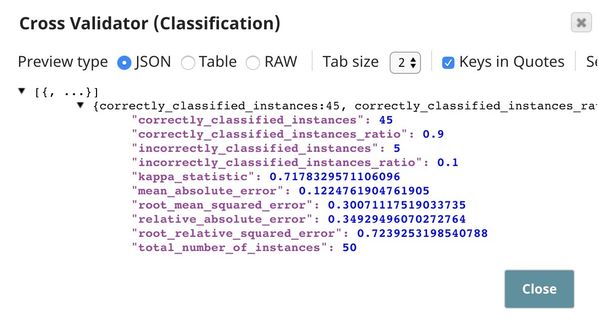
Cross Validator (Classification)
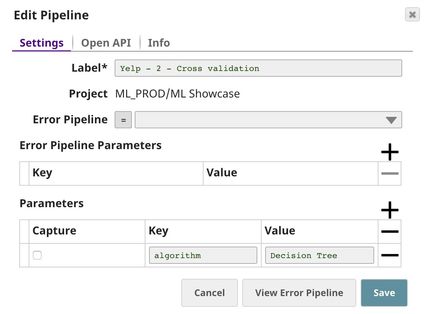
This Snap performs 10-fold cross validation on the data received from the Data Preparation pipeline, using the algorithm specified by _algorithm, which is a pipeline parameter passed into this pipeline by the Pipeline Execute Snap in the parent pipeline. You can set pipeline parameter values in the pipeline settings. For more information on pipeline parameters, see Pipeline Properties.
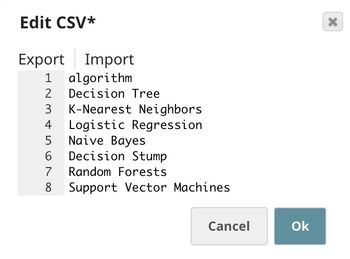
CSV Generator
This Snap lists out all the cross-validation algorithms that we want to try. In this case, we specify 7 algorithms. Note that the Multilayer Perceptron algorithm is also available, but it takes a long time to complete; so, we exclude it for now.
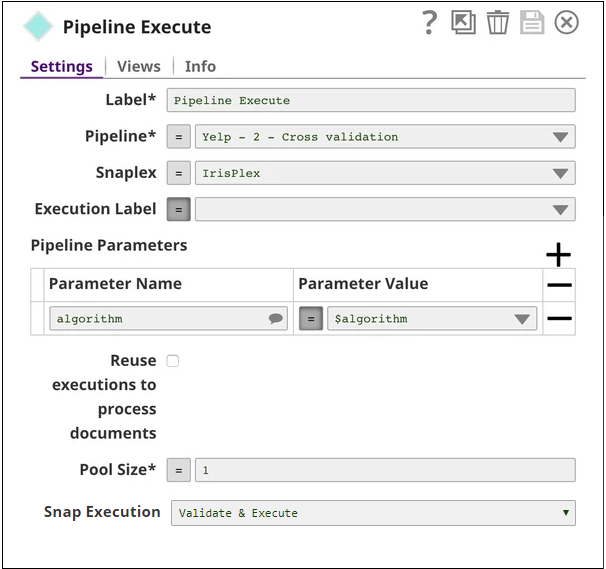
Pipeline Execute
This Snap spawns and executes the child pipeline (Yelp - 2 - Cross validation) seven times, once for each algorithm listed in the CSV Generator Snap. You can specify the Pool Size to be greater than 1 to execute multiple child pipeline instances in parallel.
Mapper
This Snap lists out all the algorithms that we used for cross validation and lists each algorithm's accuracy (defined as $correctly_classified_instances_ratio) against their respective names. The rest of the statistics are removed.
Aggregate
This Snap uses the max function to identify the algorithm that offers the greatest accuracy in validation.
The Model Building Pipeline
We design the Model Building pipeline as shown below:
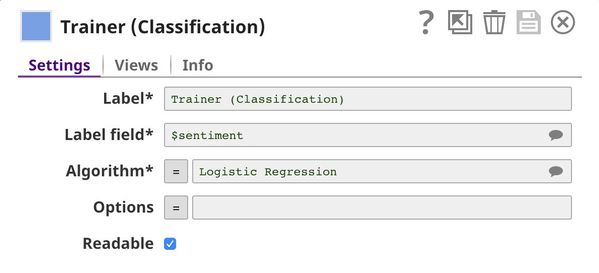
The Cross Validation pipeline (above) demonstrated to us that the logistic regression and support vector machines algorithms offered the greatest cross-validation accuracy for our dataset. In the Model Building pipeline, we use the Trainer (Classification) Snap to train a logistic regression model, which we write to SLFS using the JSON Formatter and File Writer Snaps.
Key Model Building Snaps
Trainer (Classification)
We decide to use the logistic regression algorithm to train the ML model, because even though the support vector machines algorithm offered a slightly better accuracy, logistic regression provides better interpretability. You can see all available algorithms with their options here.
The Model Hosting Pipeline
Follow the instructions available here to schedule this pipeline as a REST API.
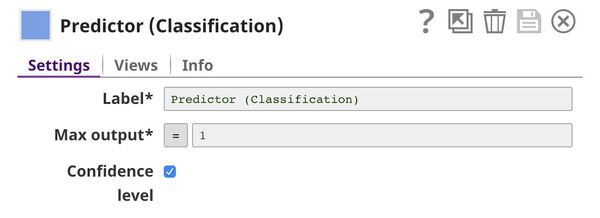
This pipeline is scheduled as an Ultra Task to provide REST API to external applications. The request comes into the open input view of the Filter Snap. The core Snap in this pipeline is Predictor (Classification), which hosts the ML model from JSON Parser1 Snap. The Tokenizer and Bag of Words Snaps prepare the input text. The File Reader Snap reads the common words that are required in the bag of words operation. See more information here.
Predictor (Classification)
This Snap hosts the model from the JSON Parser1 Snap and predicts the sentiment expressed in each input request, using the processed data coming from the Bag of Words Snap. If the Confidence level check box is selected, the output includes a confidence level value associated with the prediction. This value is expressed as a probability, and ranges from 0 to 1.
The API Testing Pipeline
We design an ultra task to trigger the sentiment analysis pipelines. For detailed information on scheduling and managing ultra tasks for machine learning, click here.
We design the API Testing pipeline as shown below:
This pipeline sends an API request to the sentiment analysis ultra task and outputs the response received.
Key Snaps
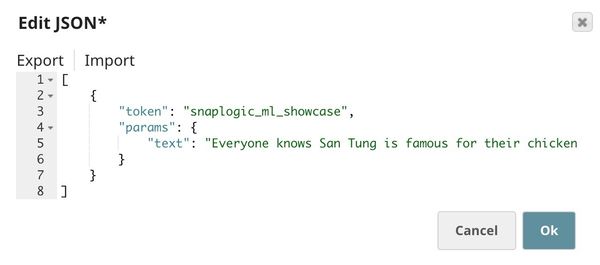
The JSON Generator Snap contains the sample request, including the token and the text. The REST Post Snap sends a request to the Ultra Task (API). Once the response is received, the Mapper Snap extracts the prediction from the response body.
JSON Generator
This Snap contains a sample request, which will be sent to the API by the REST Post Snap. The $params.text property in the document containing the request is the actual text whose sentiment we want the model to predict.
Downloads
Important steps to successfully reuse Pipelines
- Download and import the pipeline into the SnapLogic application.
- Configure Snap accounts as applicable.
- Provide pipeline parameters as applicable.
Have feedback? Email documentation@snaplogic.com | Ask a question in the SnapLogic Community
© 2017-2025 SnapLogic, Inc.
