Creating Triggered Tasks
- John Brinckwirth
- Leena Gopal
- Anand Vedam
In this article
Overview
You can create a Triggered Task after you have created the Pipeline in SnapLogic Designer. You can create a Triggered Task in Designer or Manager. When you create a Triggered Task in Designer, the Pipeline is pre-selected when you open the Create Task dialog. When you create a Triggered Task in Manager, you must select a Pipeline to associate with the Task.
Creating a Triggered Task
- Choose one of the two following methods to create a Triggered Task:
- In Designer, open the target Pipeline, and click the toolbar Create Task button:

- In Manager, navigate to the target Project folder, click the toolbar Add button and from the drop-down list, select Triggered Task:
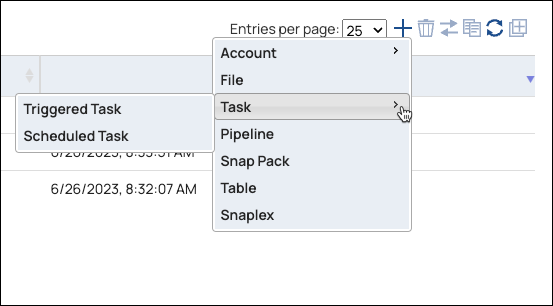
Alternatively, selecting Tasks from the Assets tab menu displays only those Tasks in the Project, and opens the Create Task form when you click on the Assets toolbar.
- In Designer, open the target Pipeline, and click the toolbar Create Task button:
- Enter the following in the Create Task dialog:
Name. Enter a name for the Triggered Task. This name is used in the URL when the Pipeline has unconnected inputs/outputs.
The names of assets, projects, or project spaces are limited to UTF-8 alphanumeric characters and these special characters:
!"$%&'()*+,-.:;<=>@[]^_`{|}~. All URLs/Query parameters across the different Task types should not have any spaces.Pipeline. Select the Pipeline to run from the Pipeline drop-down menu. This Pipeline is triggered when the Triggered Task is called. If applicable, edit any of the parameter values from the Pipeline.
- Snaplex. Select the Snaplex on which to run the Pipeline from the Snaplex drop-down menu.
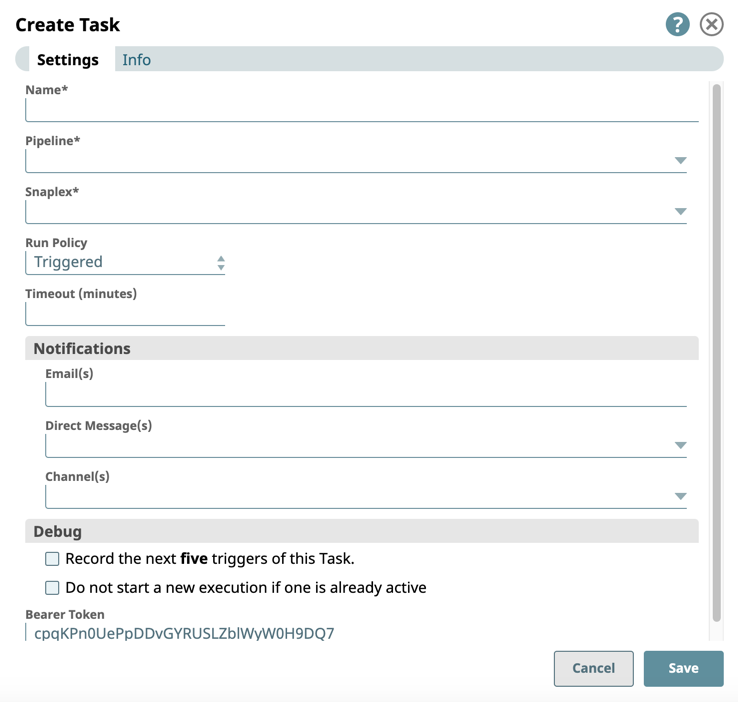
- If applicable, modify the Configuration Options in the dialog window, and click Save.
(Optional) To create an API in API Manager, click Save and create API. Learn more about creating APIs from Triggered Tasks.
- You can run your Triggered Task through a variety of methods. See Running Triggered Tasks for details.
Notifications
You can create email notifications based on the status of the Scheduled Task. If your Org supports Slack notifications, you can add Slack channels or recipients. To add recipients for Task notifications:
- In Notifications, enter each recipient's email address, separated by commas.
- If Slack notifications are configured for your Org, then the following fields support dropdown lists containing your Slack channels and users. For each field, you can also type to invoke suggested recipients in the field.
- Direct Message(s). Select Slack recipients from the dropdown list.
- Channels. Select Slack channels as recipients from the dropdown list.
- Select the status event for which Notifications are sent from the When Task has selector:
- Started. The Task is activated.
- Completed. The Task is completed.
- Failed. The associated pipeline did not execute.
- Stopped. The associated Pipeline has abruptly stopped, and the Task is no longer running.
- Suspended. Select if you want to receive a Notification if the Task is based on a Resumable Pipeline that is in a Suspended state.
Recipients receive notifications based on the selections in the When Task has field.
Behavior change
Snaplogic API calls that use non-RFC-compliant characters space : /? # [] @! $ & ' ( ) * +,; = need to be corrected. The following SnapLogic APIs called with unencoded characters will result in execution failures after Oct 5, 2024:
Cloud Triggered Tasks
- APIM and Ultra Tasks on the SnapLogic-managed Cloudplexes
Note that this issue does not impact customers using the EMEA environment.
Viewing Triggered Task Details
After you create and enable your Triggered Task, you can view details about the Task.
- Open the Task Details page for your Triggered Task by clicking View Details:
- On the Task Details page, view Pipeline execution information for any instance by clicking Run Details.
- You can view the Cloudplex and Groundplex network URL details in the following screenshots. The Secured and Unsecured URLs display details on the HTTPS and HTTP URLs.
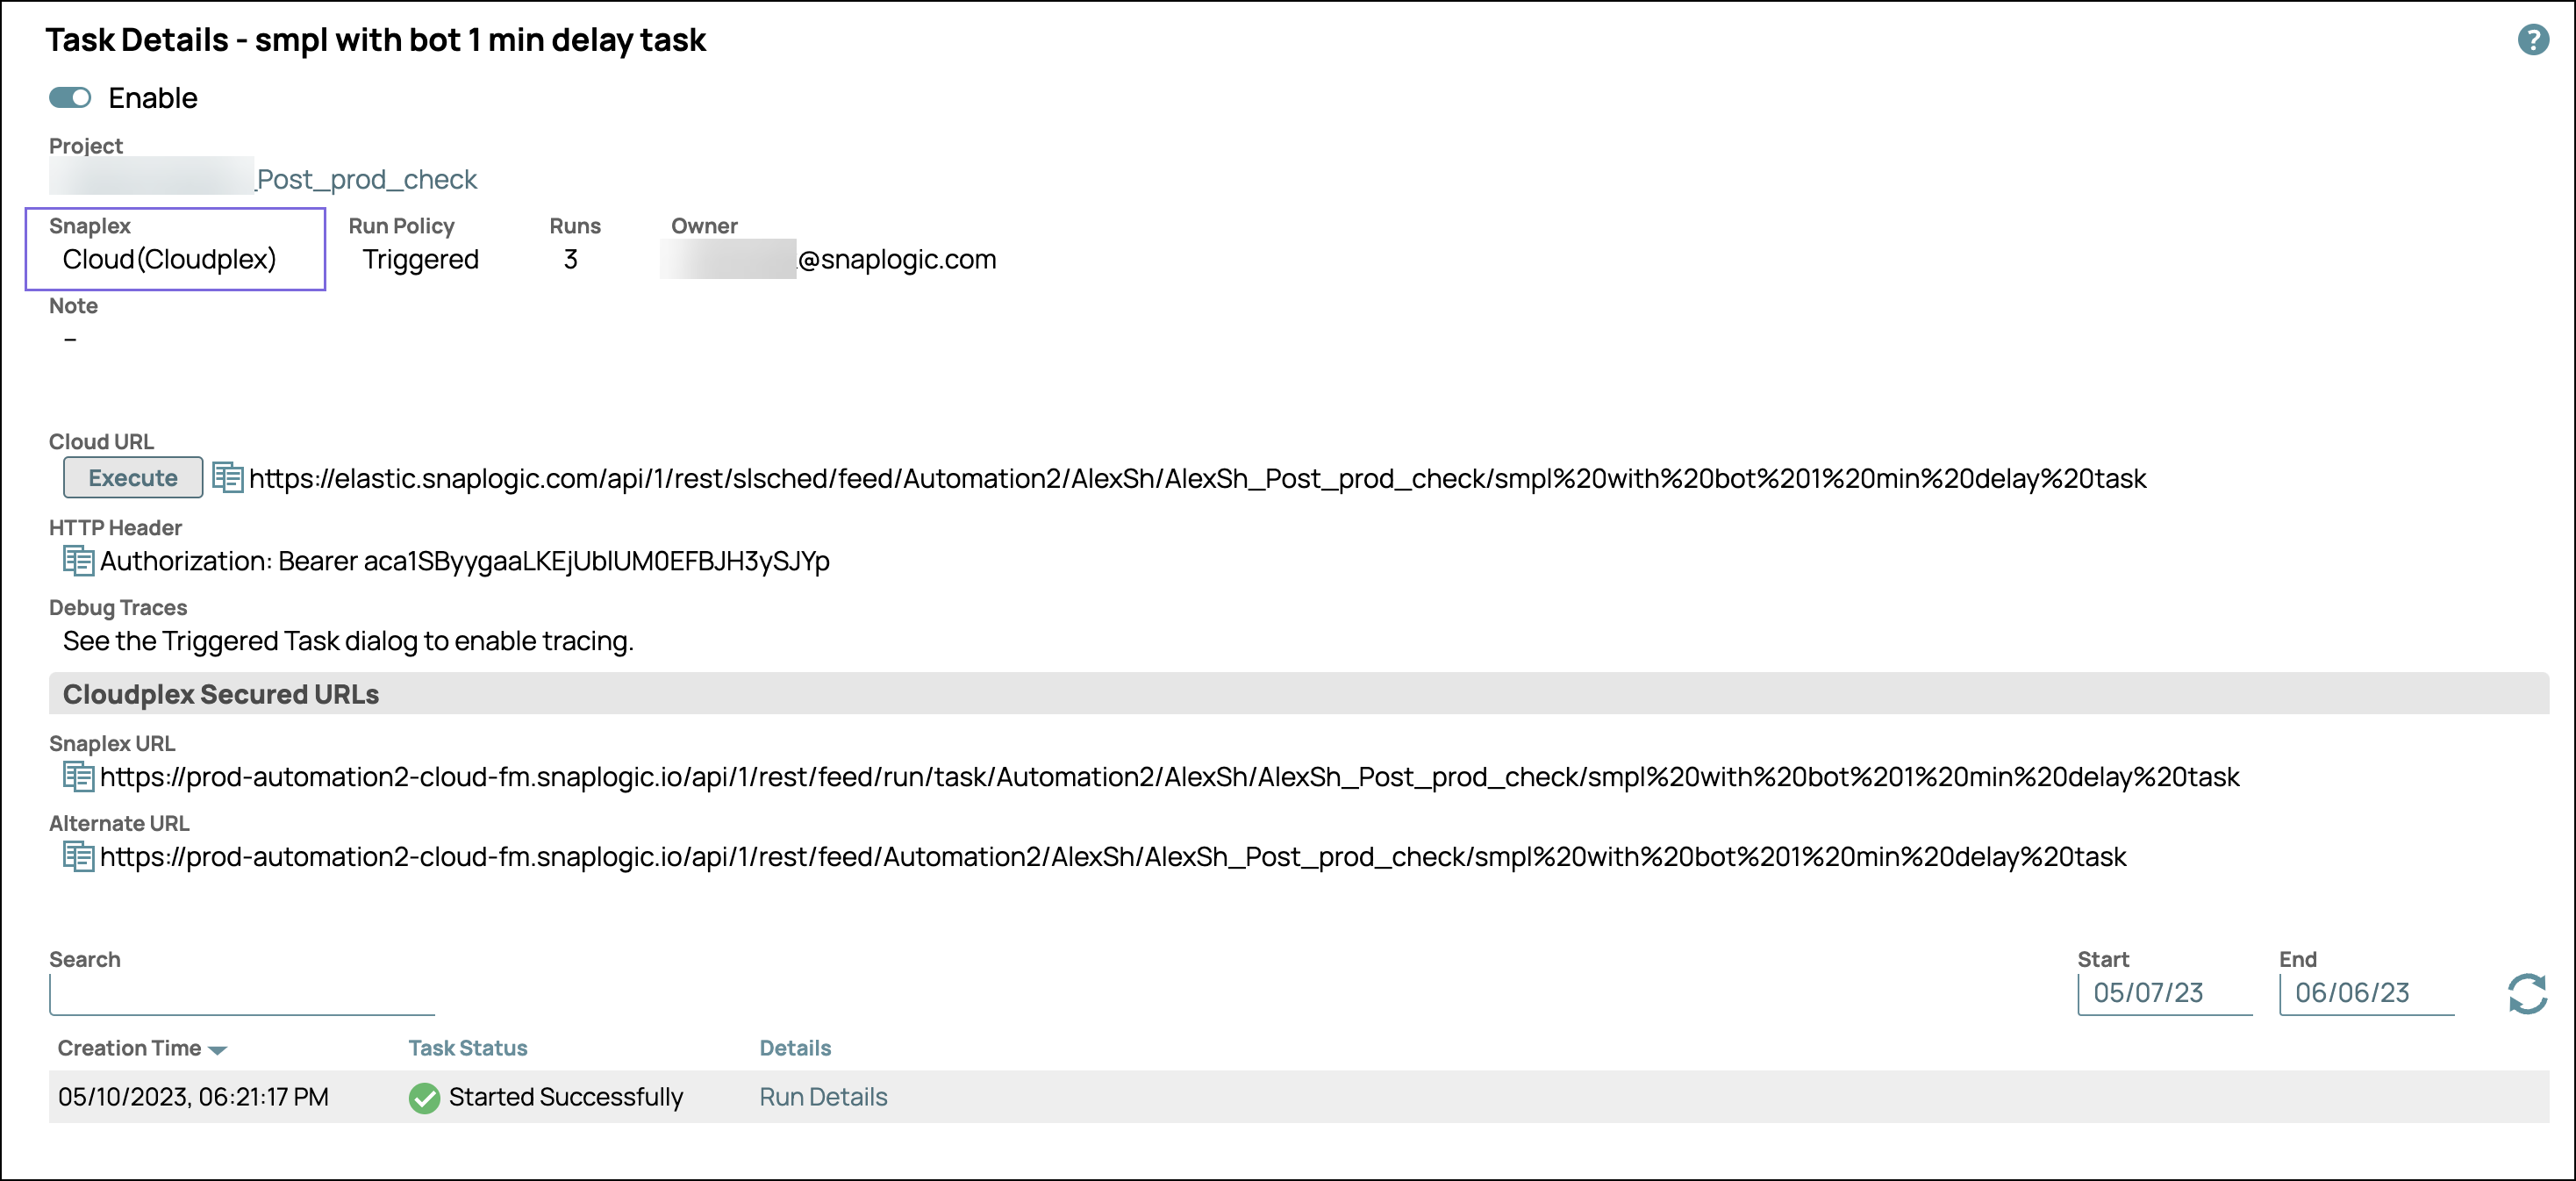
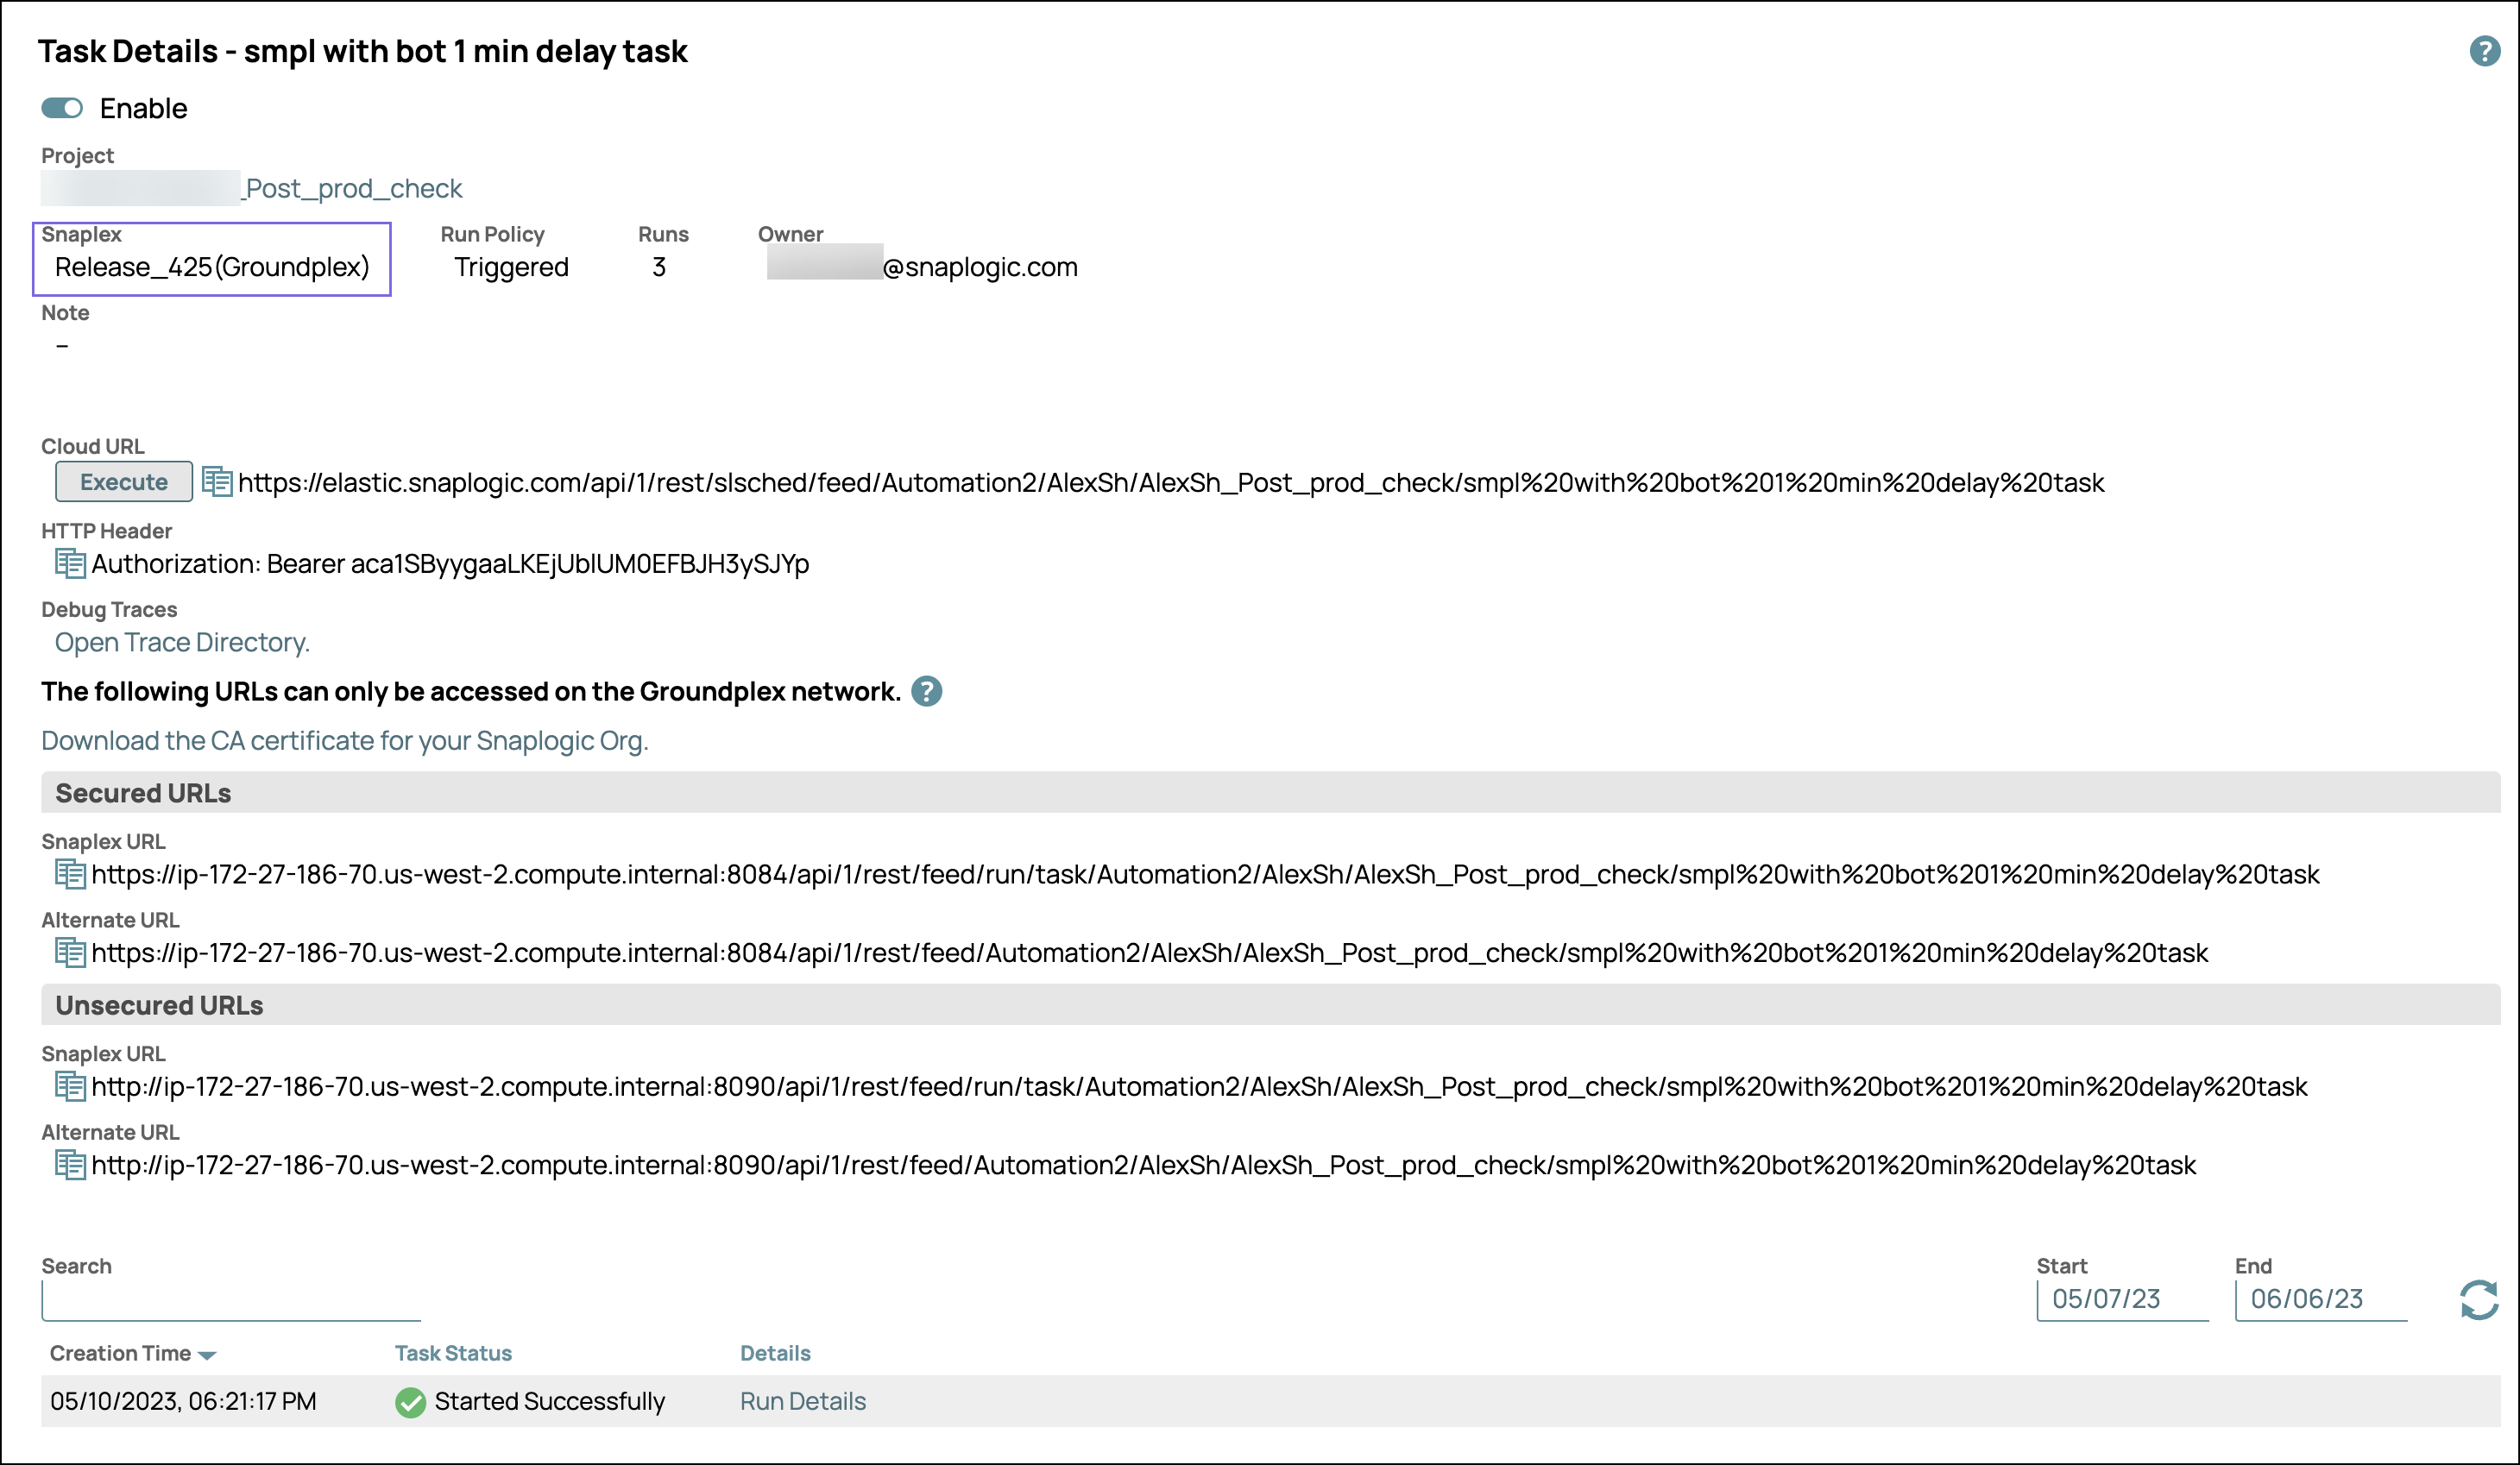
- Click the Show More link under the Cloudplex Secured URLs to display the Alternate URL.

- Navigate to the Dashboard Pipeline Wall to monitor the execution details about your Triggered Task.
Triggered Task Configuration Options
You can configure the following settings for your Triggered Task.
Bearer Token
You can use the auto-generated bearer token as the HTTP Authorization header. If you clear this field, then requests are authenticated by the Pipeline itself. You can also modify the field value as required.
Debug
You can set the following debugging options:
- Record the next five triggers of this task. Select to record five triggers of this Task after its creation.
- Do not start a new execution if one is already active. Select if you prefer to wait until the Task is complete before it can be re-triggered. This option lets you prevent a Pipeline from running again if a previous execution of that Pipeline is already running. If you attempt to call the Triggered Task when it is already running, you will receive a 409 error.
Timeouts
You can add Pipeline timeouts to Scheduled Task executions that occur frequently in a short period of time. To configure the maximum duration that a Pipeline is allowed to run, enter the number of minutes in the Timeout field. The Scheduled Task stops executing after the specified timeout duration is reached. The minimum timeout duration for a Pipeline is one minute. If you leave the field empty, the timeout is zero, which is equivalent to no timeout.
Triggered tasks have a default idle connection timeout of 60 minutes. Add -Didle_connection_timeout_seconds=7200 (or a different number) in the jcc.jvm_options to change this value.
Change the Run Policy
When you create a Triggered Task, Triggered is the chosen Run Policy by default. 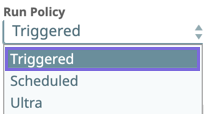
If you change the Run Policy setting to Ultra or Scheduled, the underlying Task type is modified. In such cases, you must re-configure the Task.
Have feedback? Email documentation@snaplogic.com | Ask a question in the SnapLogic Community
© 2017-2025 SnapLogic, Inc.